




Preparing For Passkeys: A Practical Guide For Admins
Microsoft is rolling out passkeys as its default authentication method from 1st September, 2026, and on February 1st, 2027, the company is also removing support for SMS and Voice MFA.
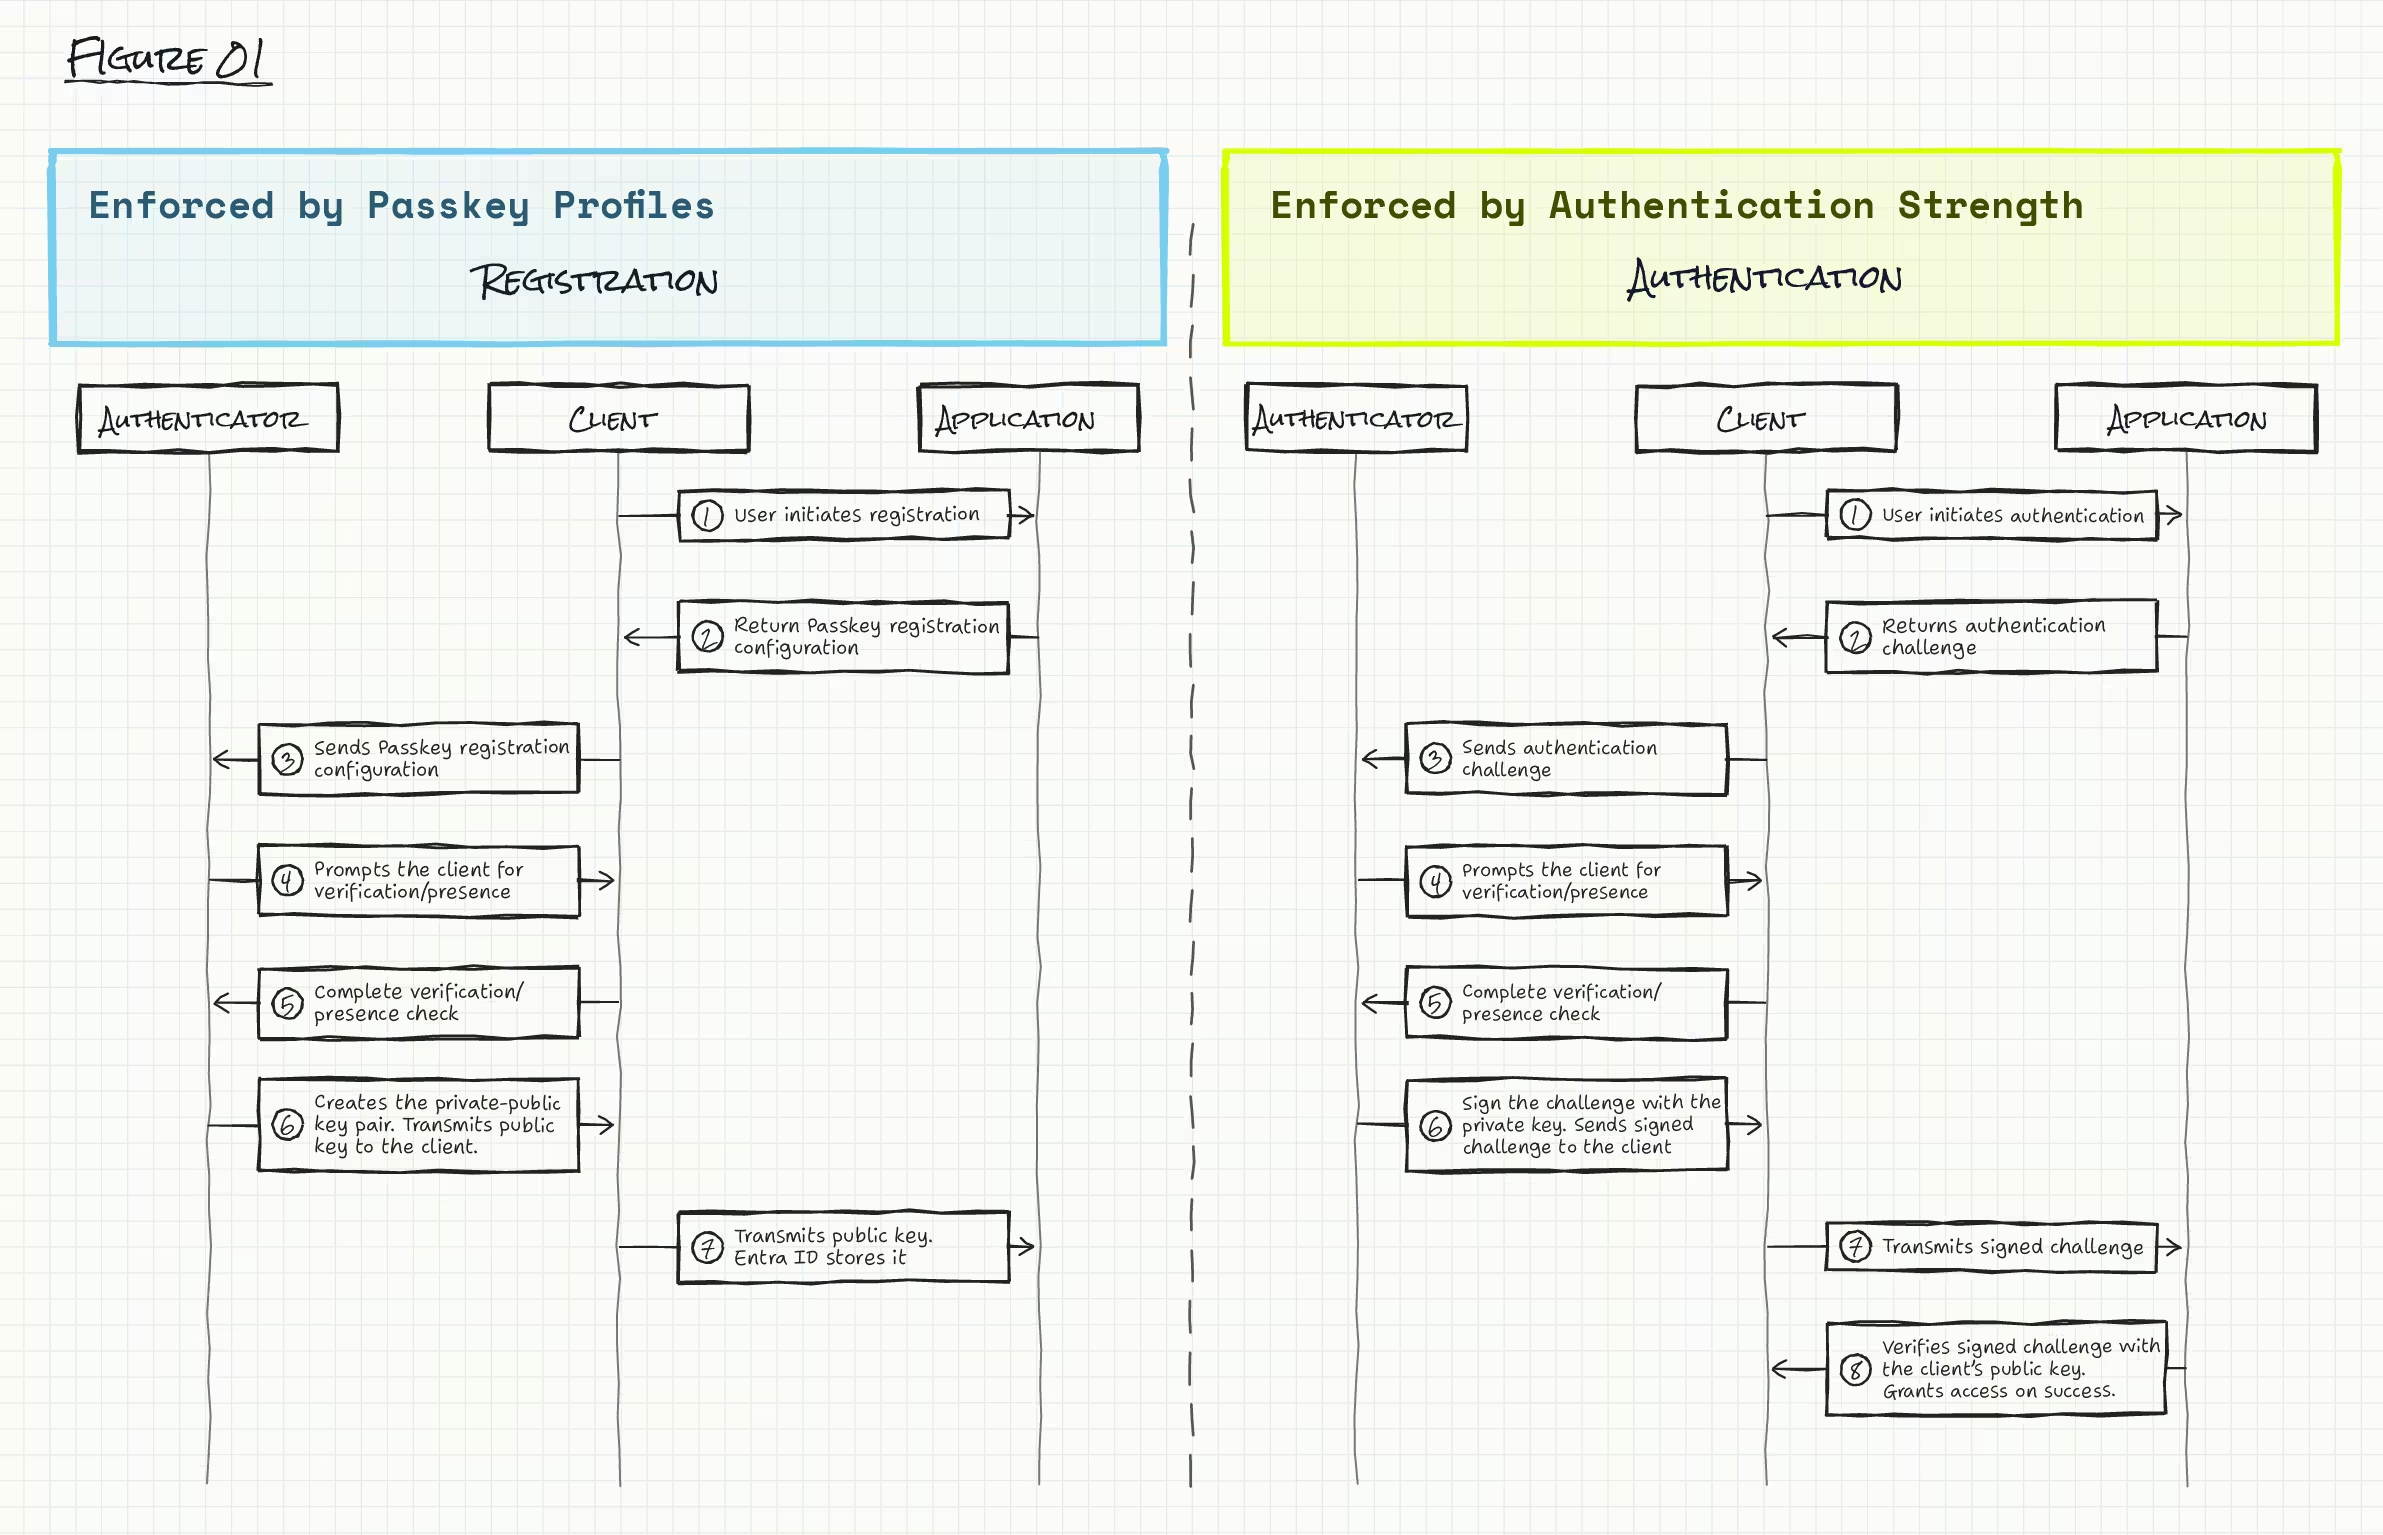
In my previous article – What Microsoft’s Entra ID Passkey Rollout Means for Microsoft 365 Admins - I covered the fundamentals around passkeys: what is a passkey, how the authentication process works, the different types of passkeys, which type to choose when, and how this all affects admins.
In this follow-up article, I’ll continue where I left off, but shift focus away from theory and into practice. I’ll explore how to configure, enforce, and deploy passkeys. So, this article will assume you are familiar with passkeys. If you’re not please go ahead and read the other article first.
Licensing and Devices Requirements for Passkeys
Before we jump into passkeys in the Entra ID Portal, let's make sure that we have licensing and other prerequisites covered.
Licensing
Using passkeys as an authentication method is available across all Entra ID licenses, including Microsoft Entra ID Free.
However, requiring specific authentication strengths for internal users during sign-in, which is set via Conditional Access Policies, requires the Entra ID P1 license.
Device requirements
Passkeys are available on all supported versions of Windows, MacOS, iOS, and Android, as well as the Microsoft Authenticator App, amongst others.
How to Enable Passkeys in Entra ID
The below step-by-step process will guide you through how to enable passkeys in Entra:
1. Sign in to the Microsoft Entra admin center (or the Microsoft Entra ID Blade in the Azure Portal)
2. Navigate to the Authentication Methods section
3. Select “Passkey FIDO2”
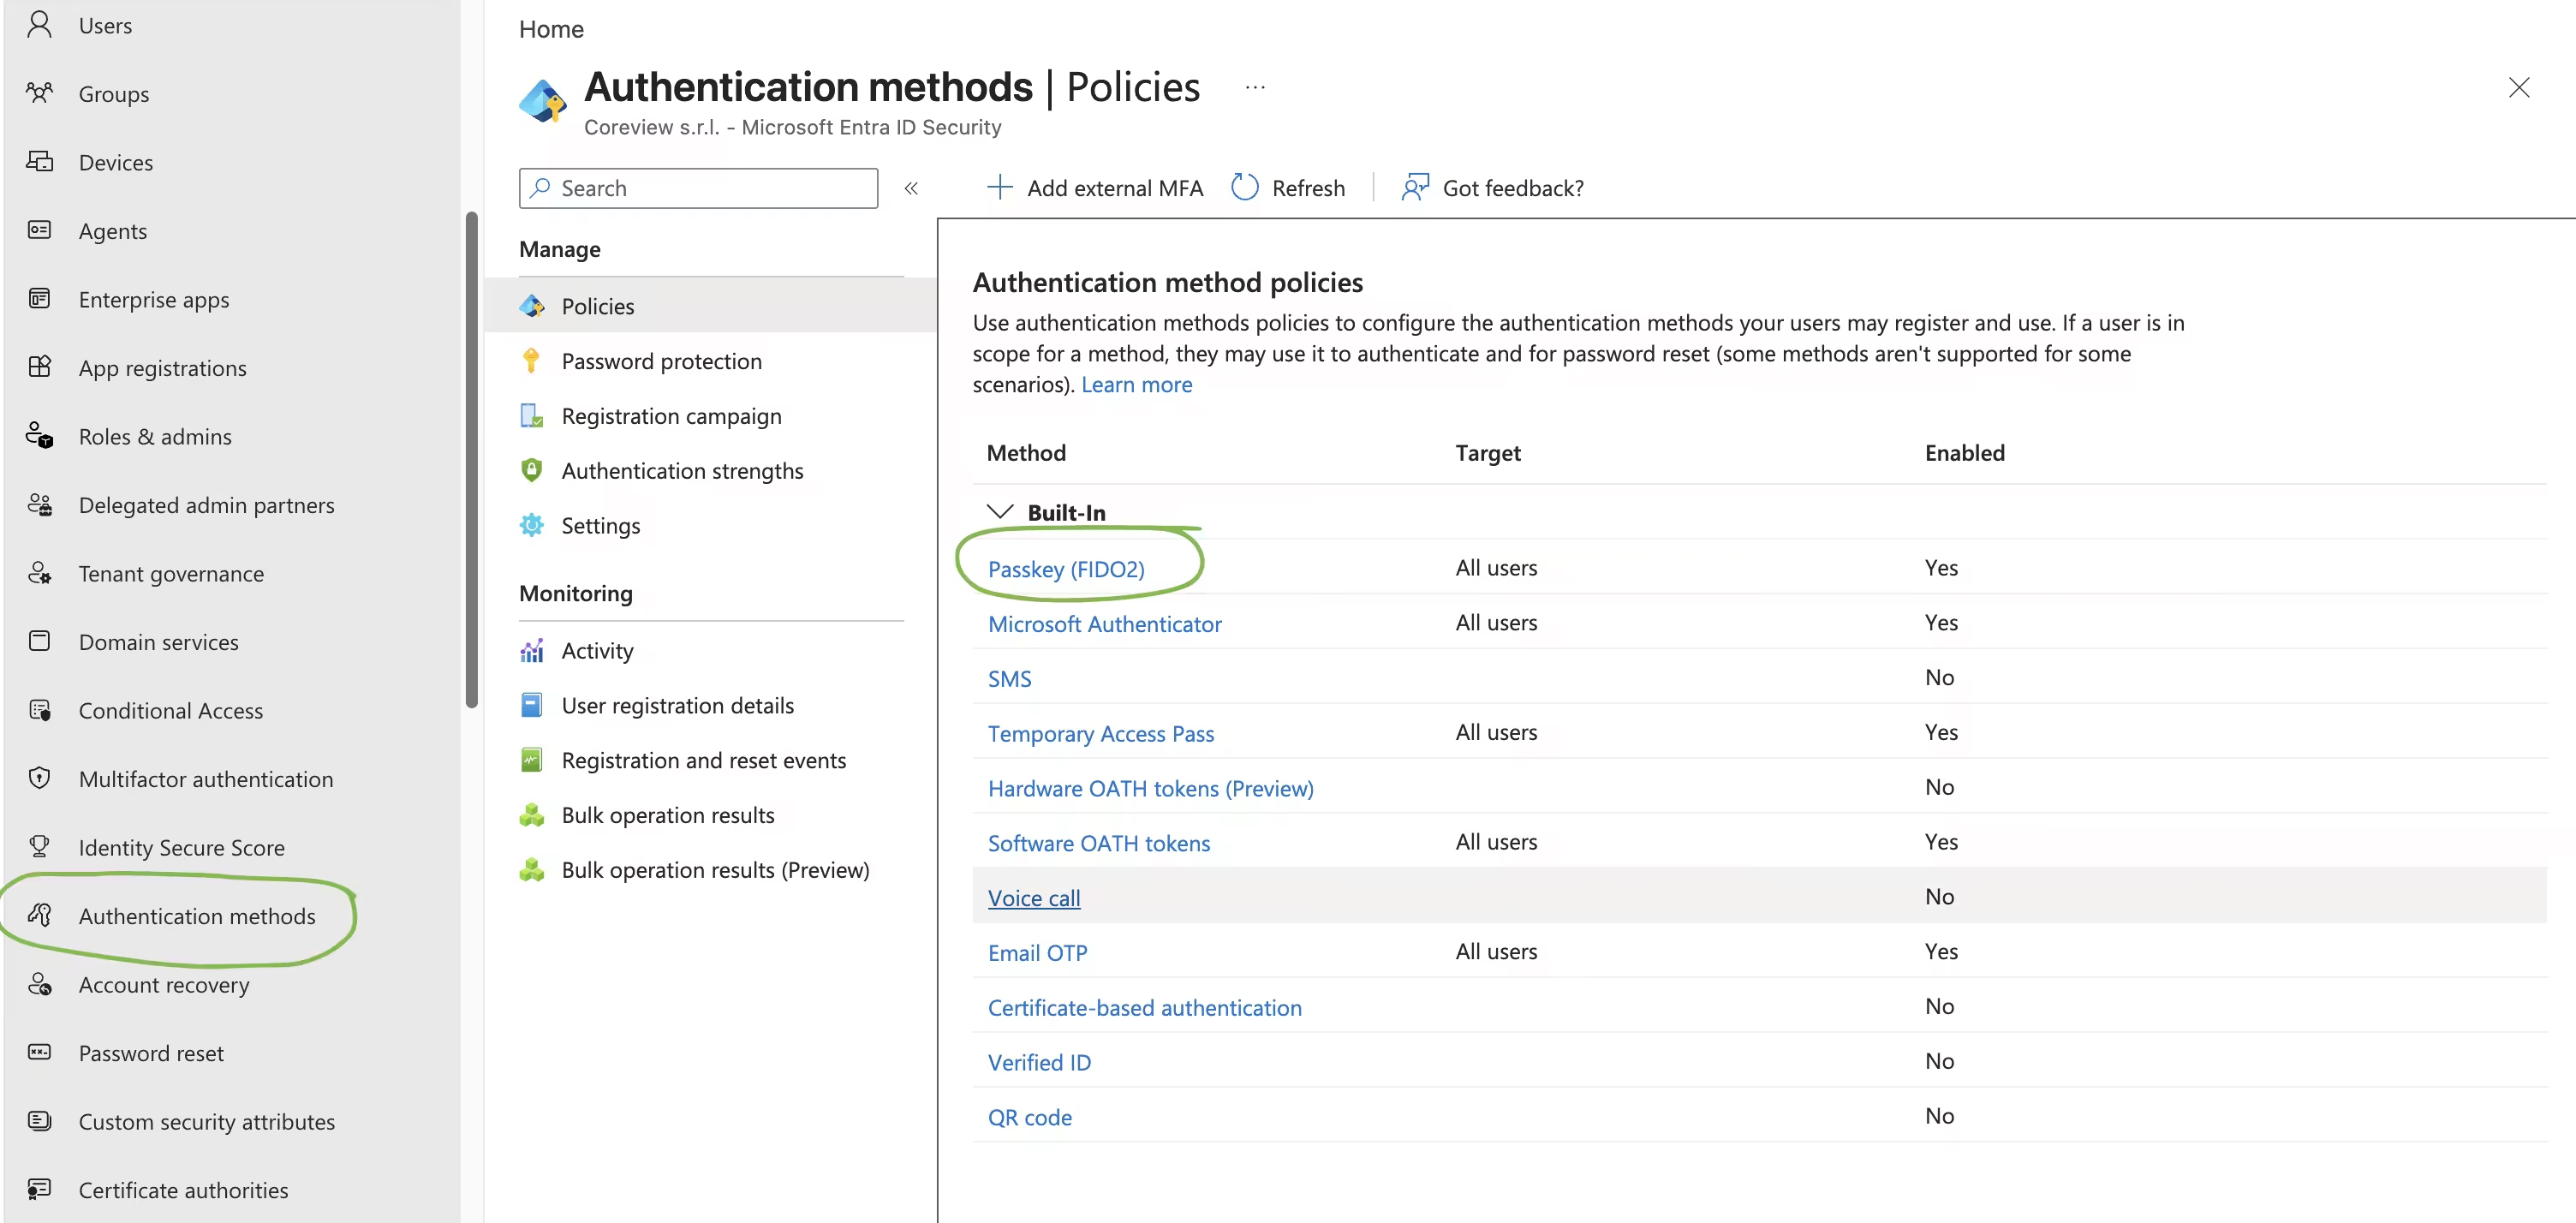
4. Make sure that “Enabled” is switched to “On”.
%20settings.avif)
5. In the “Configure” tab, you can enable “Allow self-service set-up”, which allows users to register passkeys on their own via their “security info” page.
How to Configure a Passkey Profile
To create a profile, you need to be on the “Configure” tab, and click “+ Add profile”.
Give it an appropriate name, for example “Admin-DeviceBound” if you're making a profile that targets Admins and allows Device-Bound passkeys only.
Now some choices need to be made:
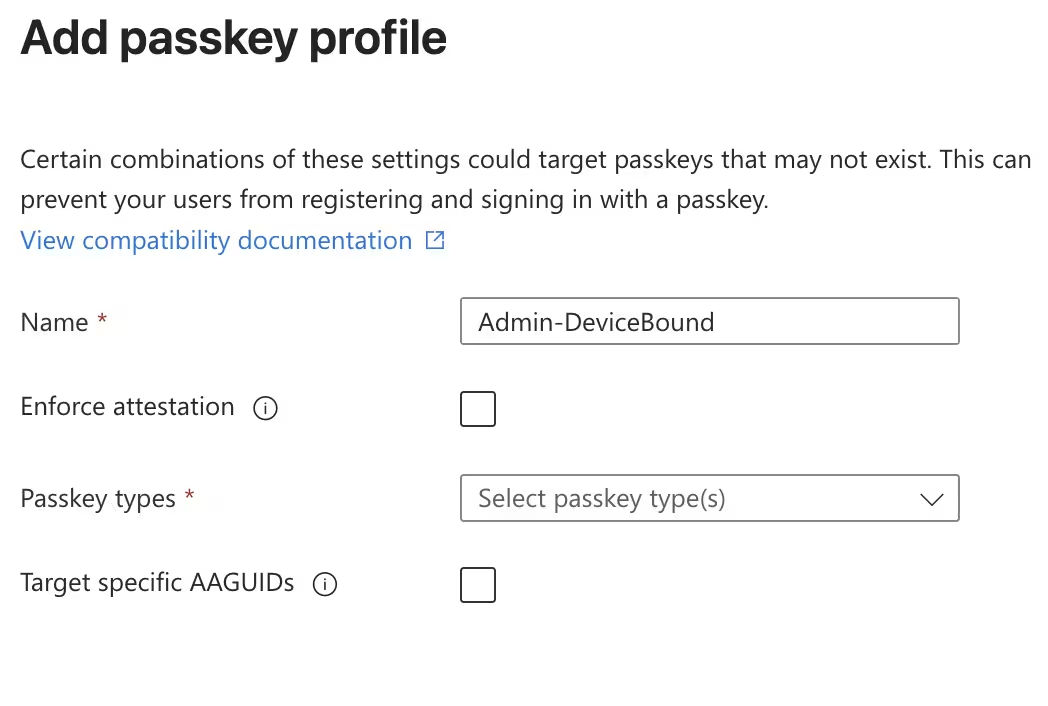
- We can enable attestation, which means that Entra ID will verify the device make and model during the registration process.
- We can set allowed types of passkeys: either Device-Bound or Synced.
- And lastly, we can target specific AAGUIDs in either Allow or Block mode.
For this setup, we will create a Passkey Policy for specific privileged admins, where we require that they use a Device Bound passkey from YubiKey, namely YubiKey 5 NFC, with Firmware version 5.8.
Creating a Passkey Policy
- Enable “Enforce attestation”.
- Choose “Device-bound” as passkey type.
- Select “Allow” in “Target specific AAGUIDs”.
- Click “Add AAGUID”, choose “Enter AAGUID”, and enter the specific AAGUID for the device I want to allow, in this case: f4ce5fc0-57d3-46f5-a736-efb7d5bc63b5.
- Lastly, click “Save”, and we have now created our Policy.
Putting a Passkey Policy Into Effect
In order for the policy to go into effect, we need to target either “All users” or a subset of users.
1. In the Passkey (FIDO2) settings window, click “+ Add target”:
%20settings%20%2B%20add%20target.avif)
If you do not want to assign the policy to All users, you choose “Select targets”, and target a security group, you have made for the purpose. In our example, we have created “SG-PrivilegedAdmin”.
2. Under the “Passkey profiles” dropdown for the target we just created, choose the policy we created.

3. Remember to click “Save” afterwards.
Note: Enabling attestation for the target of a policy after they have already registered a passkey will not affect that passkey in retrospect. A user can still use that passkey to login, no matter the configuration in the policy. However, if you delete the user’s passkey(s), the attestation will hit when they create a new one.
If you remove a currently allowed AAGUID from a passkey policy, that change will hit sign-ins immediately.
Passkeys and Conditional Access Policies
We have now setup and given users access to a much more secure way of logging in. If we want to enforce this, we need to look at our Conditional Access Policies (CAP) and bind our CAP to the concept of “Authentication Strength”. This allows us to specify precisely which authentication methods to allow during sign-ins, and prevent users from being able to “fallback” to less secure authentication methods via the “sign in another way” functionality.
Setting Authentication Strength
1. Within the “Authentication Method” section of Microsoft Entra admin center, click “Authentication Strengths”.
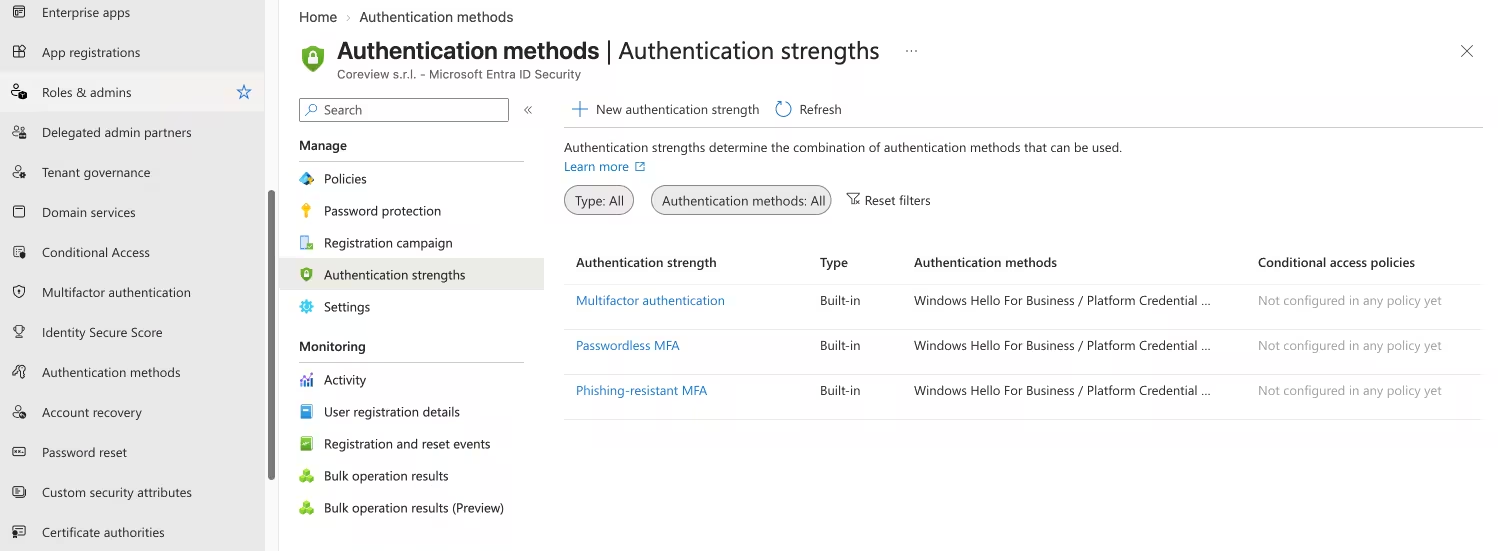
2. Click “+ New authentication strength”.
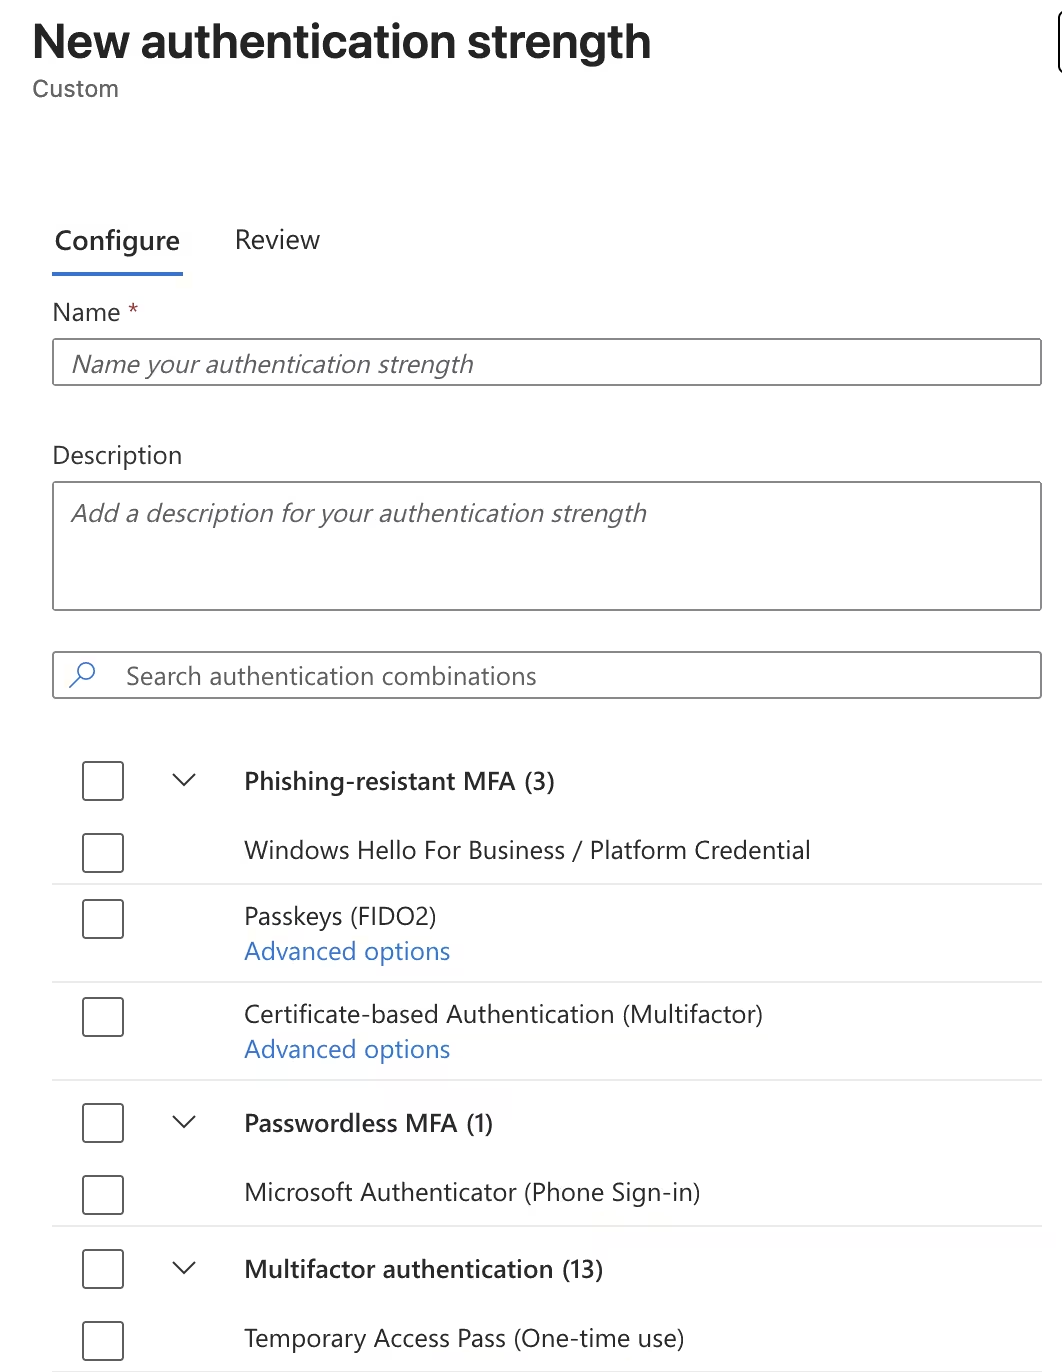
Here we should see the “Passkeys (FIDO2) checkbox and the associated advanced options:
%20advanced%20options.avif)
3. In this example, we will create an authentication strength that will only allow the user YubiKey 5 NFC (firmware version 5.8) AAGUIDs. Click “Add AAGUID +”, and enter the AAGUID from earlier.
Note: This AAGIUD restriction is a second layer of protection on top of the passkey profile. The AAGUID restriction in the passkey profile acts as a protection in registration, while, the restriction in the Authentication Strength options protects the authentication process.
4. Remember to click Save. Now we have our new “Authentication Strength”.

Adding this to a Conditional Access Policy
The next step is to add this to a Conditional Access Policy.
1. Go to the “Conditional Access” section of the Microsoft Entra admin center. Then click “Policies”.
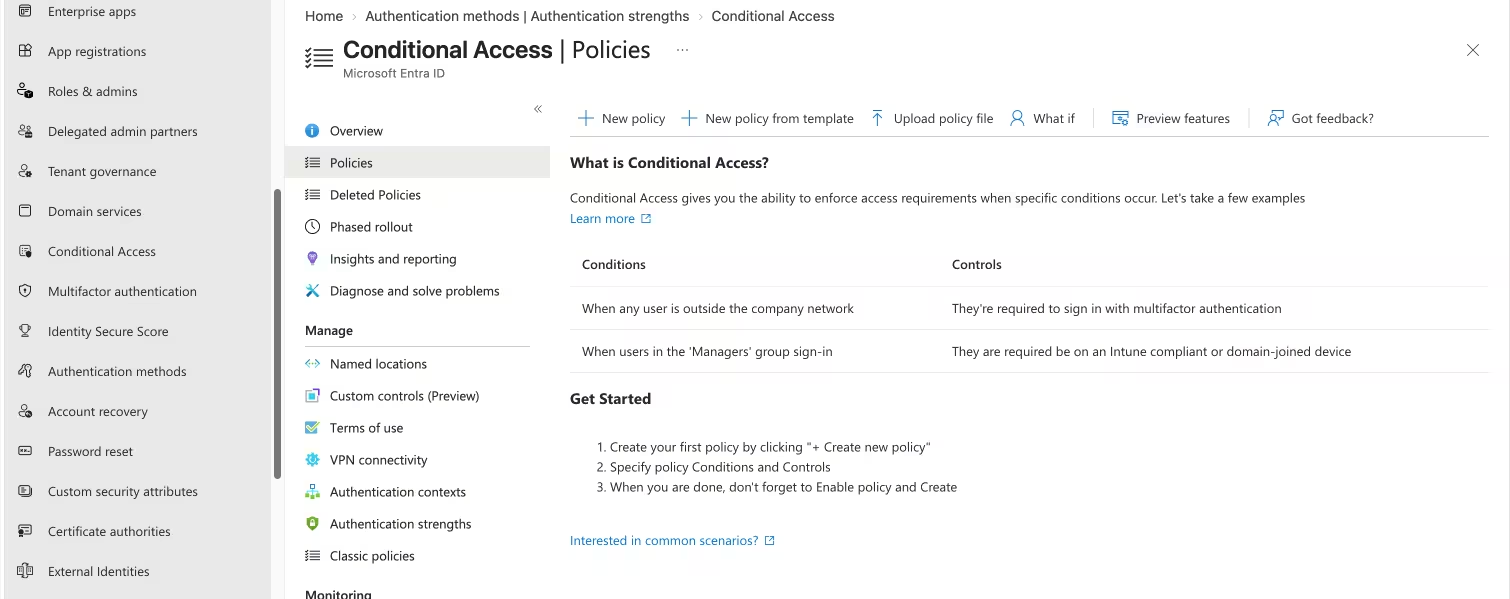
2. To require a specific “Authentication Strength” in a CAP, you need to add it to the “Grant” section.
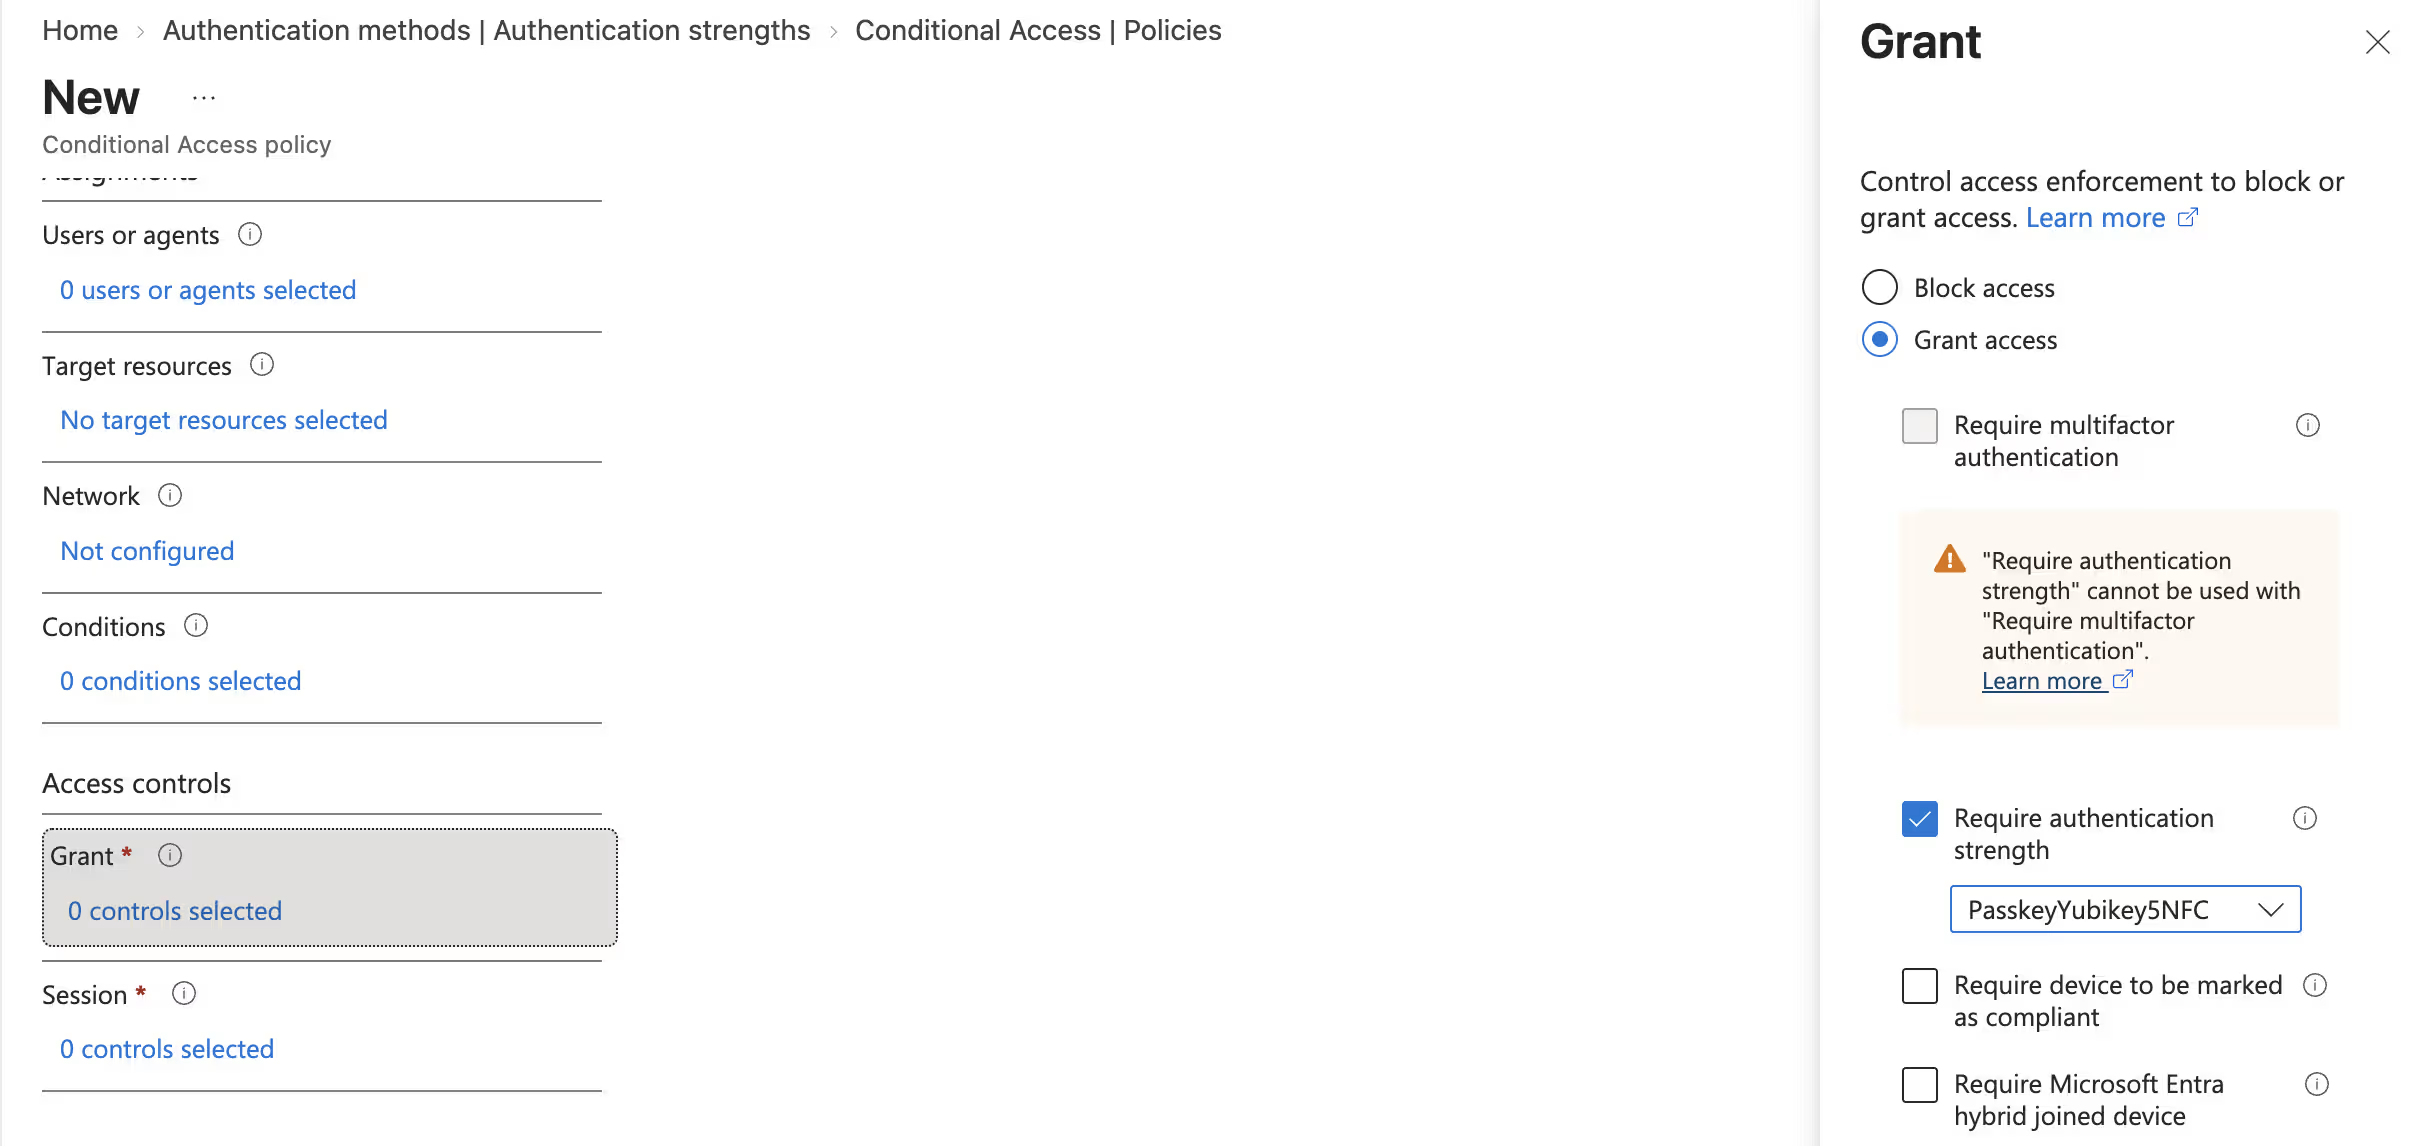
Here we have added the “PasskeyYubiKey5NFC” authentication strength, that we created earlier.
Passkey Authentication and All Resources
This article will not go into the depth of creating CAPs. However, I want to warn you about one issue you might encounter.
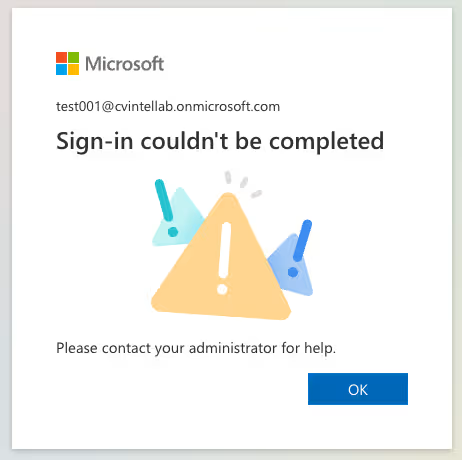
If you have a CAP that requires a passkey for authentication, and the target of the CAP is “All resources (formerly ‘All cloud apps’)”, then a user who has not yet setup a passkey will be unable to do so. This is because they cannot successfully authenticate without one. In this situation, when the user logs in, it will look like this:
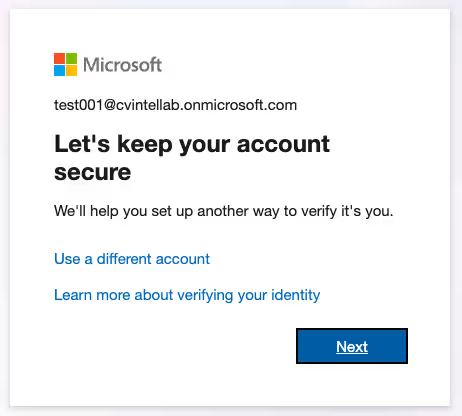
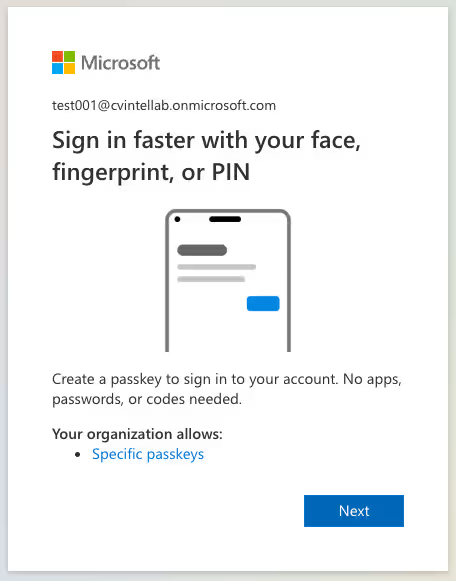
Clicking “Next” Will direct them to this page:
There are two ways to ensure that this does not happen:
- Create a CAP that targets “Register security information” and does not require a passkey.
- Issue a TAP (Temporary Access Pass) to the user. The TAP will satisfy the requirements for MFA, and will allow the user to setup their YubiKey 5 NFC (or other specified AAGUID devices).
Setting Up a Temporary Access Path
The TAP route will look like this:
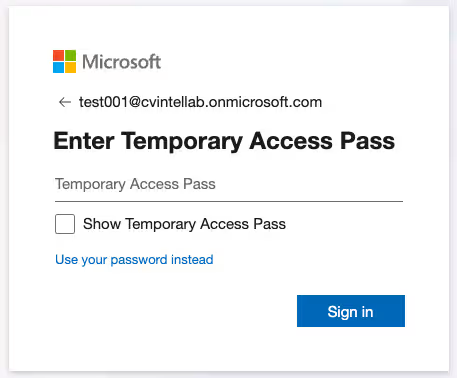
Once the user enters their TAP, they will be allowed to register their passkey.
Driving Adoption – Setting Up Registration Campaigns
We have covered how to create passkey policies and how to apply them to the authentication process. In this section, we will discuss how we can drive user adoption via “Registration Campaigns”. This is also found in the “Authentication Methods” section of the Microsoft Entra admin center.
You can choose to just follow the “Microsoft Managed” approach, where Microsoft will roll out registration campaigns, such as the passkey campaign beginning the 1st September, 2026. If you want more control, you can switch the state to “Enabled”, and configure the campaign as you see fit.
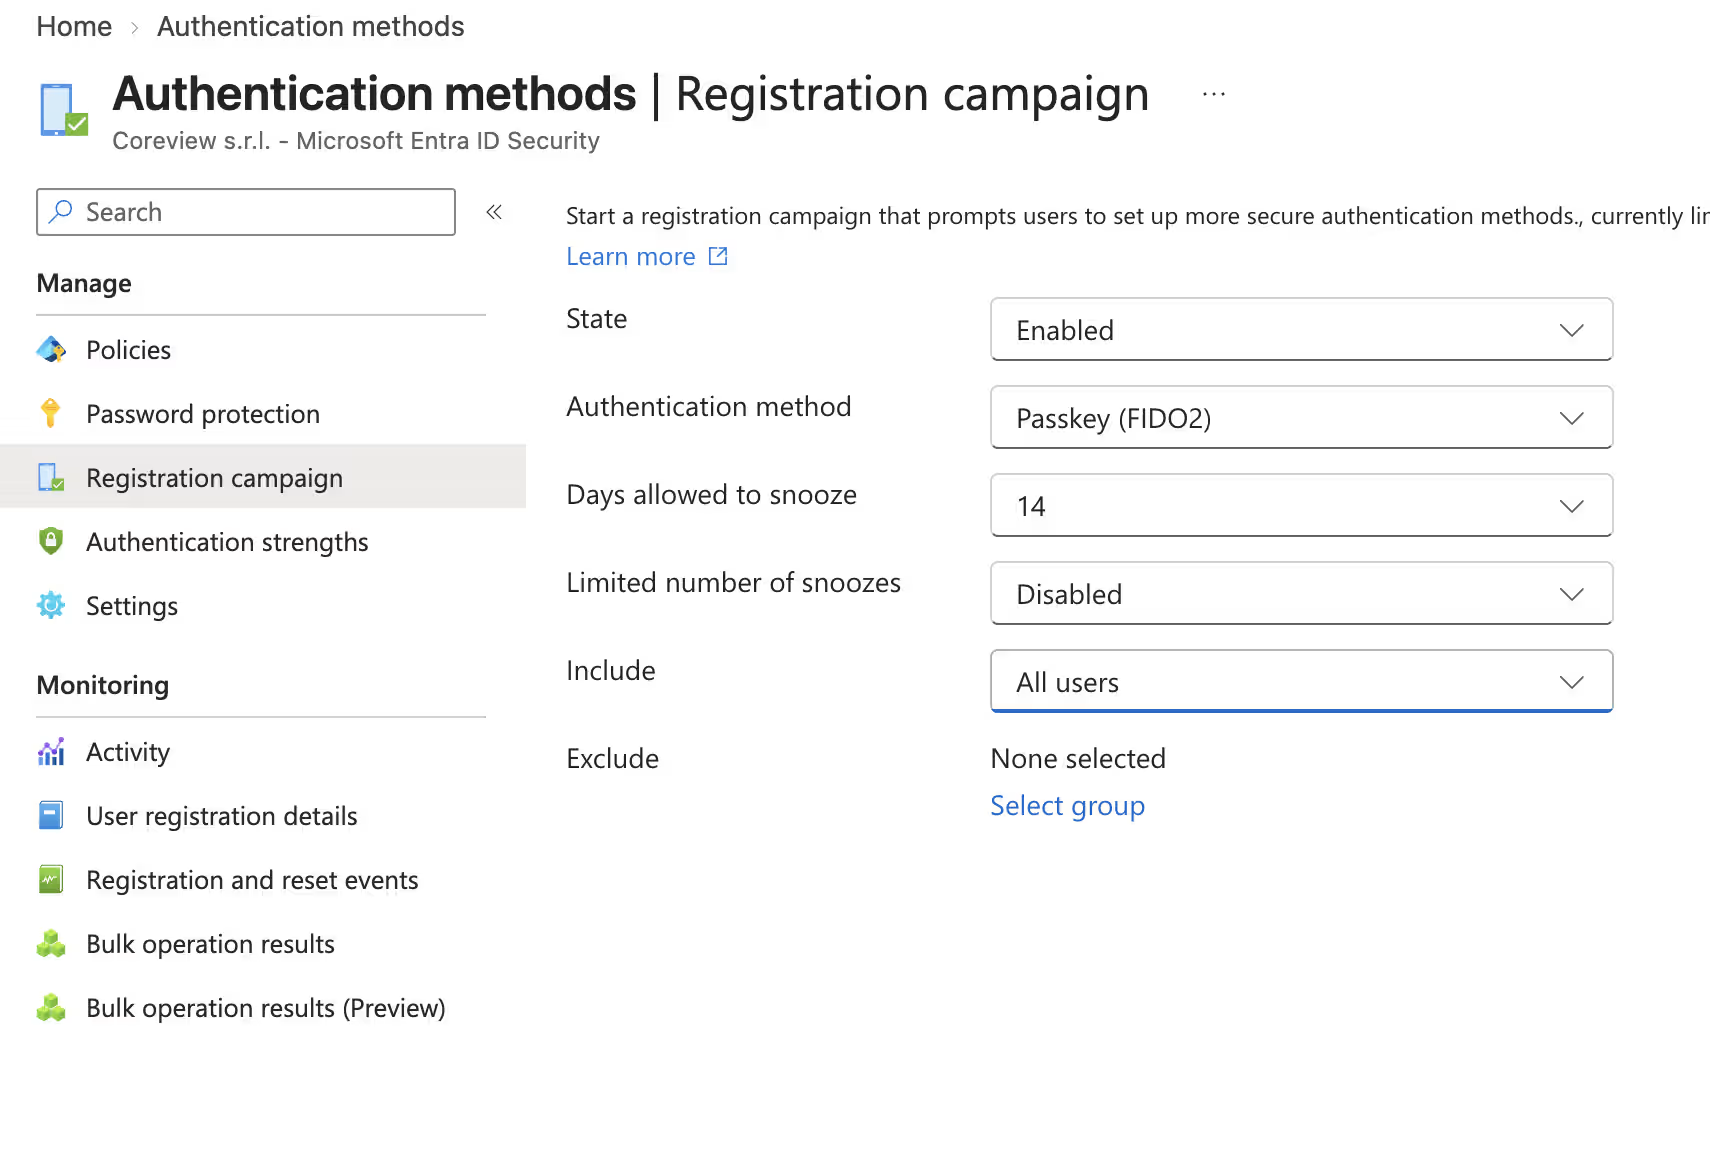
This allows you to set snoozing options and the ability to target users in deployment rings. A user must be targeted by a passkey profile, before they receive the campaign registration nudge.
Please read the Microsoft documentation on supported platforms for campaign nudging.
Known Limitations to Be Wary Of
There a some items that are worth mentioning here:
- Microsoft has a 20KB limit for the total size of Passkey Profiles. This limit can be hit, if you have multiple passkey profiles, with a lot of AAGUIDs specified.
- Passkeys for external users (B2B) will roll out from October 2026 till February 2027. Until that point, passkeys will only support registration and authentication for internal users. Read more here.
Summary
With clear deadlines to move away from “weaker” forms of authentication within your Microsoft 365 environment, successful adoption of passkeys requires some planning and forethought from IT teams. Decisions need to be made around types of passkeys to be deployed, required authentication strength, and how these need to be integrated into existing Conditional Access Policies.
While this article offers a solid overview of the mechanics of enabling and enforcing passkeys, rollouts will need to be carefully planned to avoid disruption to user services.