Published:
Jul 10, 2025
|
Modified:
|
5
min read

How to Check and Analyze Message Traces in Microsoft 365 Exchange Online

Ivan Fioravanti
Ivan Fioravanti, Co-founder and CTO for CoreView, uses his system engineer and .NET development skills to lead CoreView’s technology team. He’s passionate about AI, automation and all things Microsoft 365.

Why Message Tracing Matters for Microsoft 365 Administrators

Tracing messages is a crucial task for Microsoft 365 administrators to diagnose mail delivery issues, audit activity, and maintain compliance. This guide covers three up-to-date methods to perform message traces using Exchange Online and CoreView.

Tracing messages is a crucial task for Microsoft 365 administrators to diagnose mail delivery issues, audit activity, and maintain compliance. This guide covers three up-to-date methods to perform message traces using Exchange Online and CoreView.

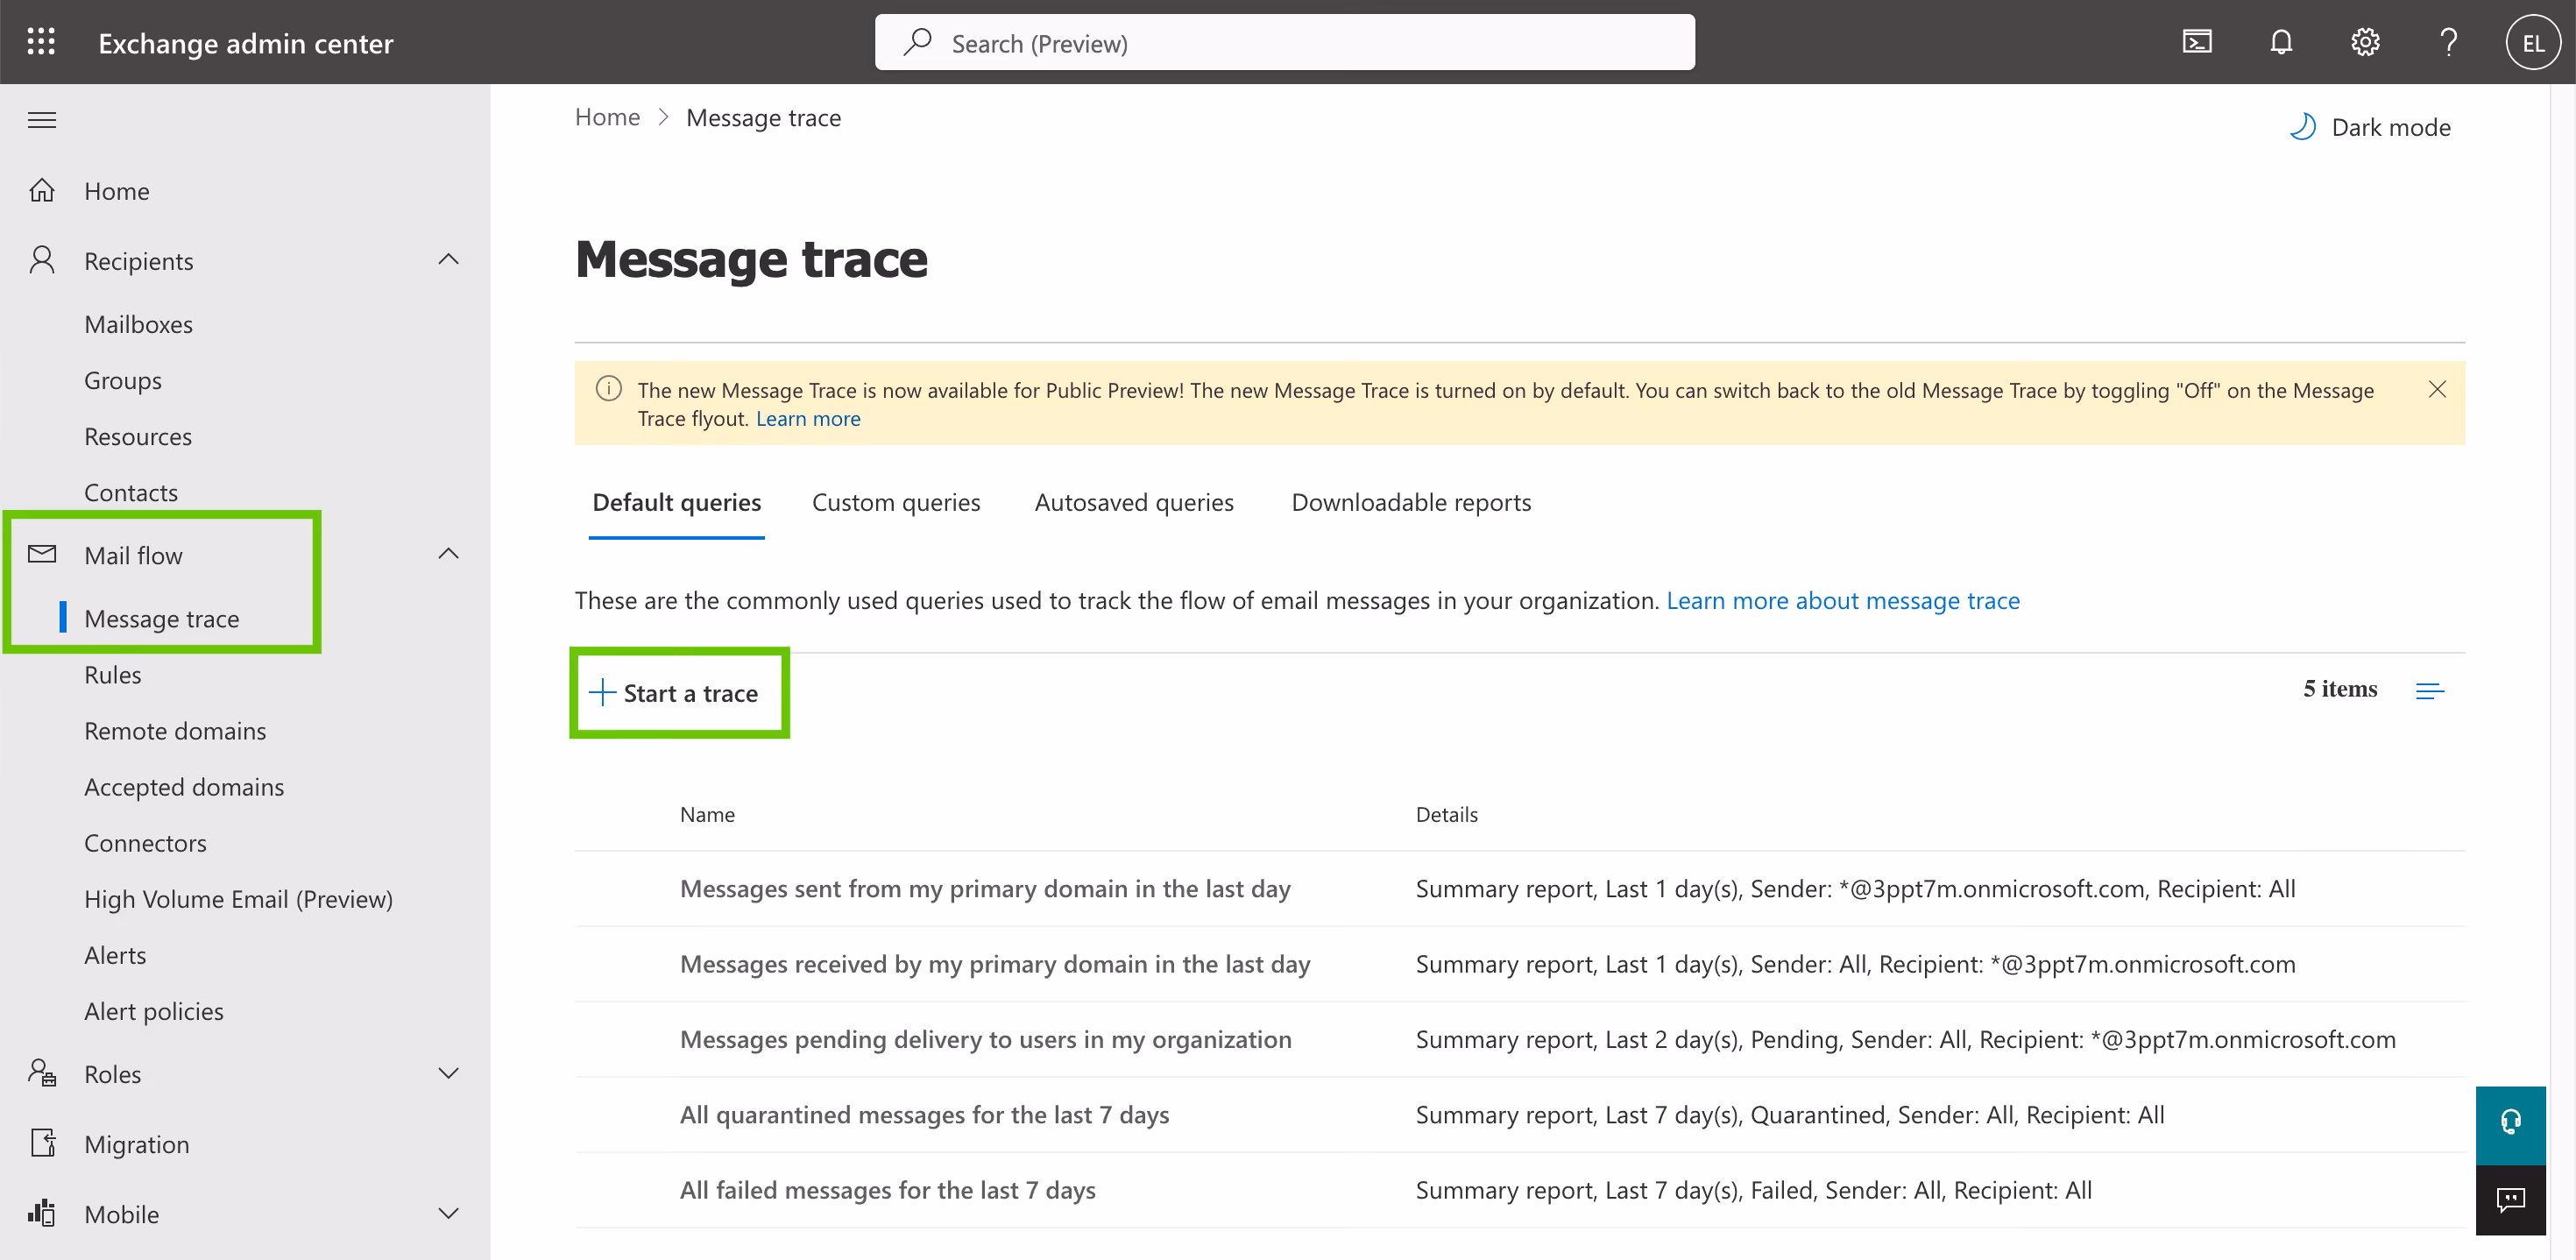
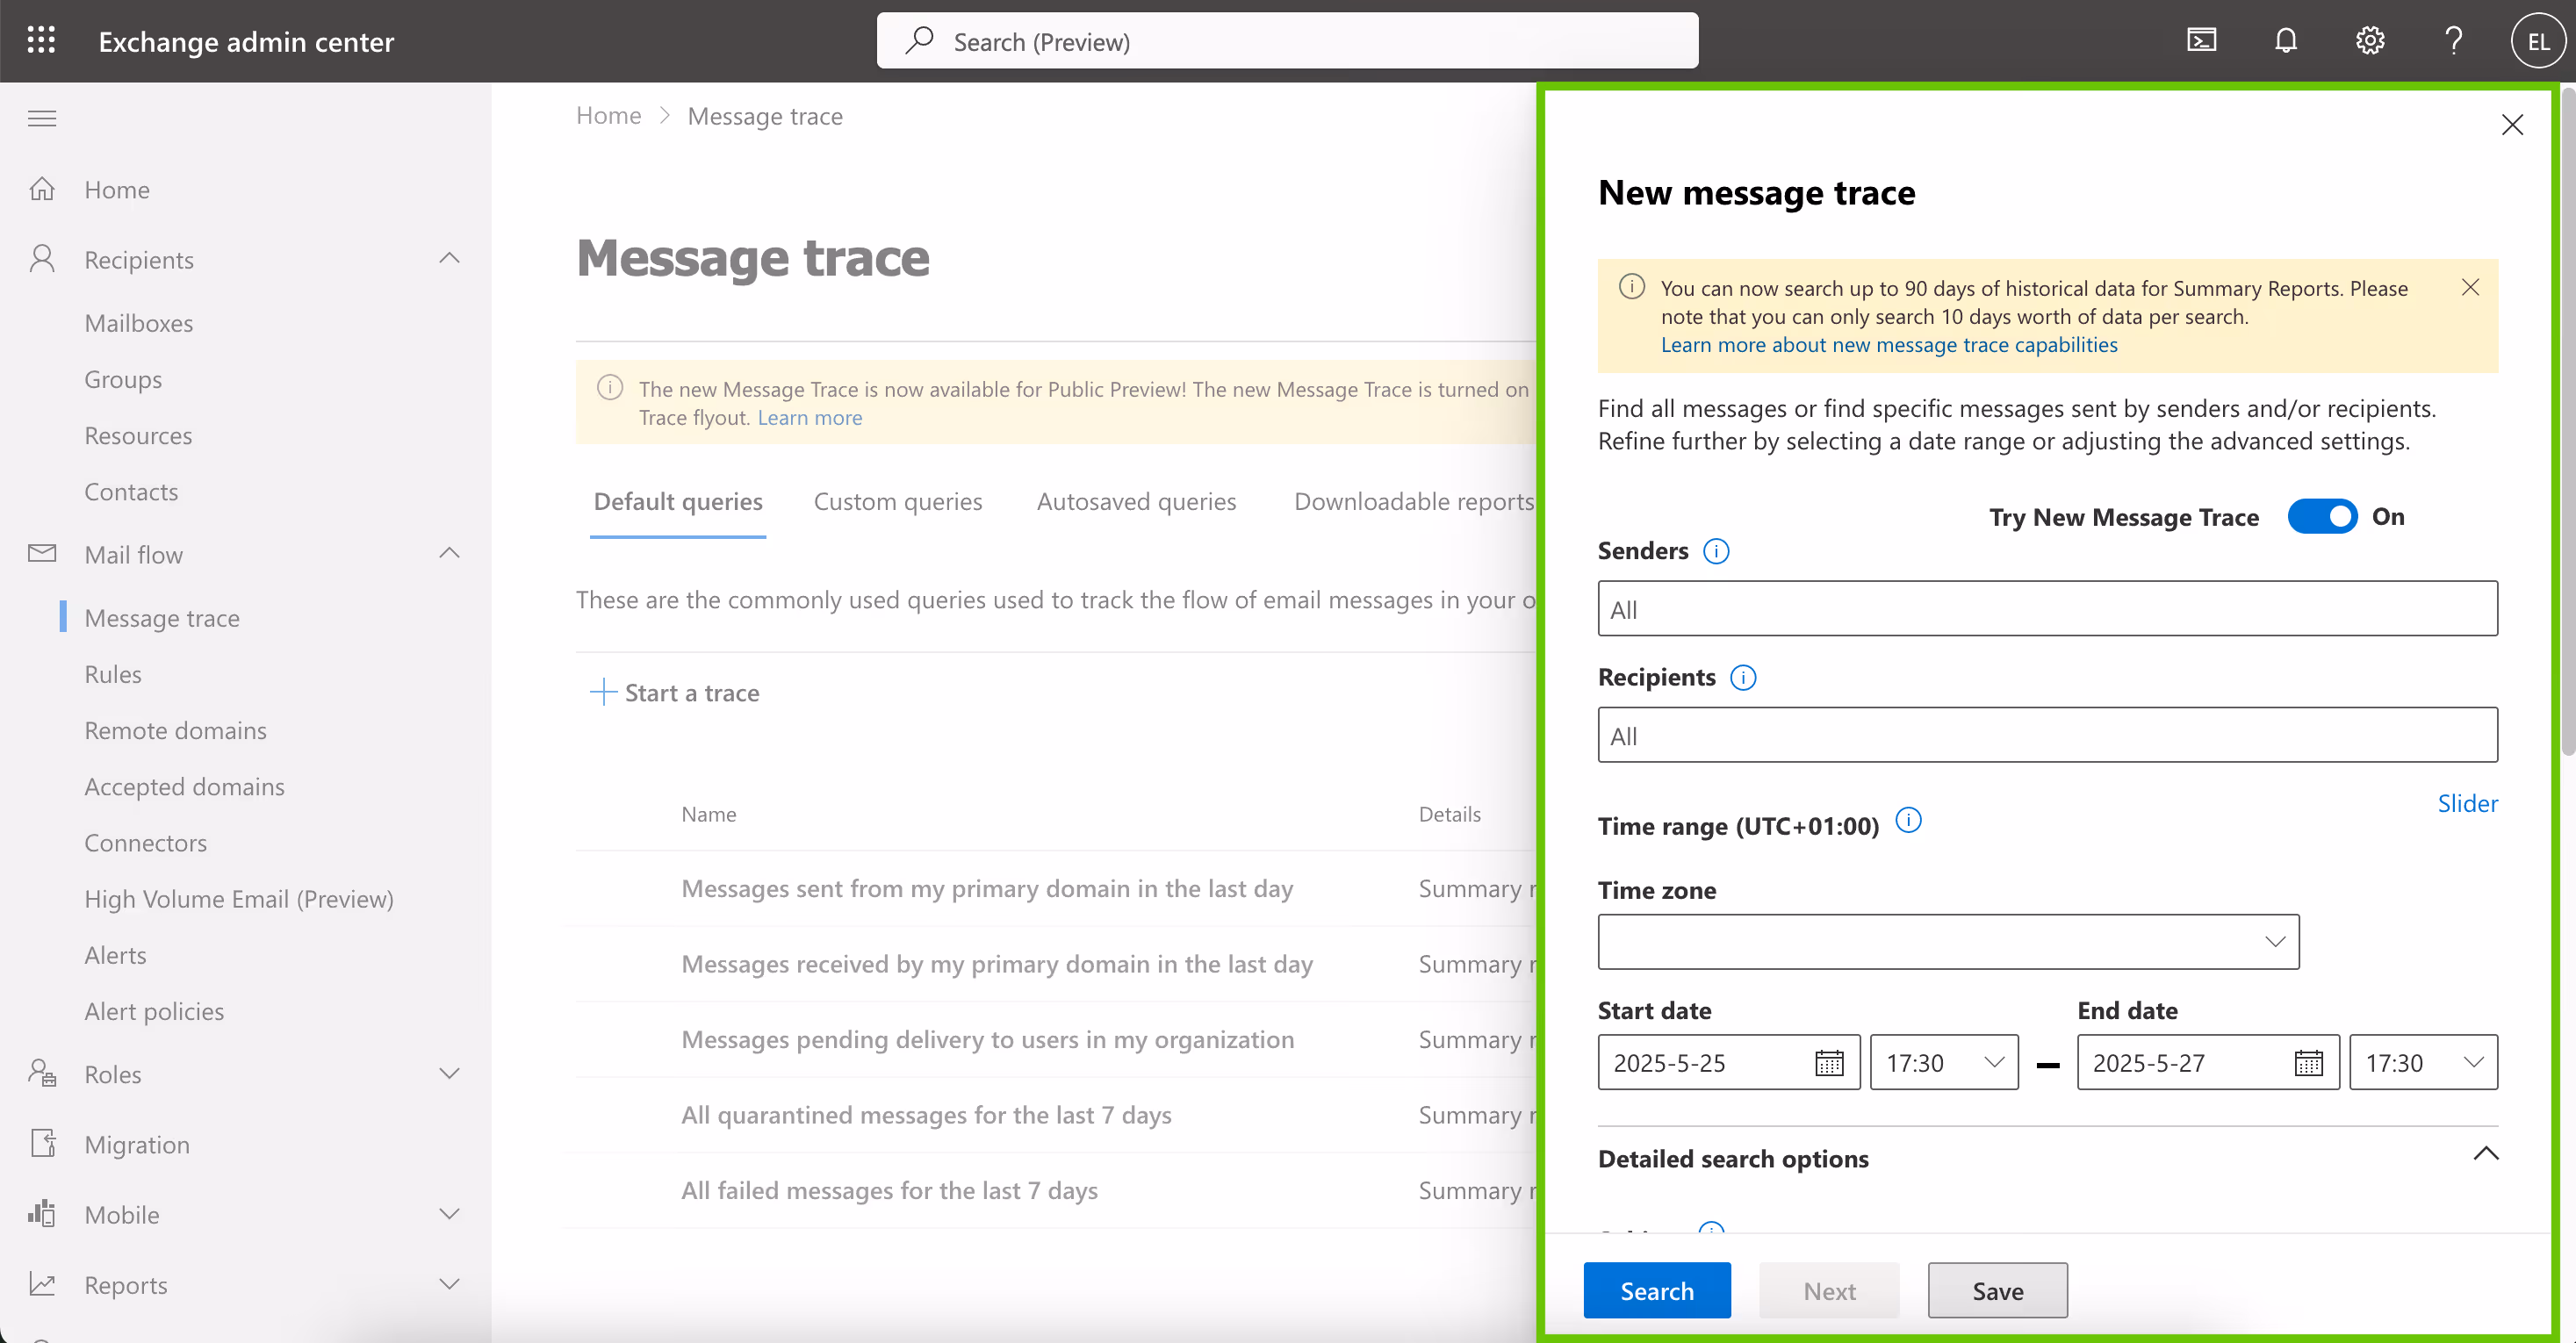
How to Run a Message Trace Using the Exchange Admin Center

To run a message trace, you need to be a member of one of the following role groups:

  • Global Administrator
  • Exchange Administrator

For more information, see the following Microsoft guides:

Step-by-Step Guide to Message Tracing in Exchange Admin Center [H3]

  • Navigate to the Exchange Admin Center.
  • In the left pane, expand “Mail flow”, and then select “Message trace”.
  • Click “Start a trace”.
Start a trace screen
  • Specify your desired search criteria (sender, recipient, and date range).
  • Click “Search”.
Search screen
  • Review results, view details, and download reports as needed.

For more detailed information on Message Trace using Exchange Admin Center, please refer to the Message trace in the modern Exchange admin center in Exchange Online article.

How to Perform Message Traces with PowerShell

Leverage PowerShell for automated or advanced message tracing using the Exchange Online PowerShell V2 Module (EXO V2).

Setting Up PowerShell for Exchange Online Tracing

Open PowerShell and connect to Exchange Online:

Connect-ExchangeOnline 

Basic message trace:

Get-MessageTrace 

This returns messages from the last 48 hours if no parameters are specified.

Example:

# Trace messages sent by john@contoso.com within a specific date range
Get-MessageTrace -SenderAddress john@contoso.com -StartDate 12/20/2022 -EndDate 12/30/2022 

Notes:

  • Get-MessageTrace retrieves data from the past 10 days only. Searching further back will produce an error.
  • To search for data older than 10 days, use the following:
Start-HistoricalSearch
Get-HistoricalSearch 
  • By default, up to 1,000 results are returned.
  • For large searches, consider dividing the query by using smaller -StartDate and -EndDate intervals.
  • All output is in UTC, which may differ from the time format used for the -StartDate and -EndDate parameters.
  • Ensure your account has appropriate Exchange Online roles.

For more, see Get-MessageTrace on Microsoft Learn.

How to Use CoreView for Message Trace

  • Go to the CoreView portal.
  • Go to Reports > Exchange > Message Trace. Or use the search bar at the top—type “Trace” to find the report.
Message Trace screen

Specify your criteria:

  • Sender or Recipient (type email addresses to select)
  • Date range (typically limited to 10 days; your tenant may require date selection before searching to improve performance).
  • Use Advanced Filters for further refinement (e.g., subject, status).
Message Trace Criteria screen
  • Once completed, click on the “Search” option to run the query.
Search screen
  • Click on the “MessageTraceID” arrow to view message details.
MessageTraceID screen

Understanding Key Terms and Message Status Definitions

Key terms

  • Senders: Enter or select one or multiple senders from your organization.
  • Recipients: Enter or select one or multiple recipients.

Message statuses

  • Delivered: the message was successfully sent to the recipient.
  • Expanded: a distribution group was expanded before delivery to members.
  • Failed: the message wasn't delivered.
  • Pending: delivery of the message is being attempted or reattempted.
  • Quarantined: the message was quarantined (as spam, bulk mail, or phishing). For more information, please refer to Quarantined email messages in EOP.
  • Filtered as spam: The message was identified as spam, and was rejected or blocked (not quarantined).
Operators will only be able to view and manage mailboxes that are part of their defined V-Tenant scope.

Get a personalized demo today

Created by M365 experts, for M365 experts.