Vasil is a nine-time Microsoft MVP and expert with over a decade of experience in Microsoft cloud, lifecycle management, migration, adoption, and automation.
This guide walks you through creating a service account in Microsoft 365 using the Microsoft Admin Center—an essential step for onboarding with CoreView.
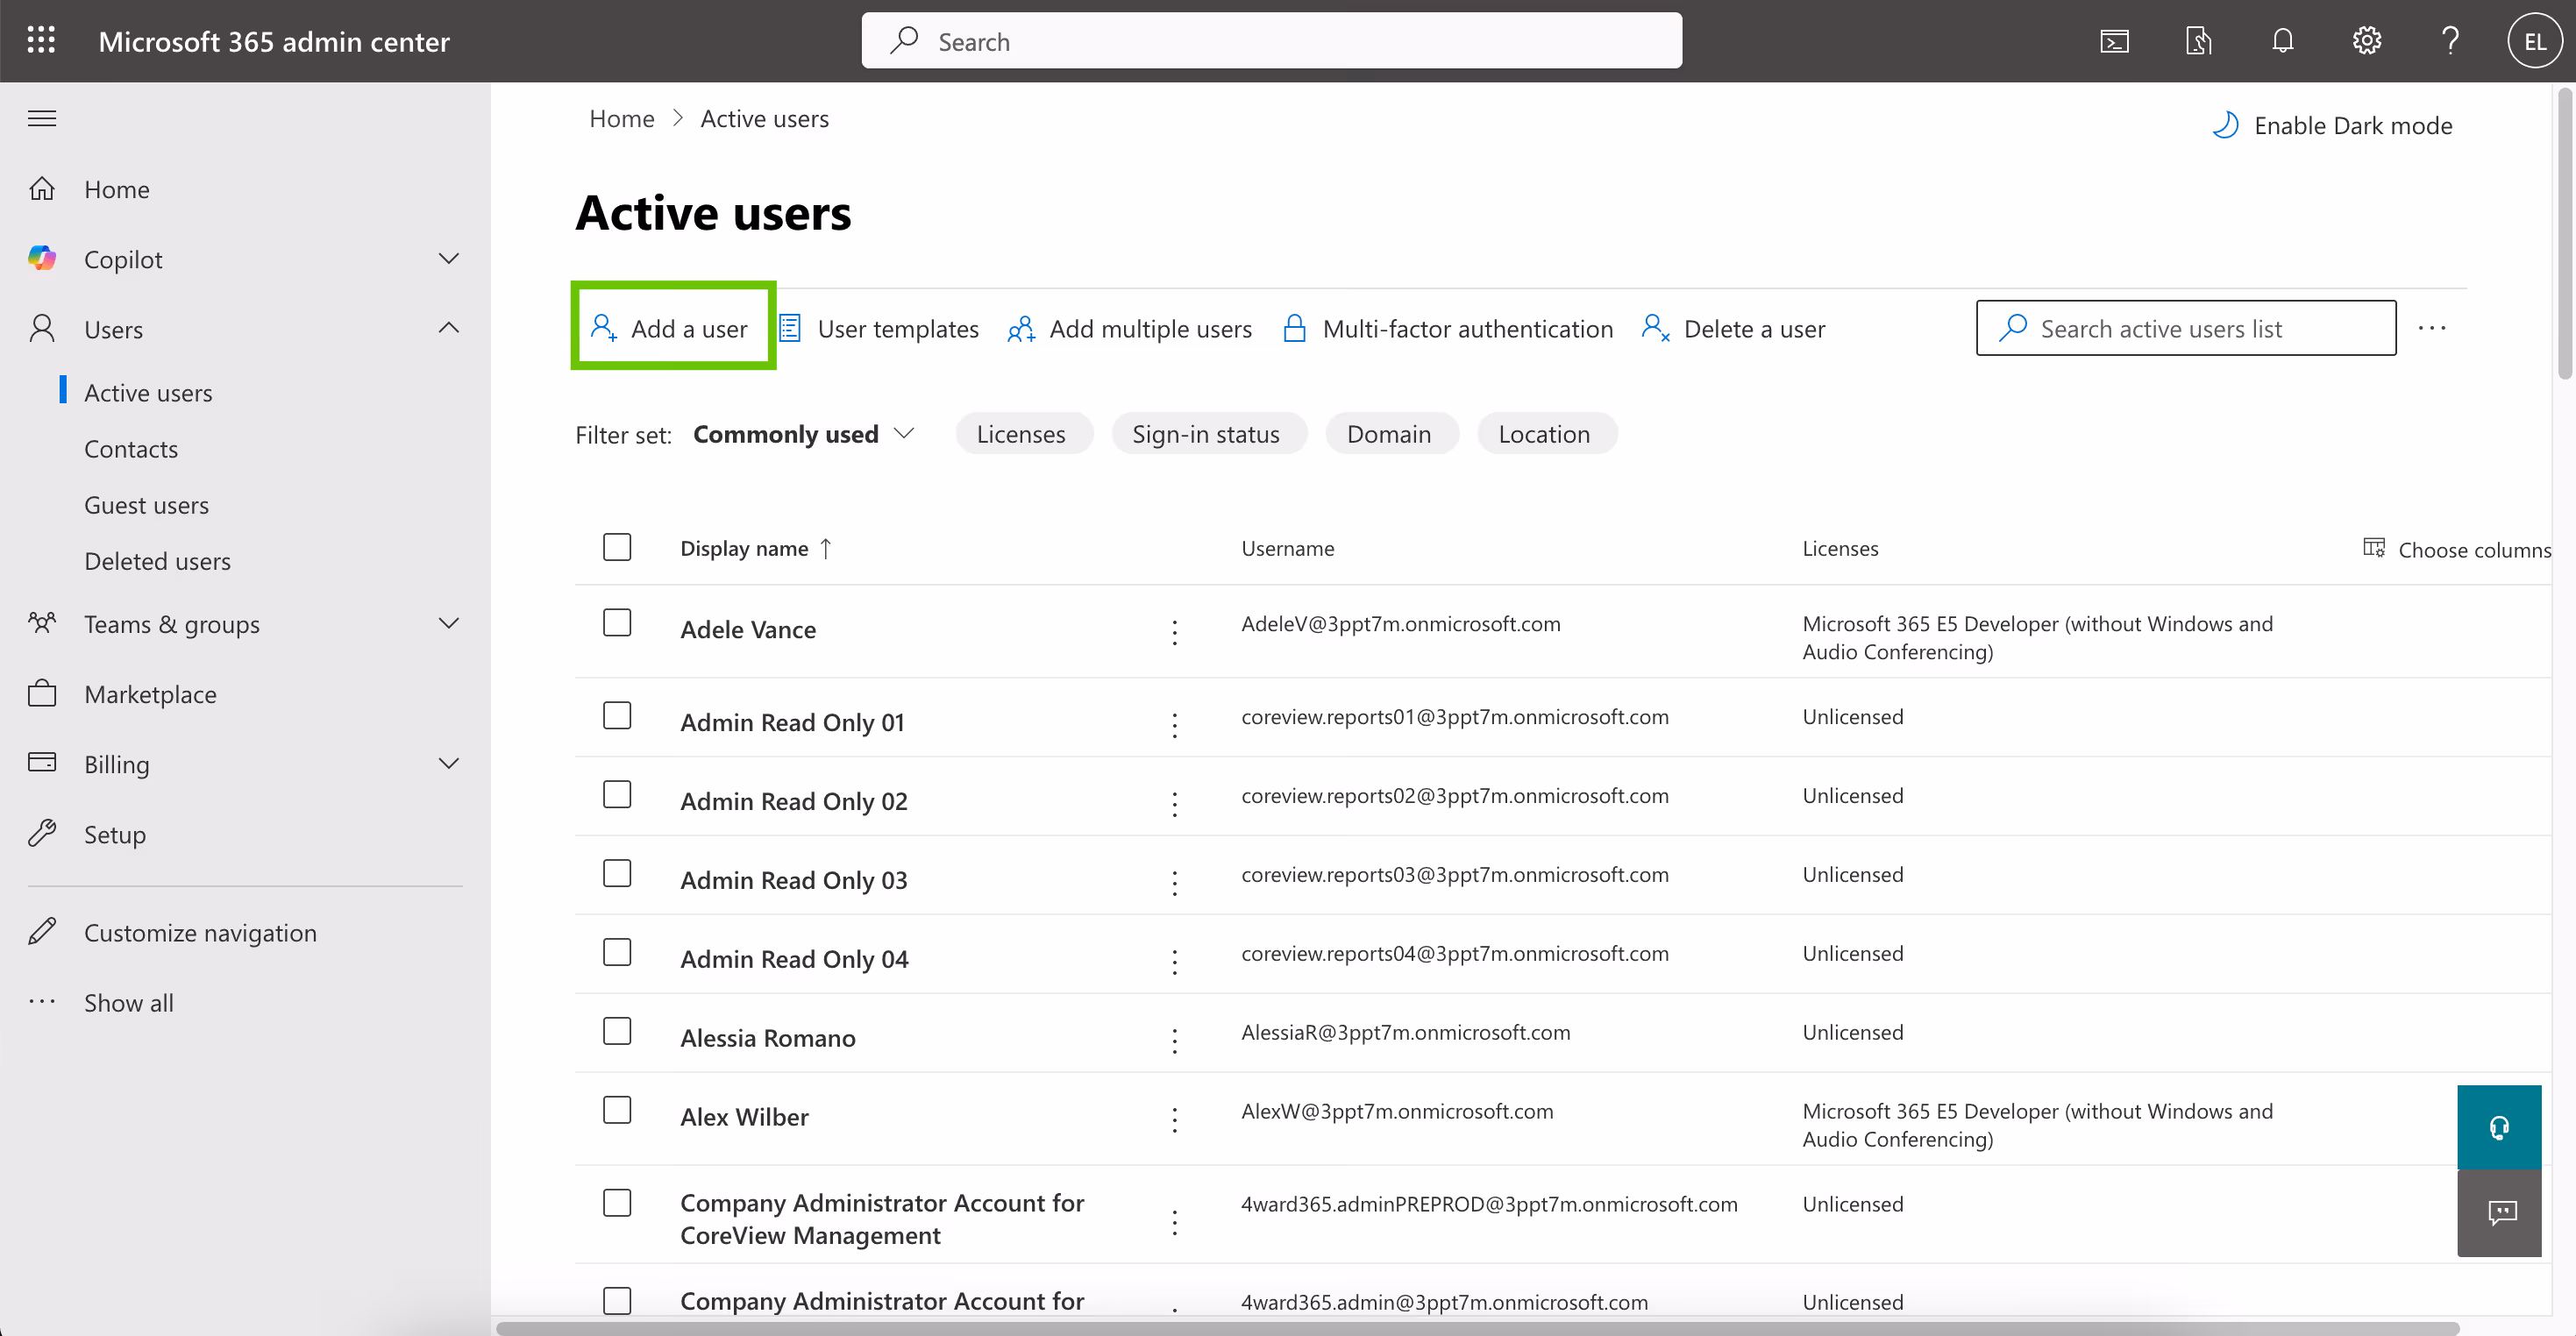
Step 1: Access the Microsoft Admin Center
Go to the Microsoft admin center and sign in with the appropriate administrator credentials.
In the left navigation panel, click to “Users” > “Active Users”.
Select “Add Users”
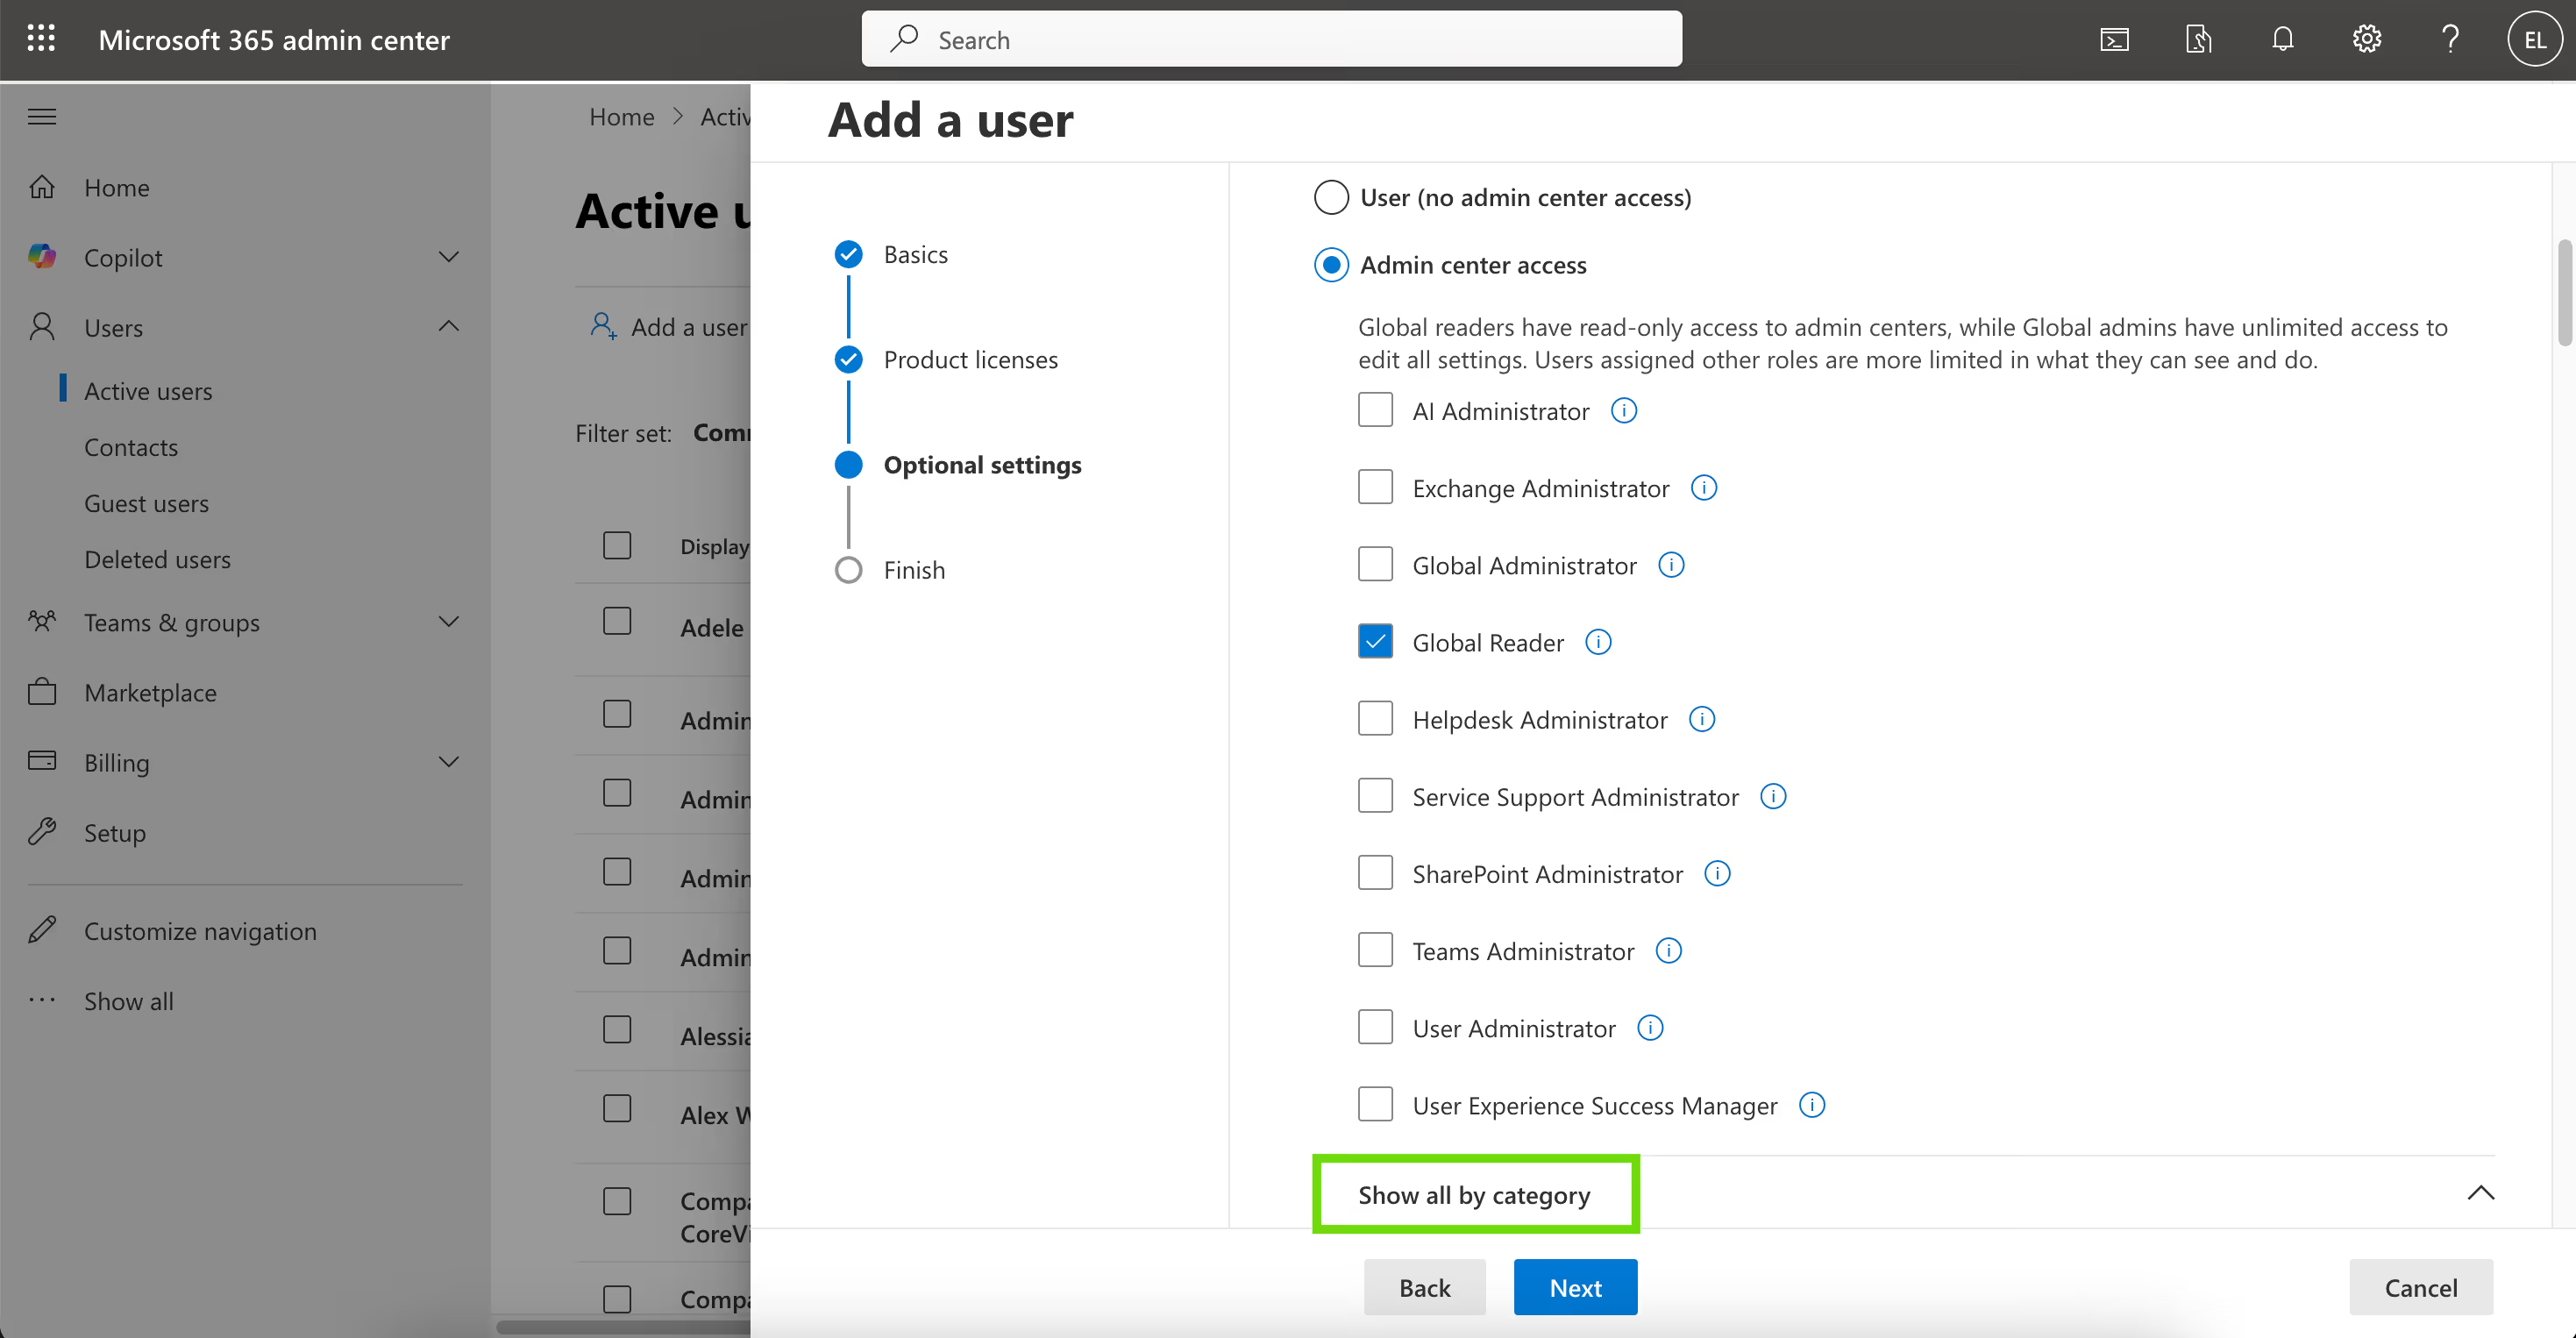
Step 2: Enter User Information for the Service Account
On the Basics page, fill in the required user details and select Next.
Under Product licenses, select “Create user without product license”, then click Next.
In the Optional settings tab, expand the Roles dropdown and select “Show all by category”.
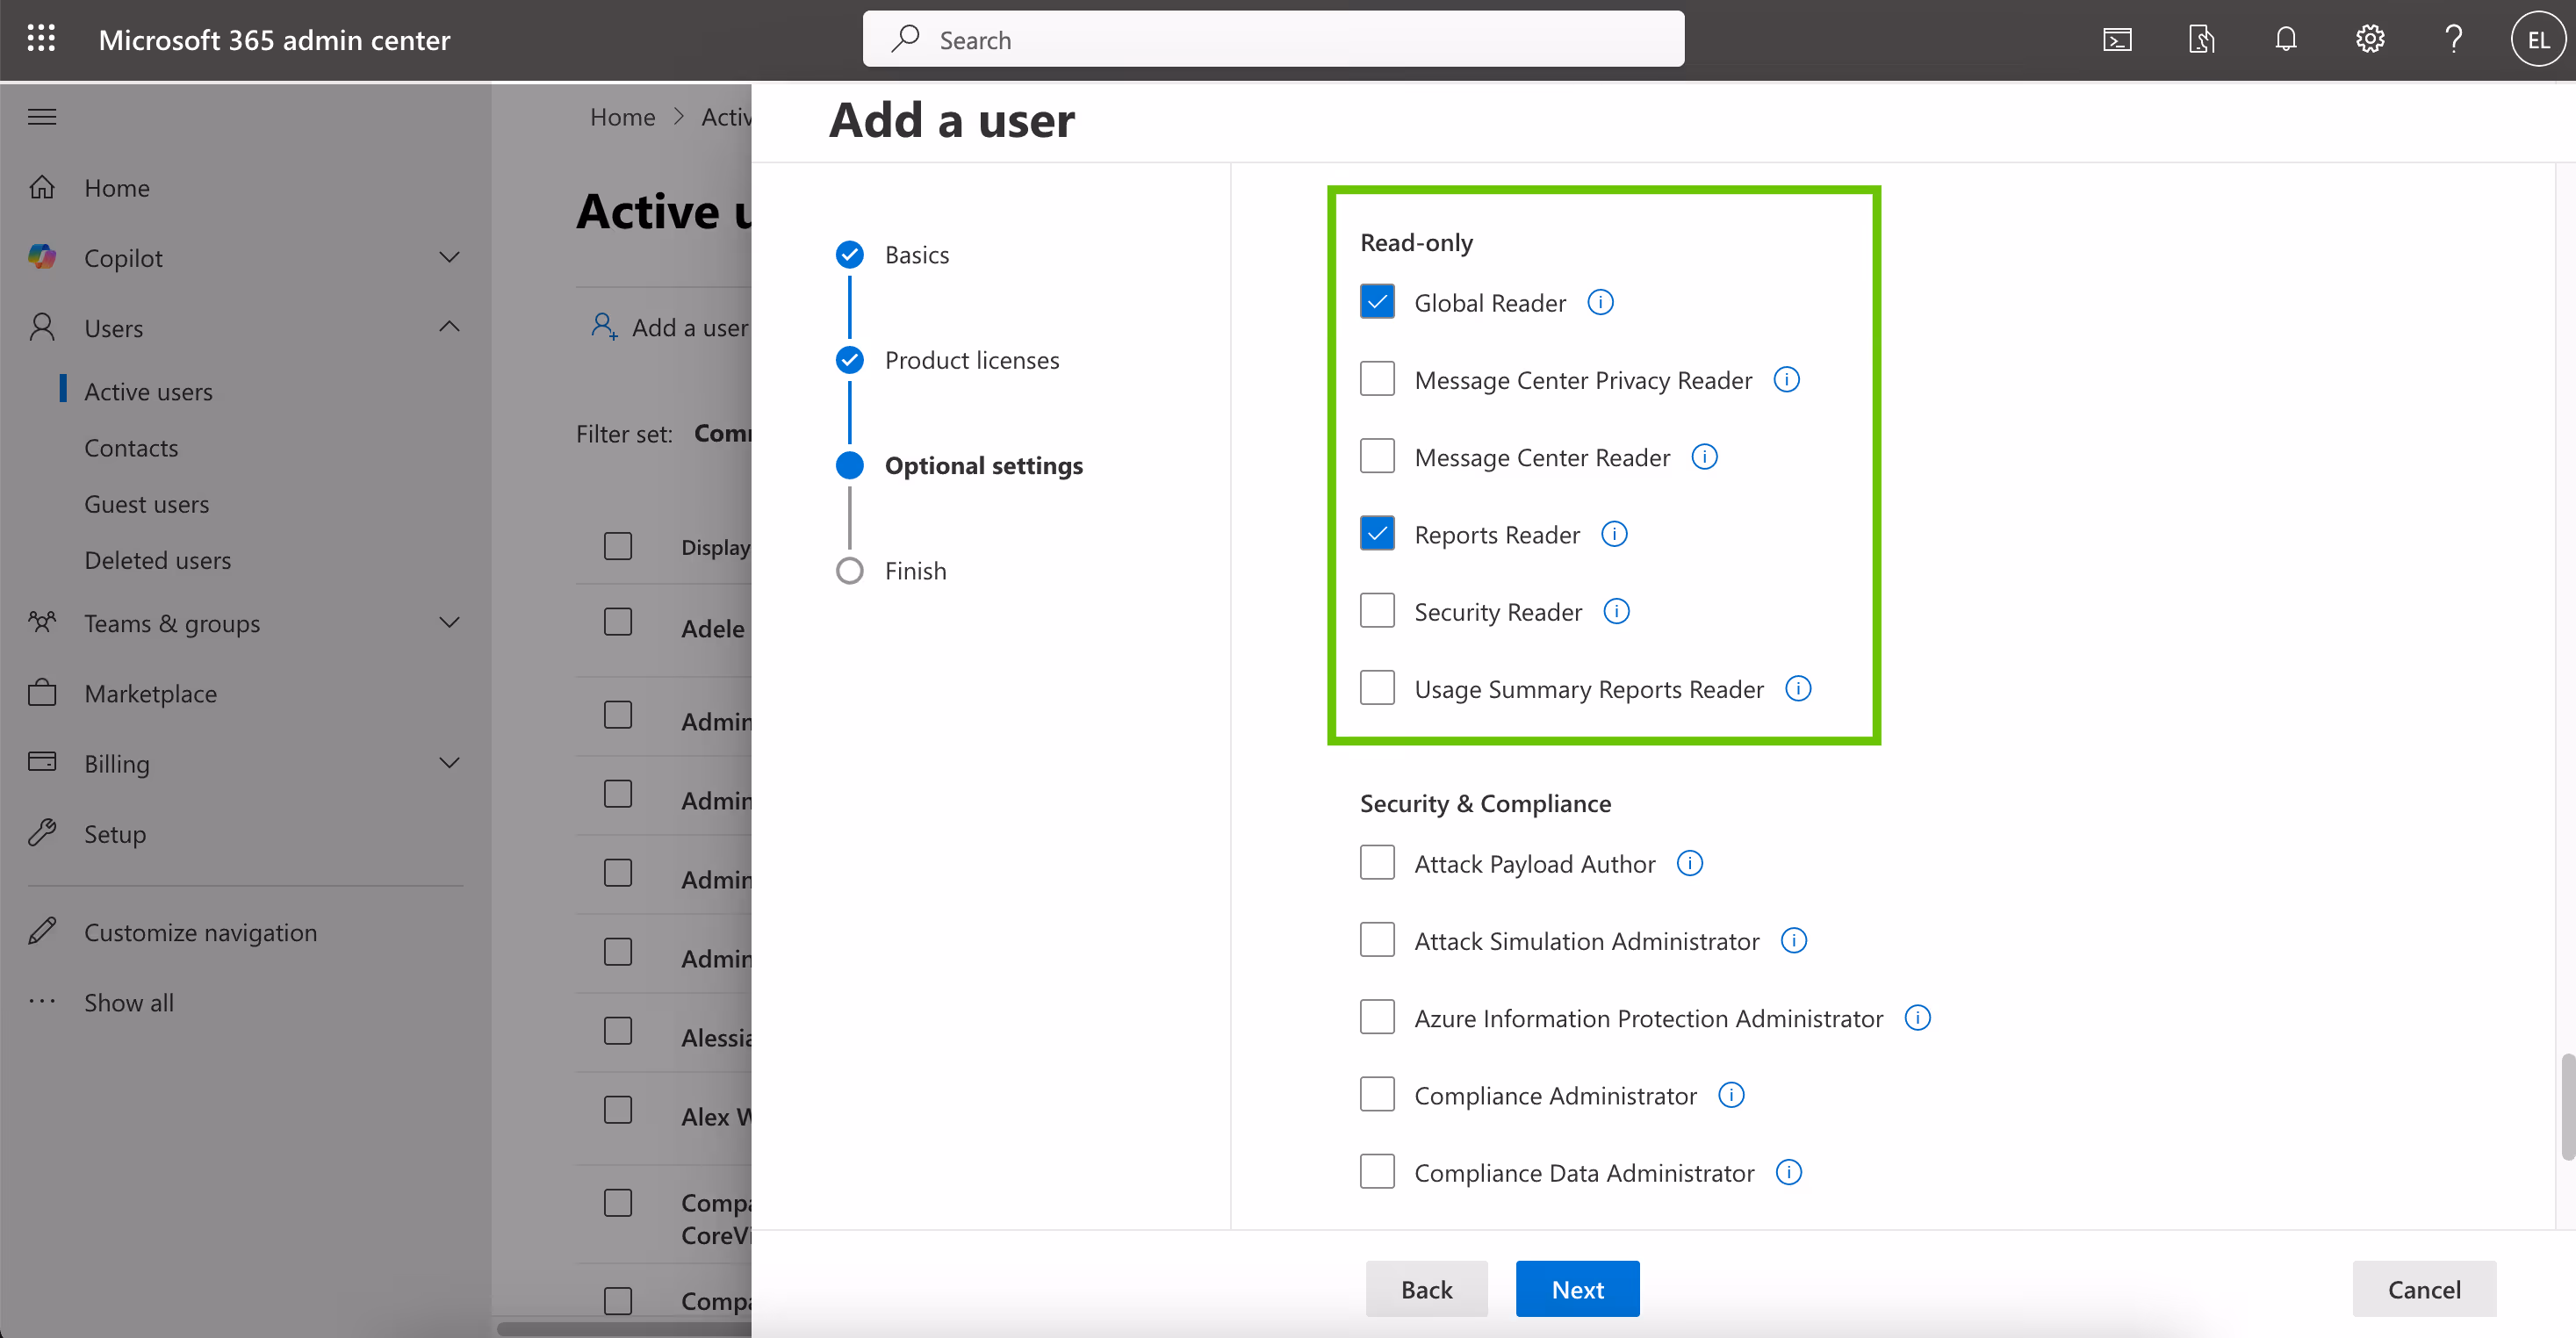
Under the Read-only section, add both the “Global reader” and “Reports reader” roles.
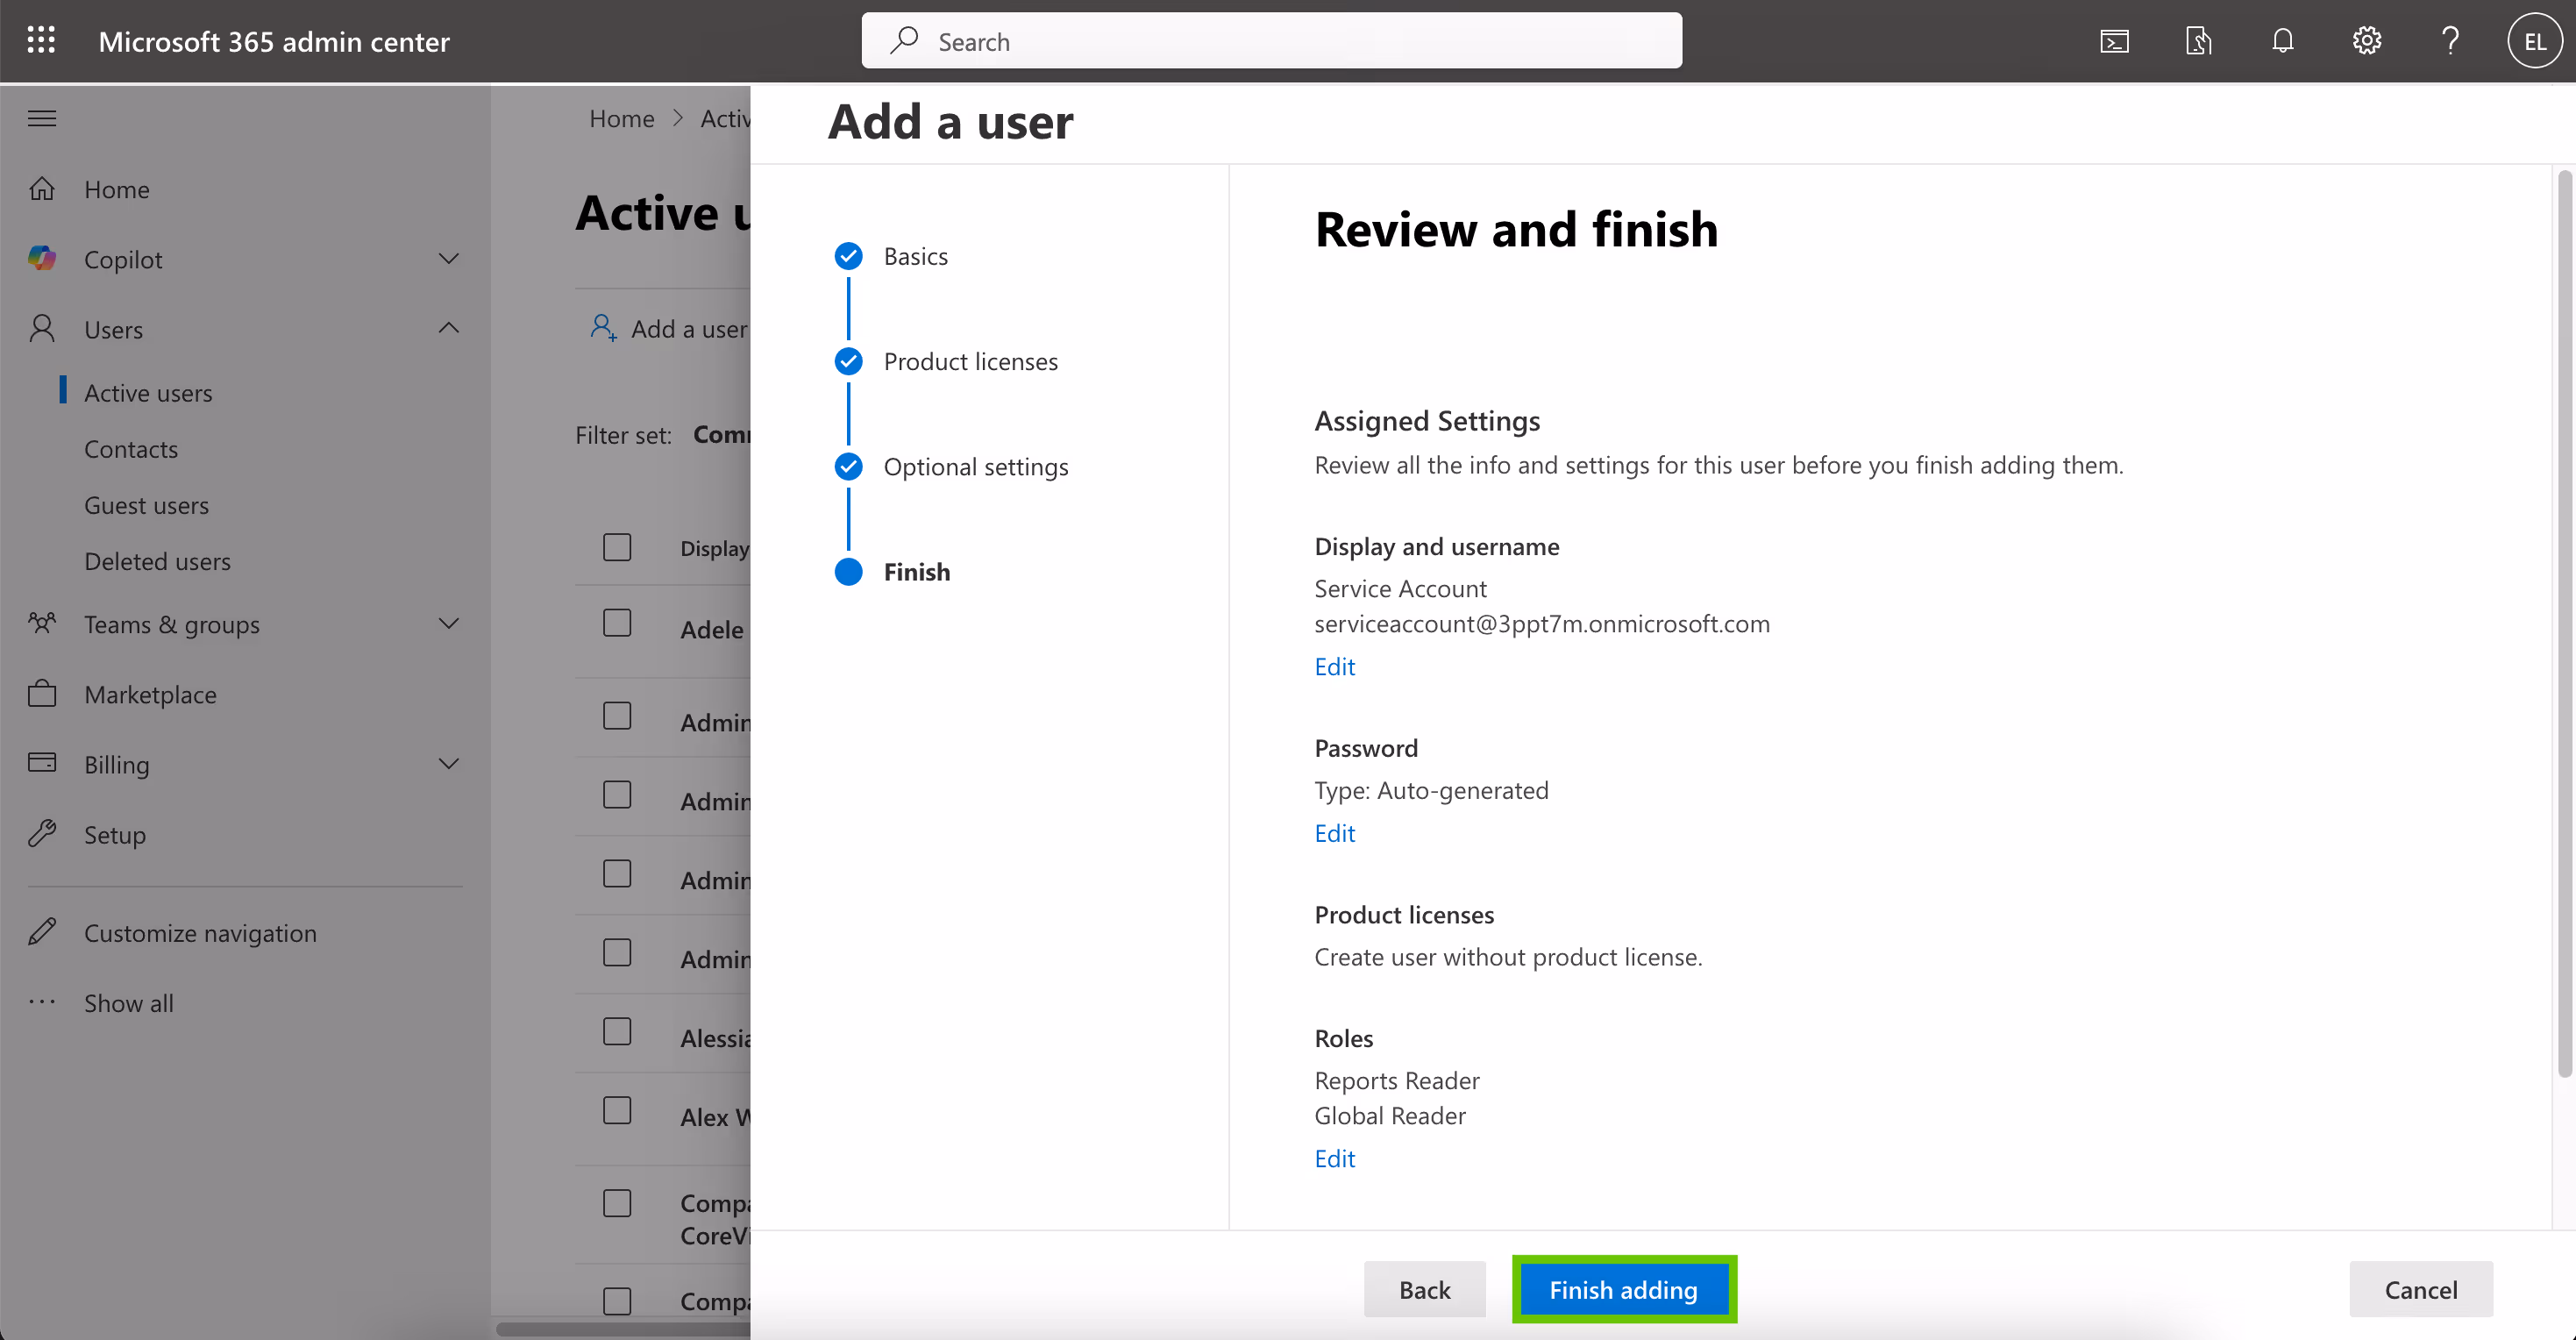
Step 3: Review and Complete Service Account Setup
Click Next, then review your new user’s credentials and configuration.
Click “Finishadding”, then select “Close” to exit the wizard.