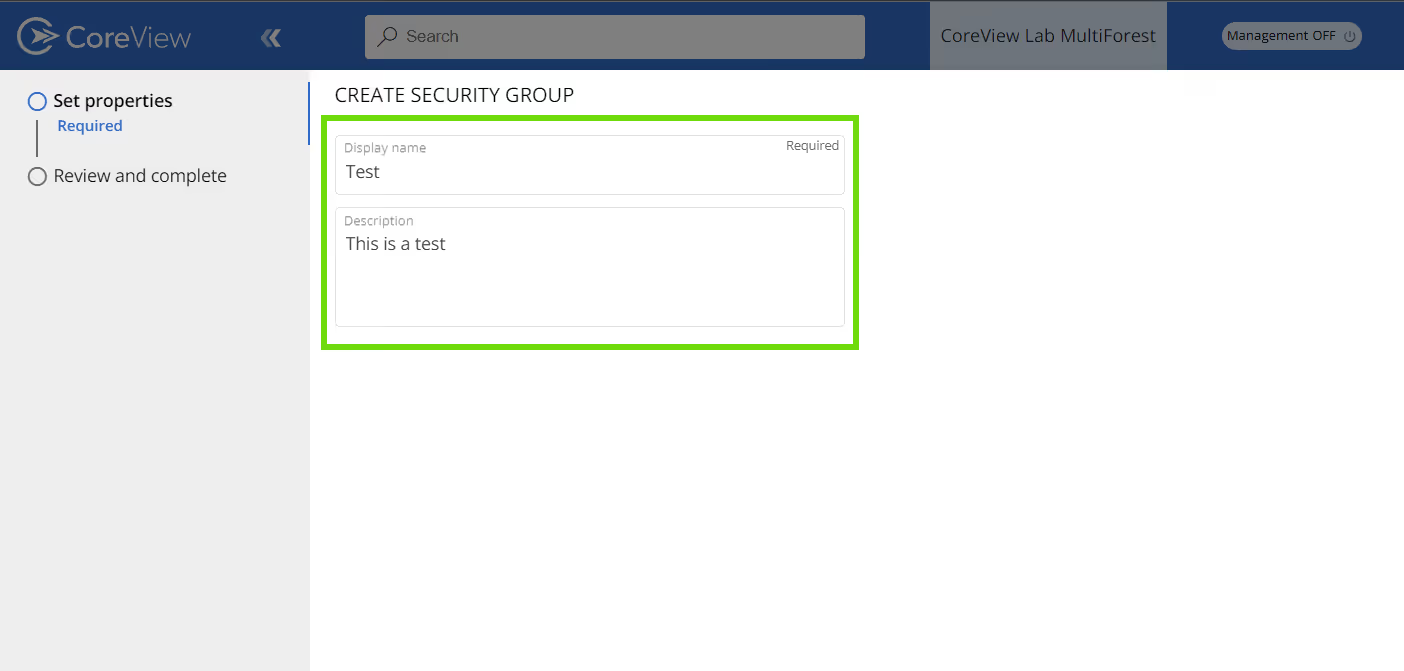
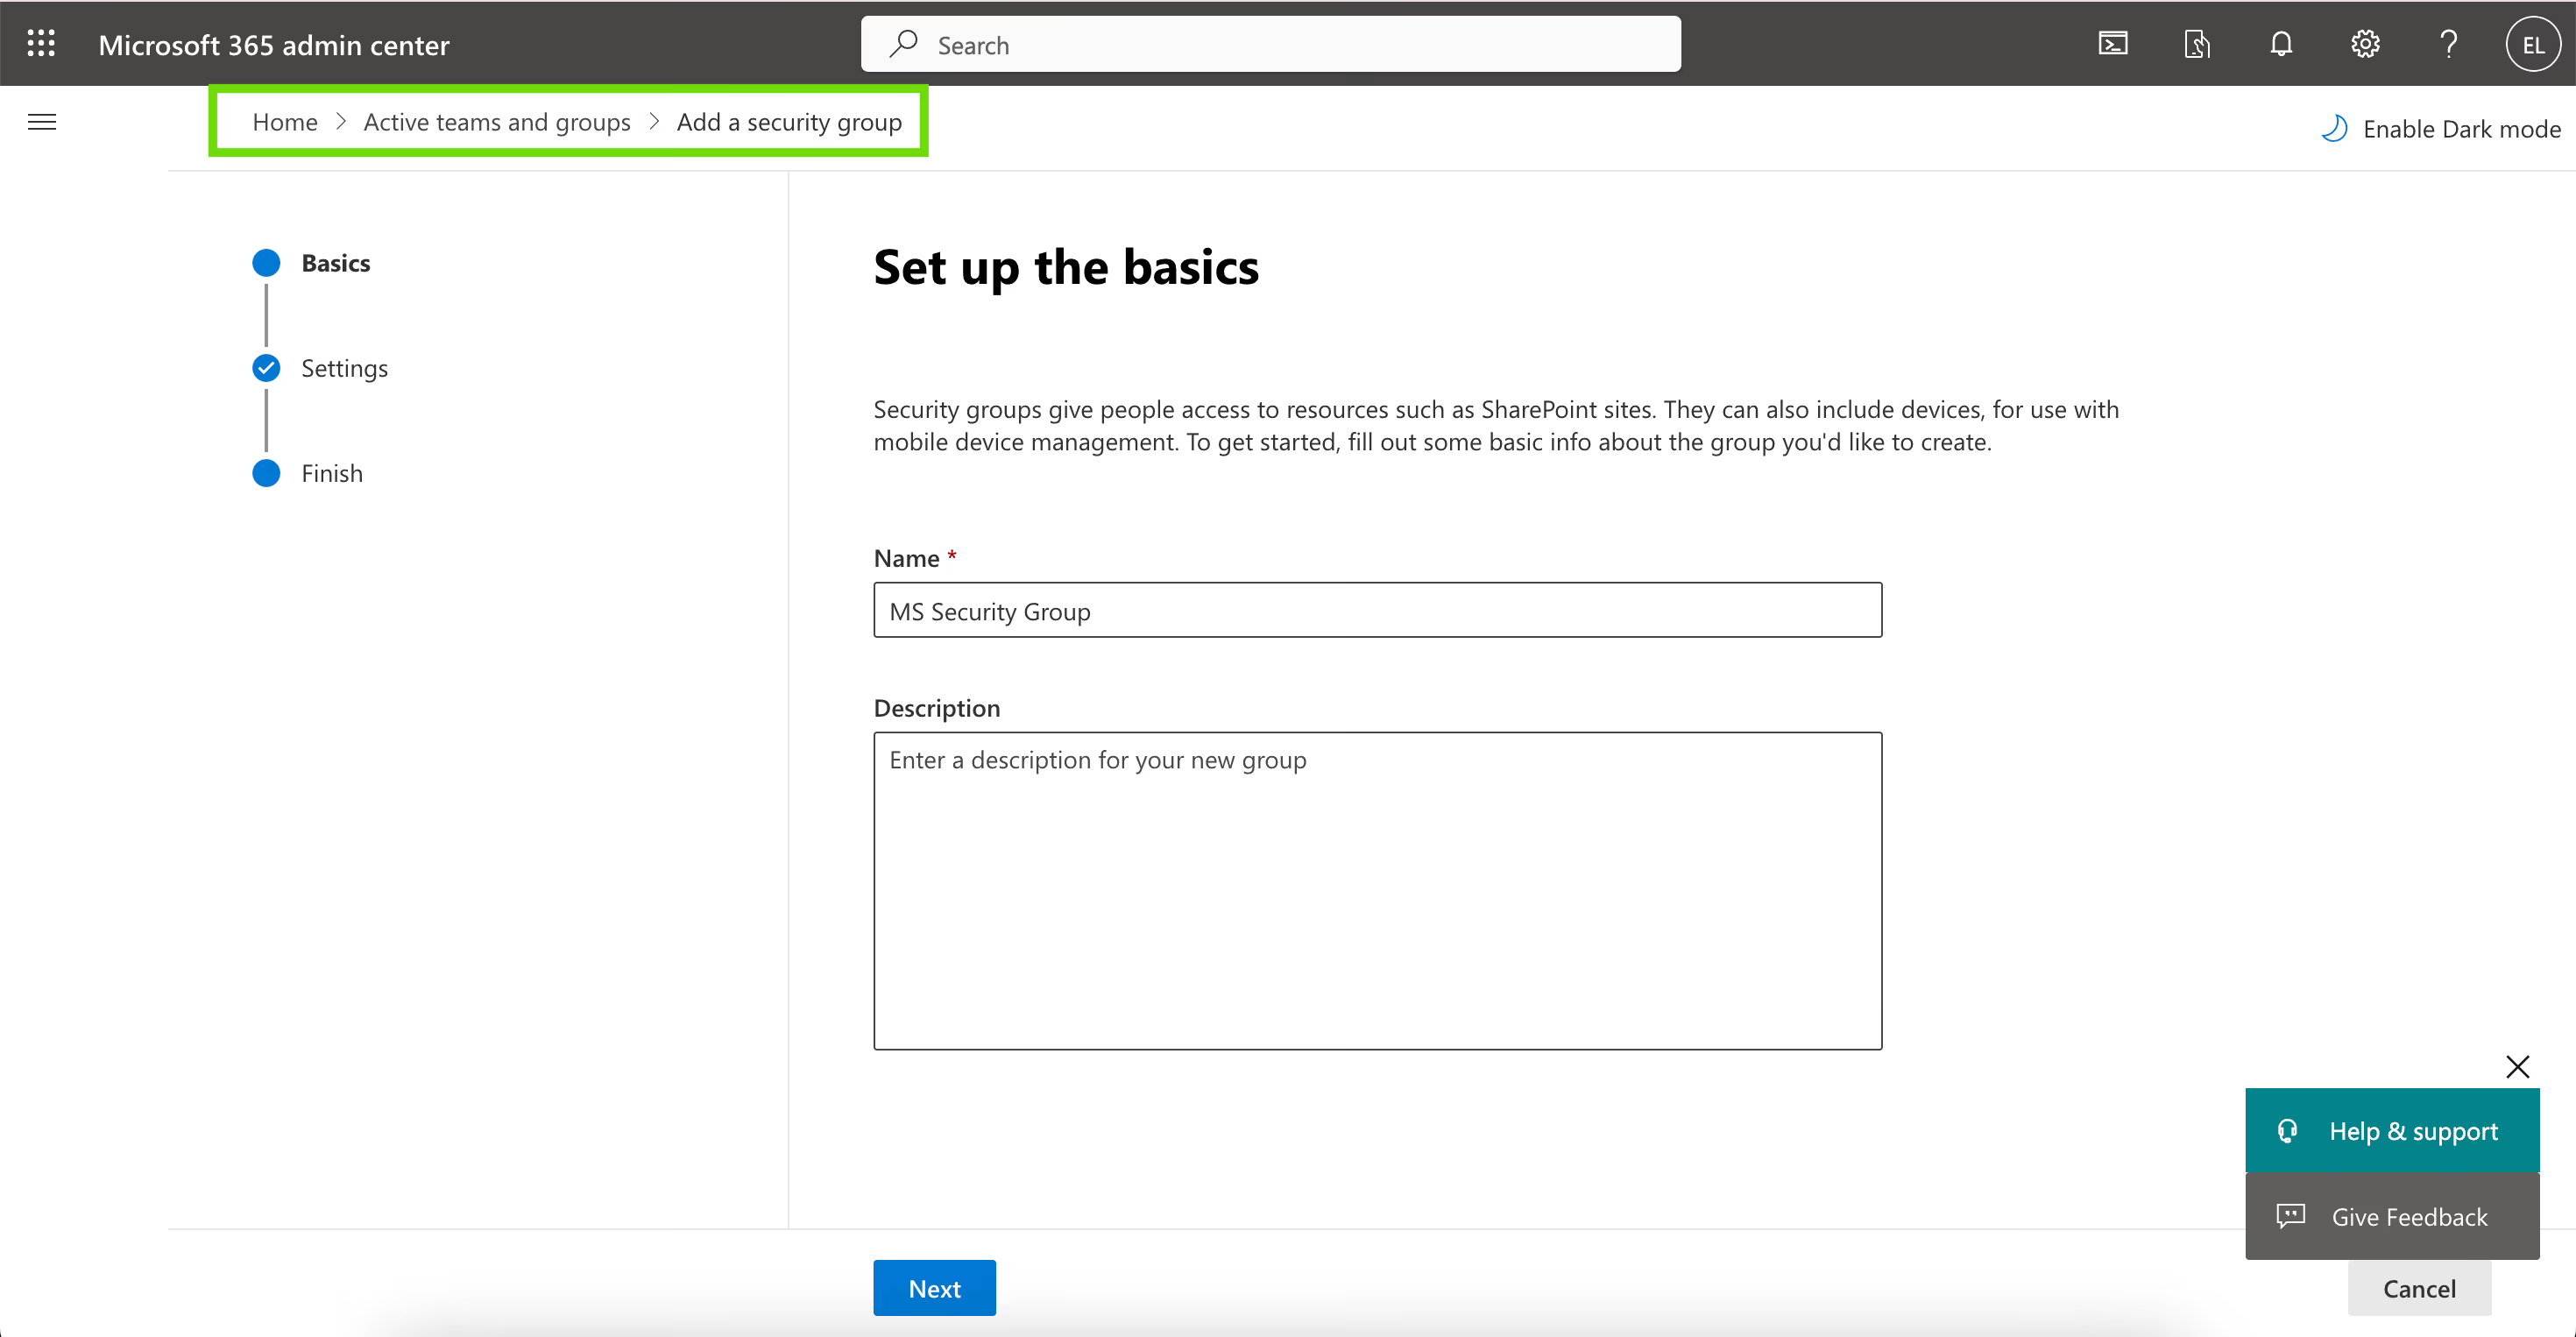
Security groups in Microsoft 365 are designed to grant access to resources, such as SharePoint sites. These groups simplify administration by enabling administrators to manage access at the group level, rather than adding users to each resource individually.
Security groups can include either users or devices, which can be used with mobile device management services like Intune. The group membership can also be set to dynamic. This allows for the automatic addition or removal of members based on specific attributes, such as department, location, or title.
Below, you can find instructions on how to manage Security groups using the Microsoft 365 Admin Center, PowerShell, or CoreView.
Security groups control access to apps, data, and resources—but mismanaging them creates more problems than they solve. Too many admins use the wrong group types, assign permissions inconsistently, or skip group lifecycle policies entirely. That leads to access sprawl, broken automations, and risky over-permissioning. Stick to a clear naming convention, use dynamic groups where possible, and avoid mixing security and M365 groups unless necessary. Most importantly, review group memberships regularly and clean up unused groups. If you don’t actively manage group structure, access control becomes messy fast. And users end up with permissions no one remembers granting.
To learn more about PowerShell commands for creating Security groups please refer to the Microsoft documentation article “New-MgGroup".