Ivan Fioravanti, Co-founder and CTO for CoreView, uses his system engineer and .NET development skills to lead CoreView’s technology team. He’s passionate about AI, automation and all things Microsoft 365.
In this article, we'll explore how to view all the mailboxes a user has access to, utilizing PowerShell and CoreView.
Find All Accessible Mailboxes Using PowerShell
Before You Start: PowerShell Requirements and Permissions
Use the latest Exchange Online PowerShell V3 (EXO V3) module.
Ensure you have the required Exchange administrative permissions.
PowerShell Steps to List Mailboxes a User Can Access
You can use the PowerShell command to list all the mailboxes a user has access to in Microsoft 365. Here are the steps to do so:
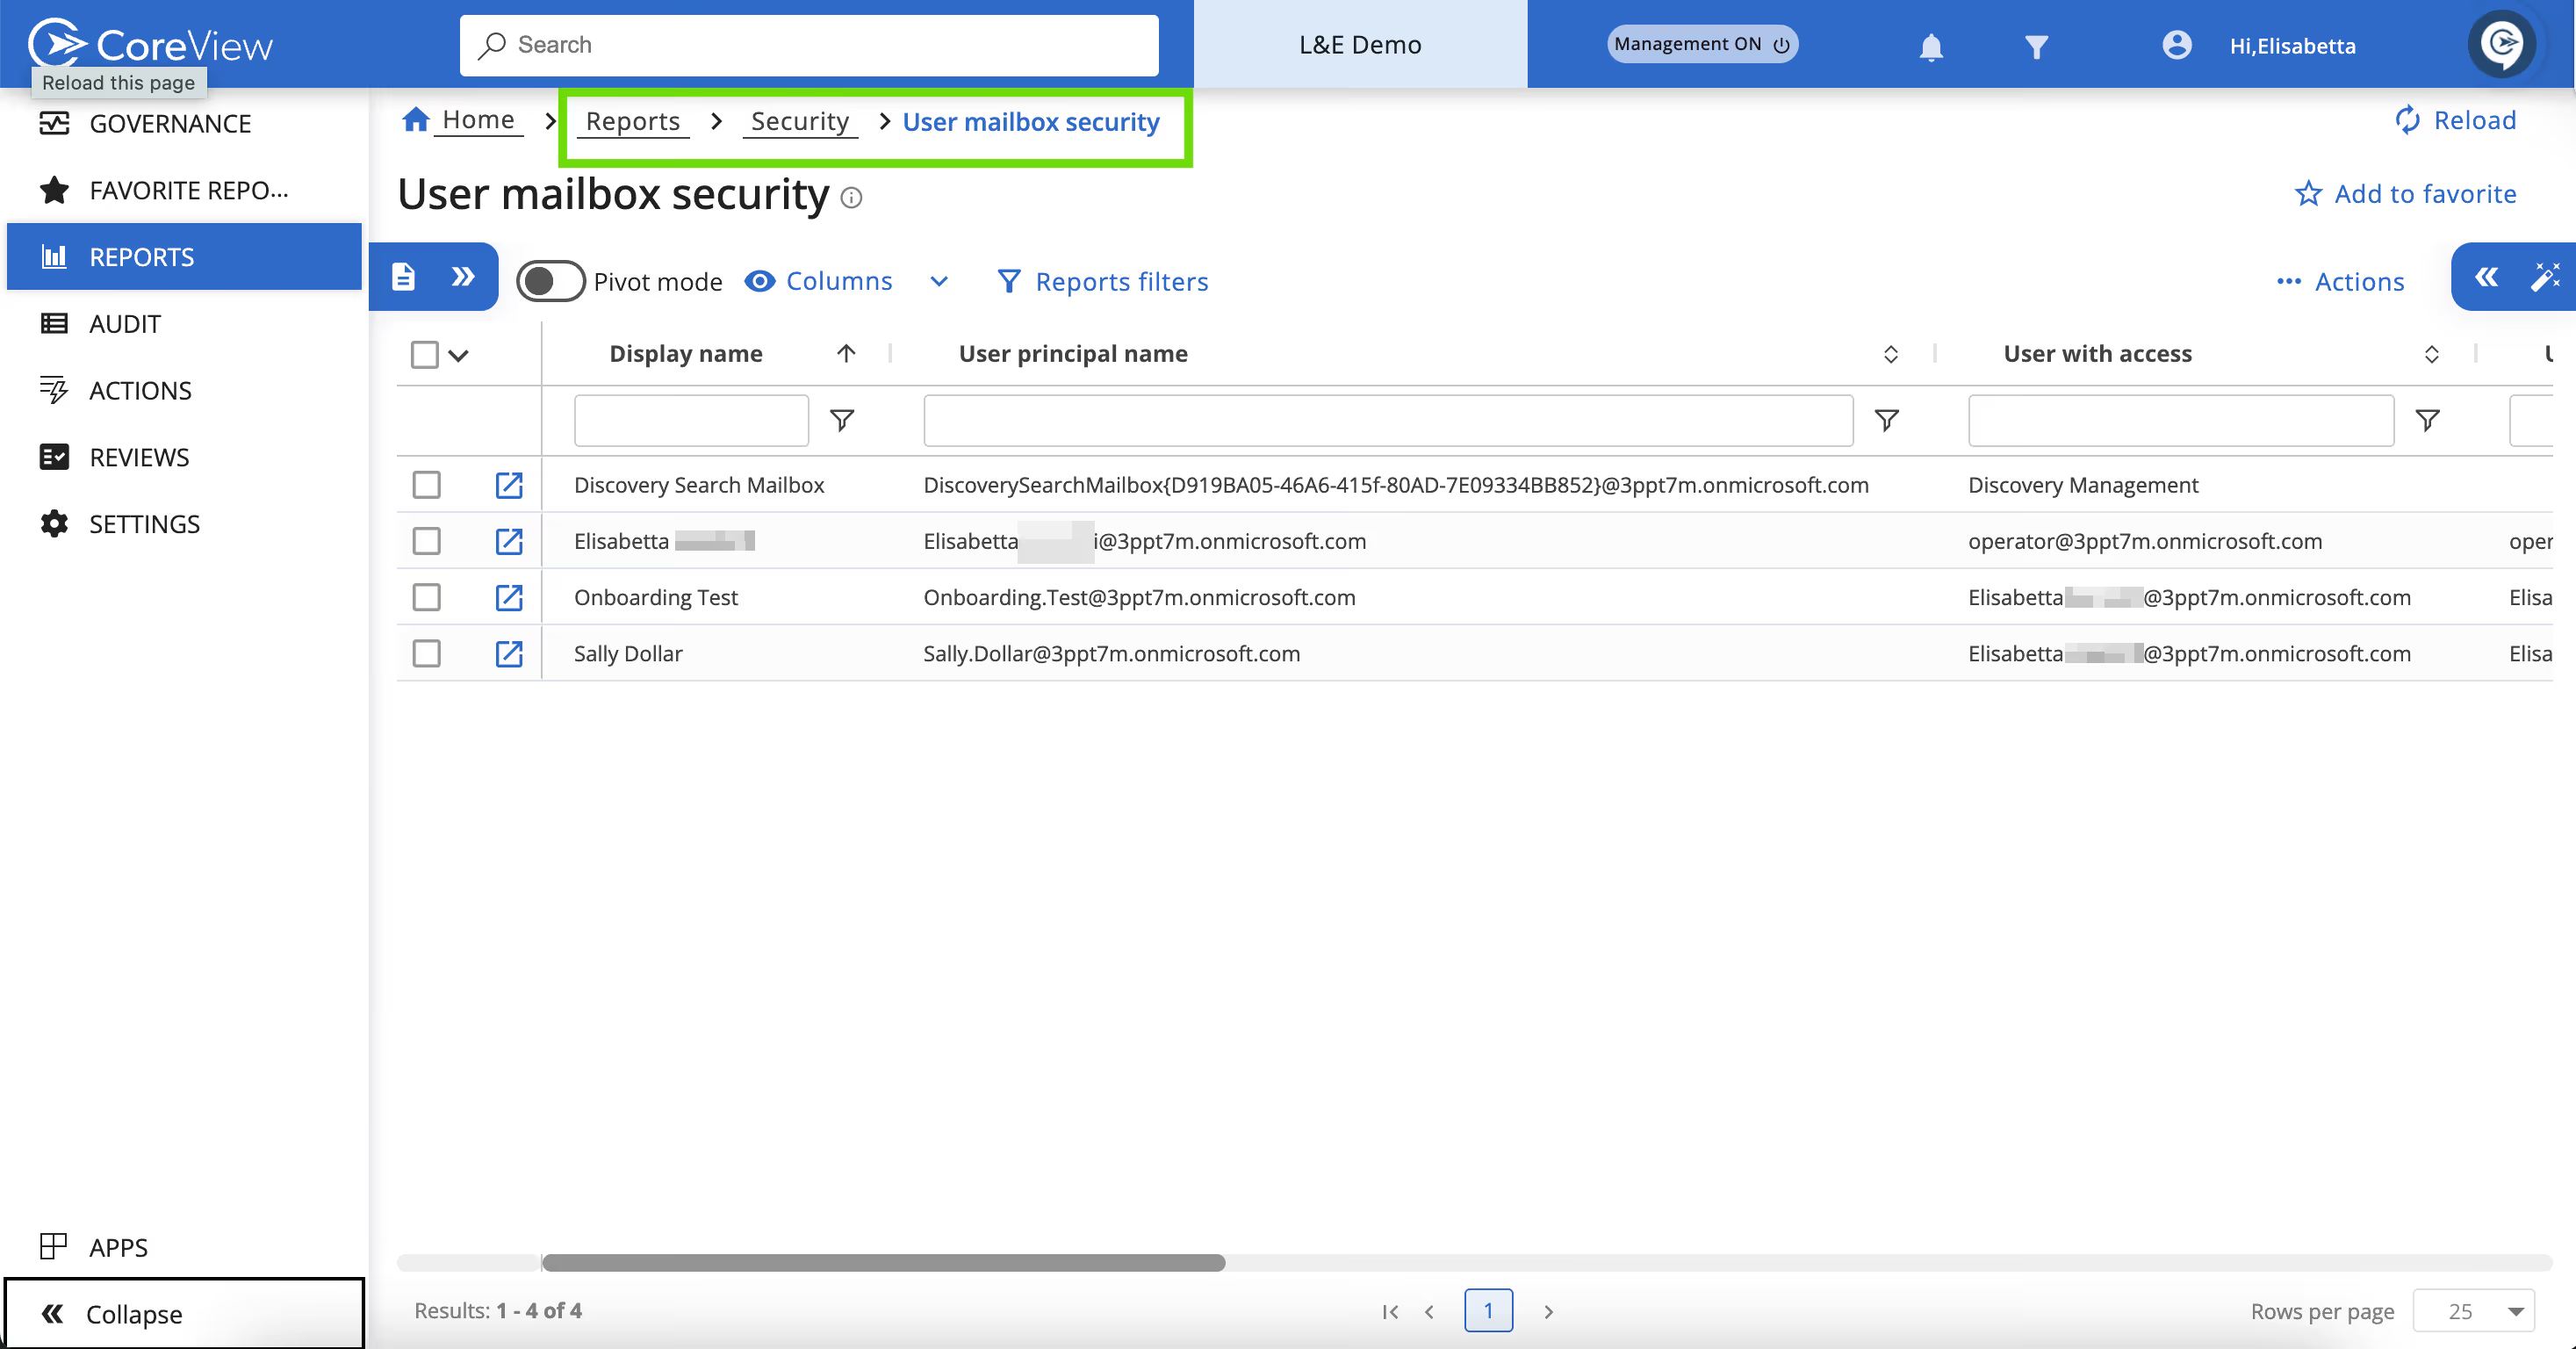
Under “Reports”, select “Security”, and then choose “User mailbox security”.
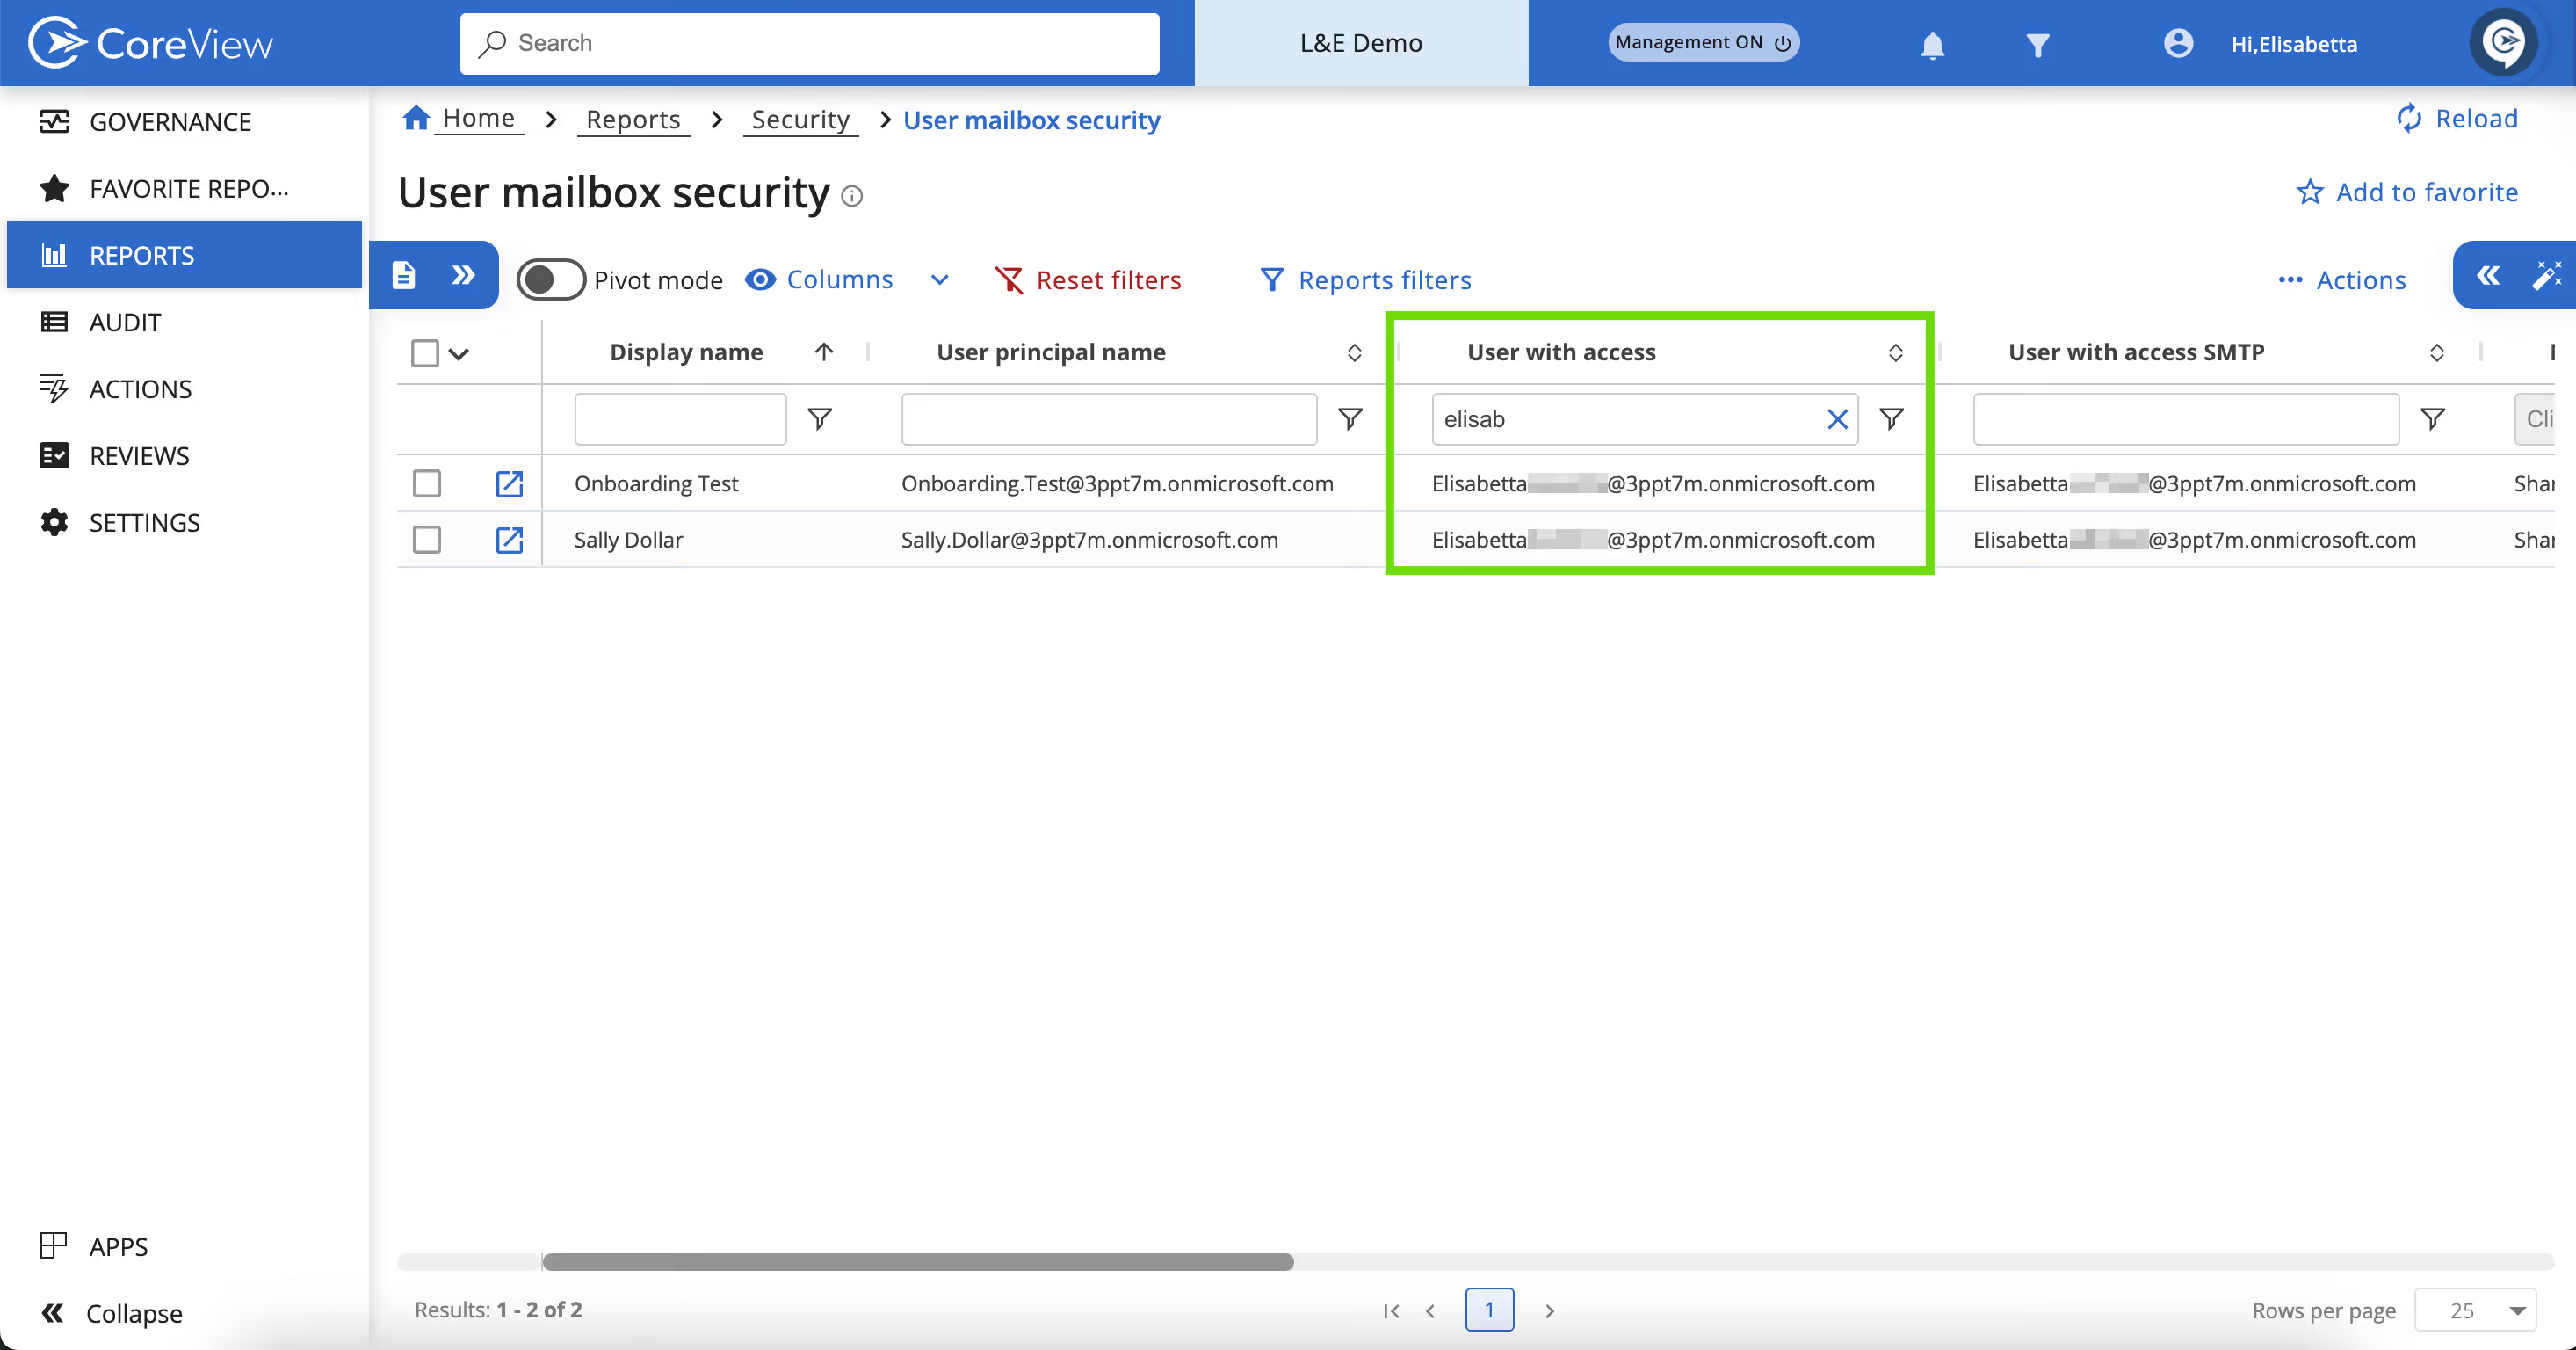
Here, apply a filter to the “Users with access” column using the user principal name of the user for whom you want to view all mailbox access.
This will display all the mailboxes to which the selected user has access rights.
The “Full name”, “User principal name”, and “Primary SMTP address” columns provide details about the mailboxes the user has access to. The “Access rights” column indicates the level of access the user has to each respective mailbox.
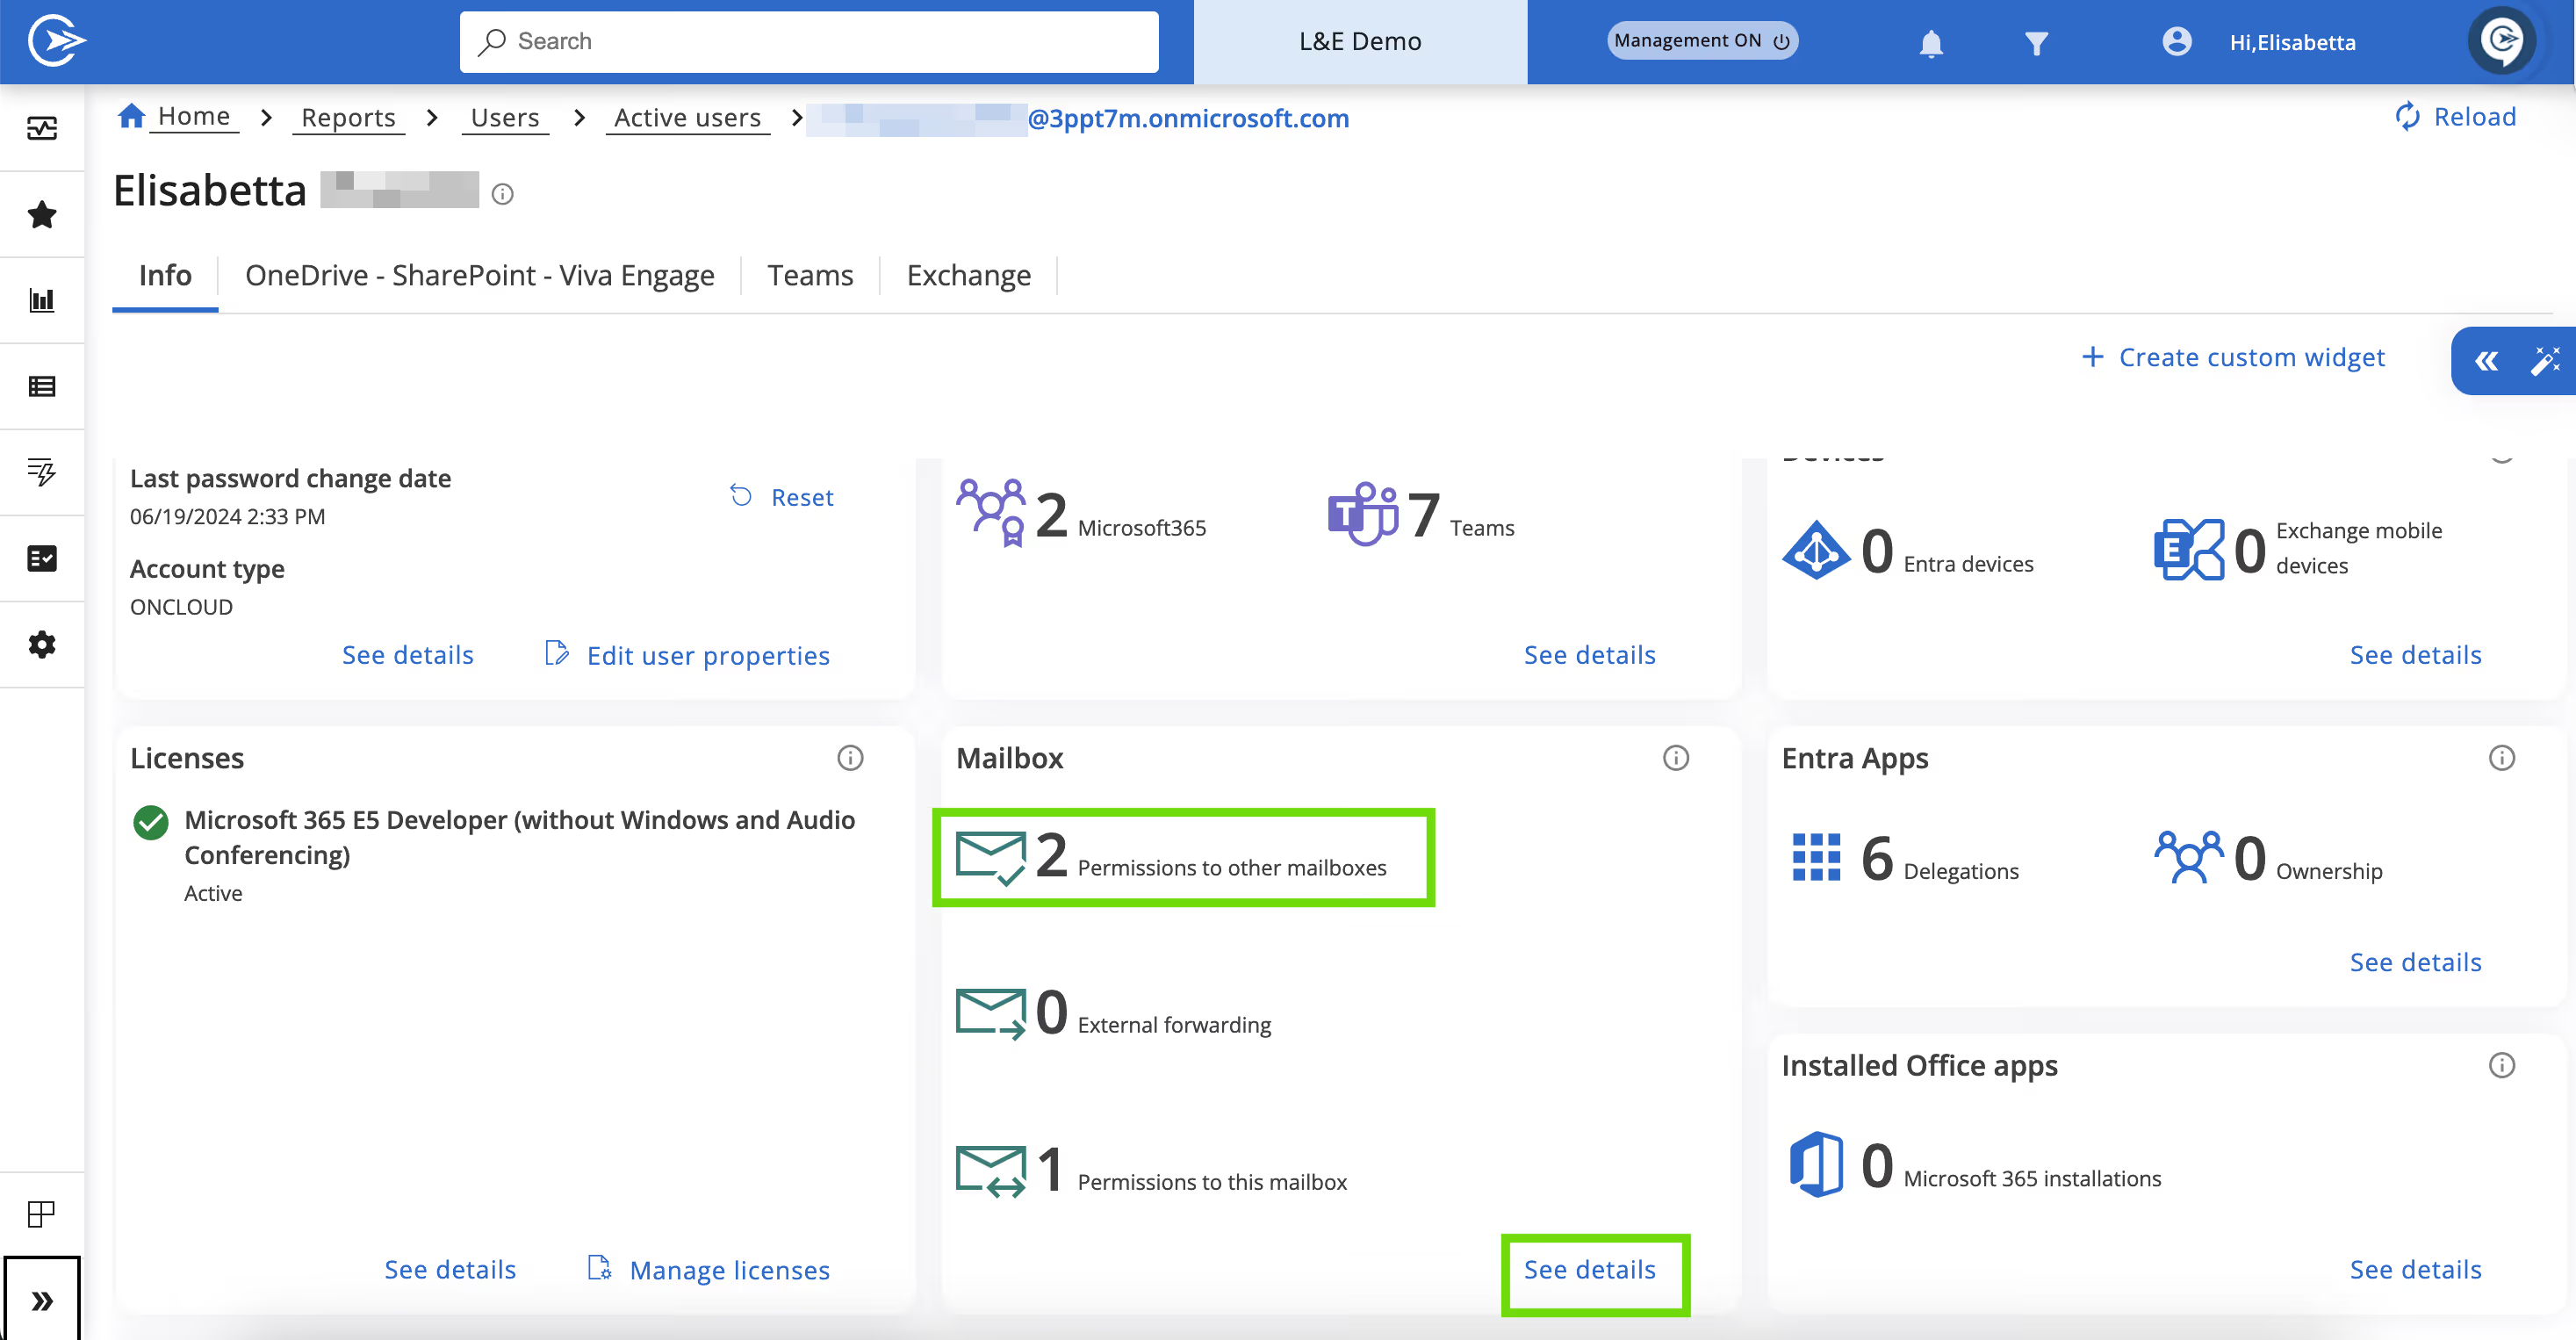
Alternatively, you can access this information from the user's “User card”.
Search for the user using the search bar located in the top menu.
Under “Mailbox”, click on “See details”.
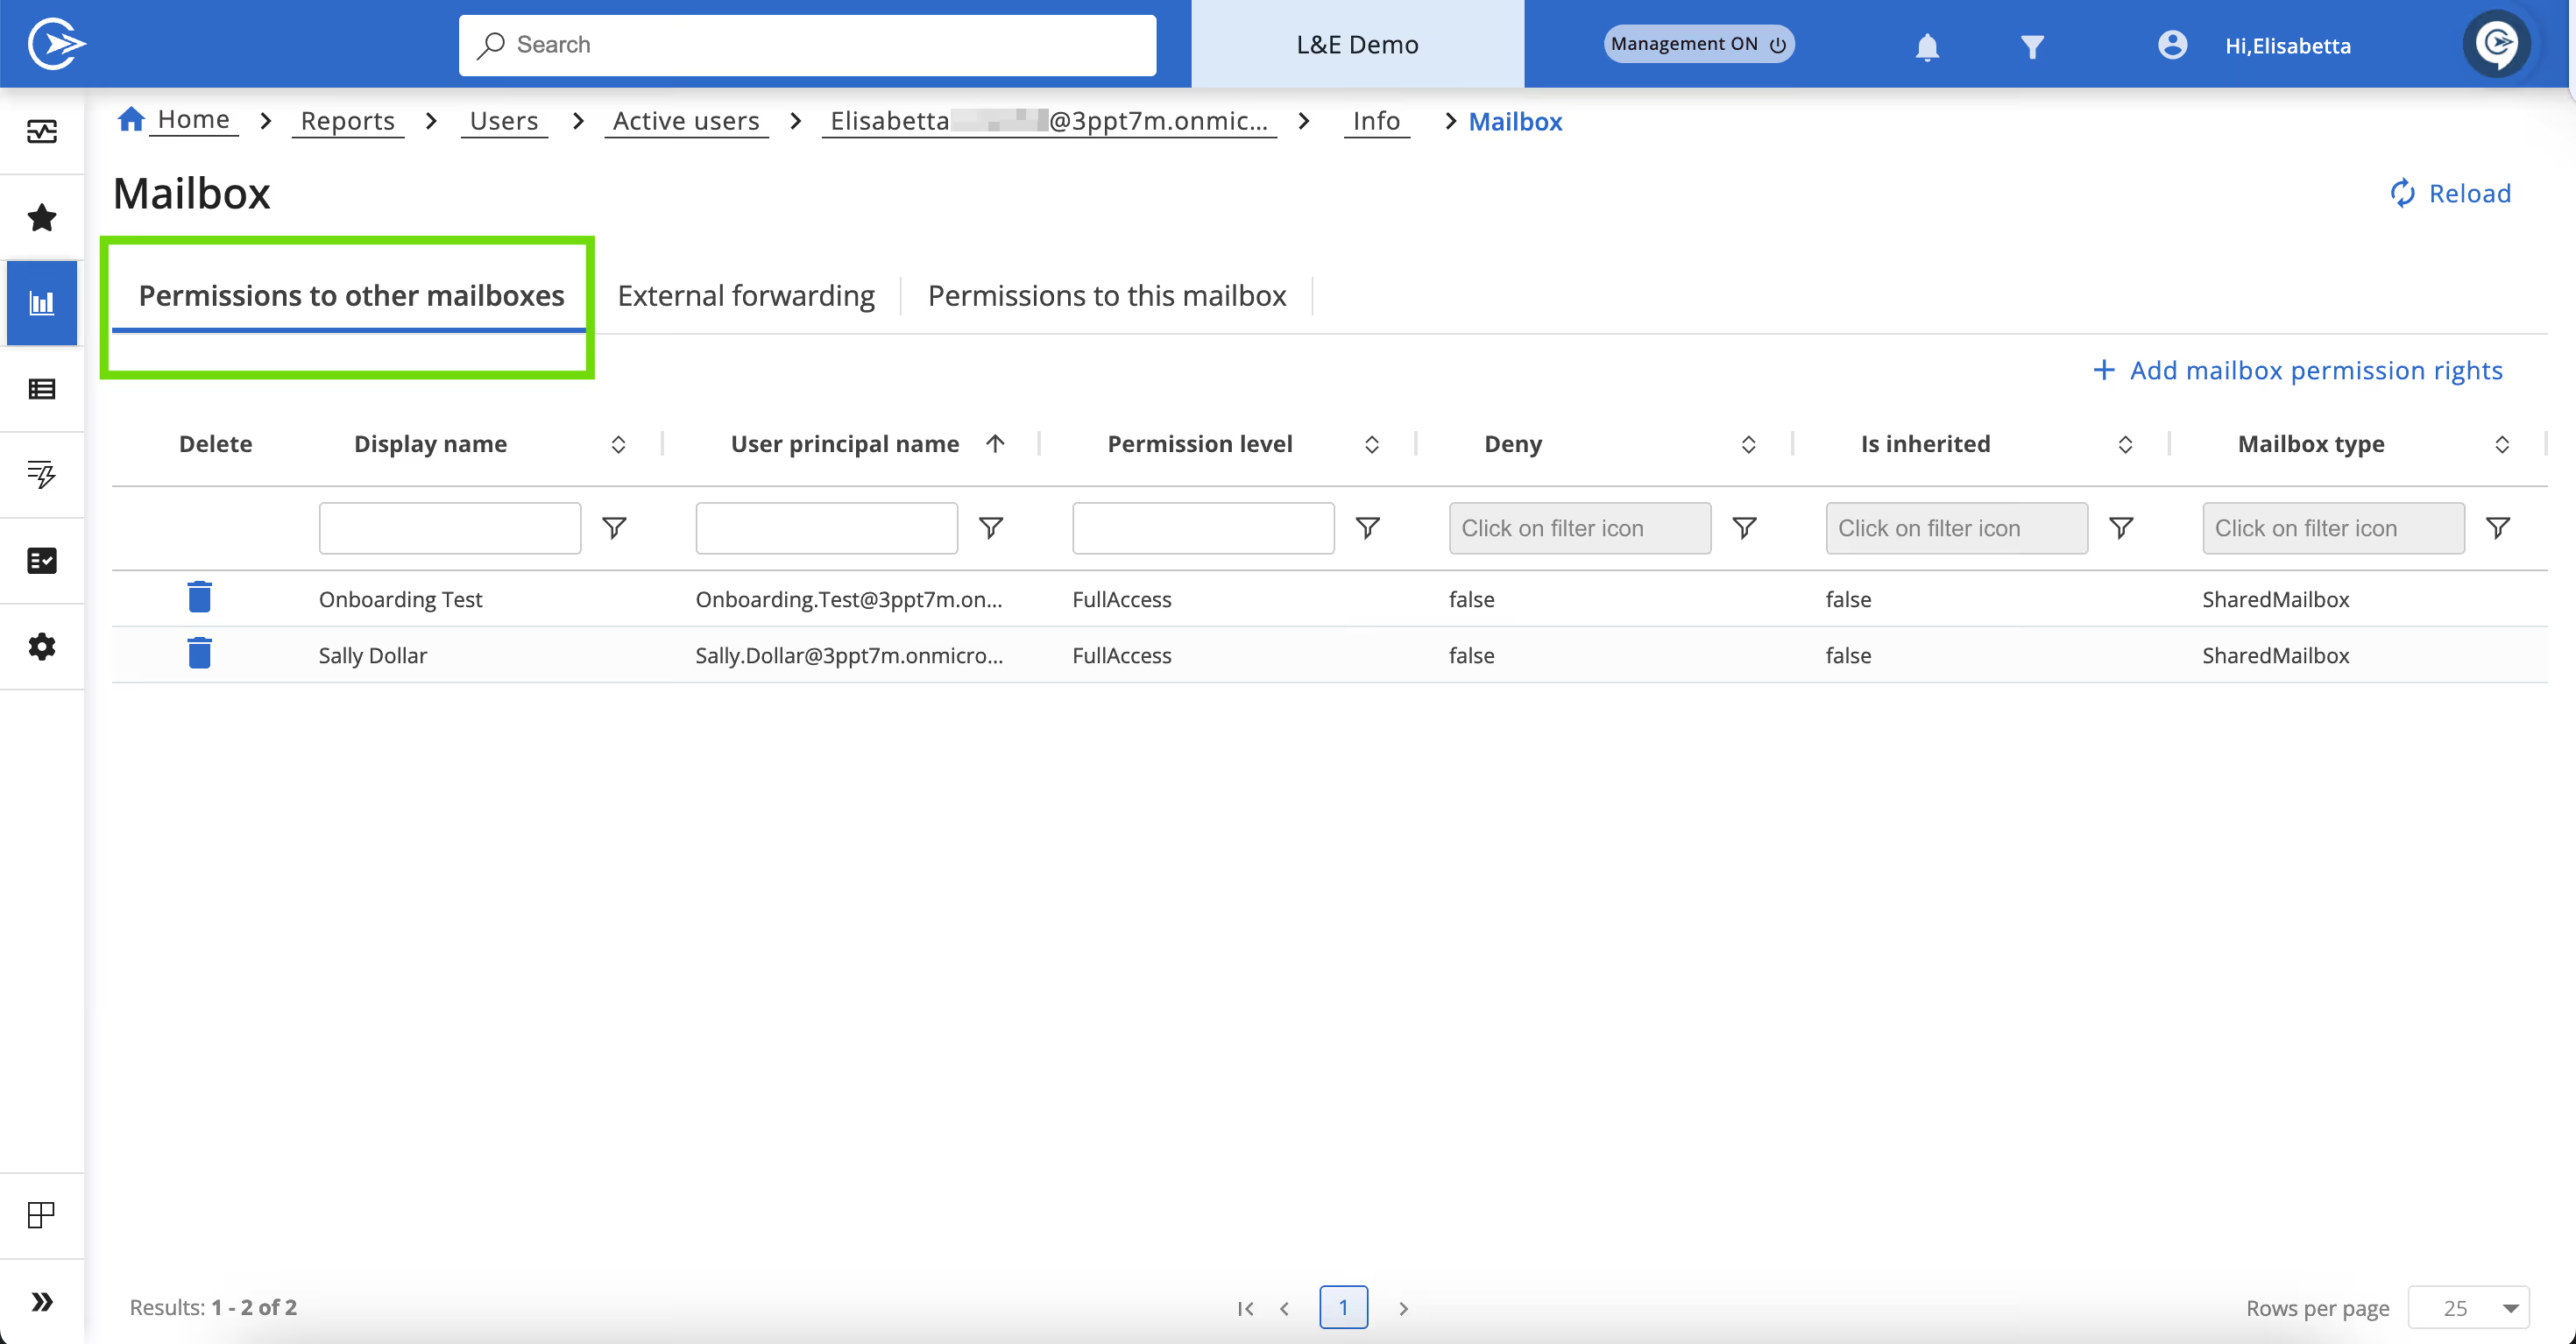
A wizard will appear. Under the “Permissions to other mailboxes" tab, you will see all the mailboxes to which the selected user has access rights.