Published:
Jun 23, 2025
|
Modified:
|
6
min read

How to Configure Email Forwarding in Microsoft 365

Ivan Fioravanti
Ivan Fioravanti, Co-founder and CTO for CoreView, uses his system engineer and .NET development skills to lead CoreView’s technology team. He’s passionate about AI, automation and all things Microsoft 365.

Prerequisites for Setting Up Email Forwarding

Before performing these steps, ensure you have the required permissions. Refer to the “Recipient provisioning permissions” section of the Microsoft documentation for details.

Organization policies or security defaults may restrict the ability to forward email to external addresses. Always confirm your settings, and ask your IT security team if uncertain

Methods to Configure Email Forwarding

Here are three methods for configuring email forwarding:

Set Up Email Forwarding via Exchange Admin Center

  • Go to the Exchange Admin Center (EAC) and navigate to Recipients > Mailboxes.
  • Select the mailbox you wish to configure.
Exchange Admin Center
  • Under Mailflow settings, select Email forwarding.
Email forwarding screen
  • Specify the forwarding address and, if desired, select “Deliver message to both forwarding address and mailbox”.
  • Save changes.
Deliver message to both forwarding address and mailbox

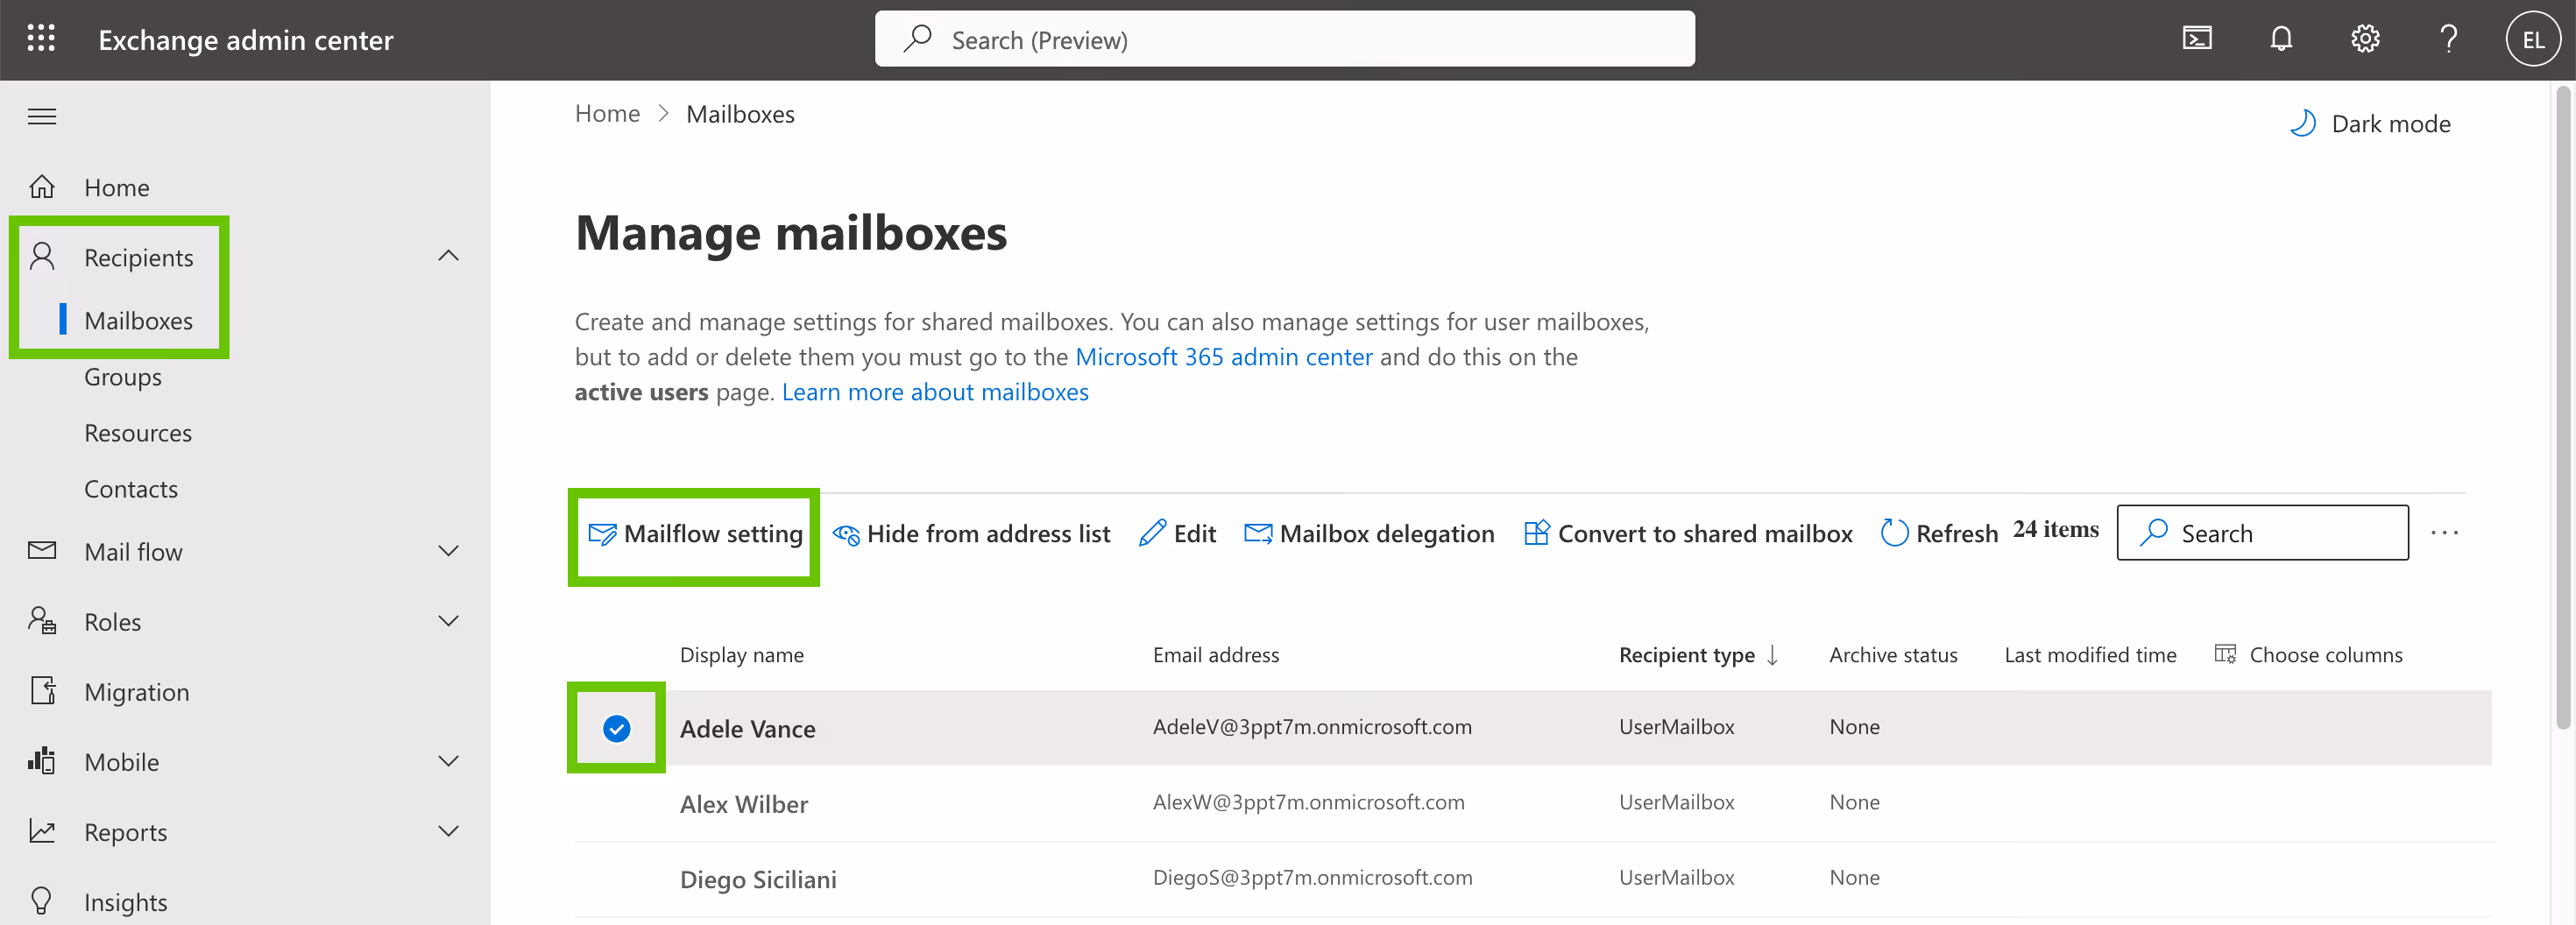
For full details, see Microsoft's official guide: Use Exchange Admin Center to set up email forwarding.

Set Up Email Forwarding Using PowerShell

Experienced IT admins can use Exchange Online PowerShell to set up and verify forwarding. The following examples remain current as of May 2025:

Set up forwarding and keep a local copy:

Set-Mailbox -Identity "Douglas Kohn" -DeliverToMailboxAndForward $true -ForwardingSMTPAddress "douglaskohn.parents@fineartschool.net" 

Set up forwarding only (do not keep a local copy):

Set-Mailbox -Identity "Ken Sanchez" -ForwardingAddress "pilarp@contoso.com" 

Verify forwarding settings:

Get-Mailbox <identity> | Format-List ForwardingSMTPAddress,DeliverToMailboxAndForward 
  • Ensure the ForwardingSMTPAddress reflects the intended address.
  • If DeliverToMailboxAndForward is $true, copies are kept in the original mailbox.

For the latest syntax and options, refer to the Set-Mailbox Microsoft documentation .

Manage Email Forwarding in CoreView

  • Go to the CoreView app.
  • Type “Forward” in the search bar at the top of the page.
Forwarding options screen

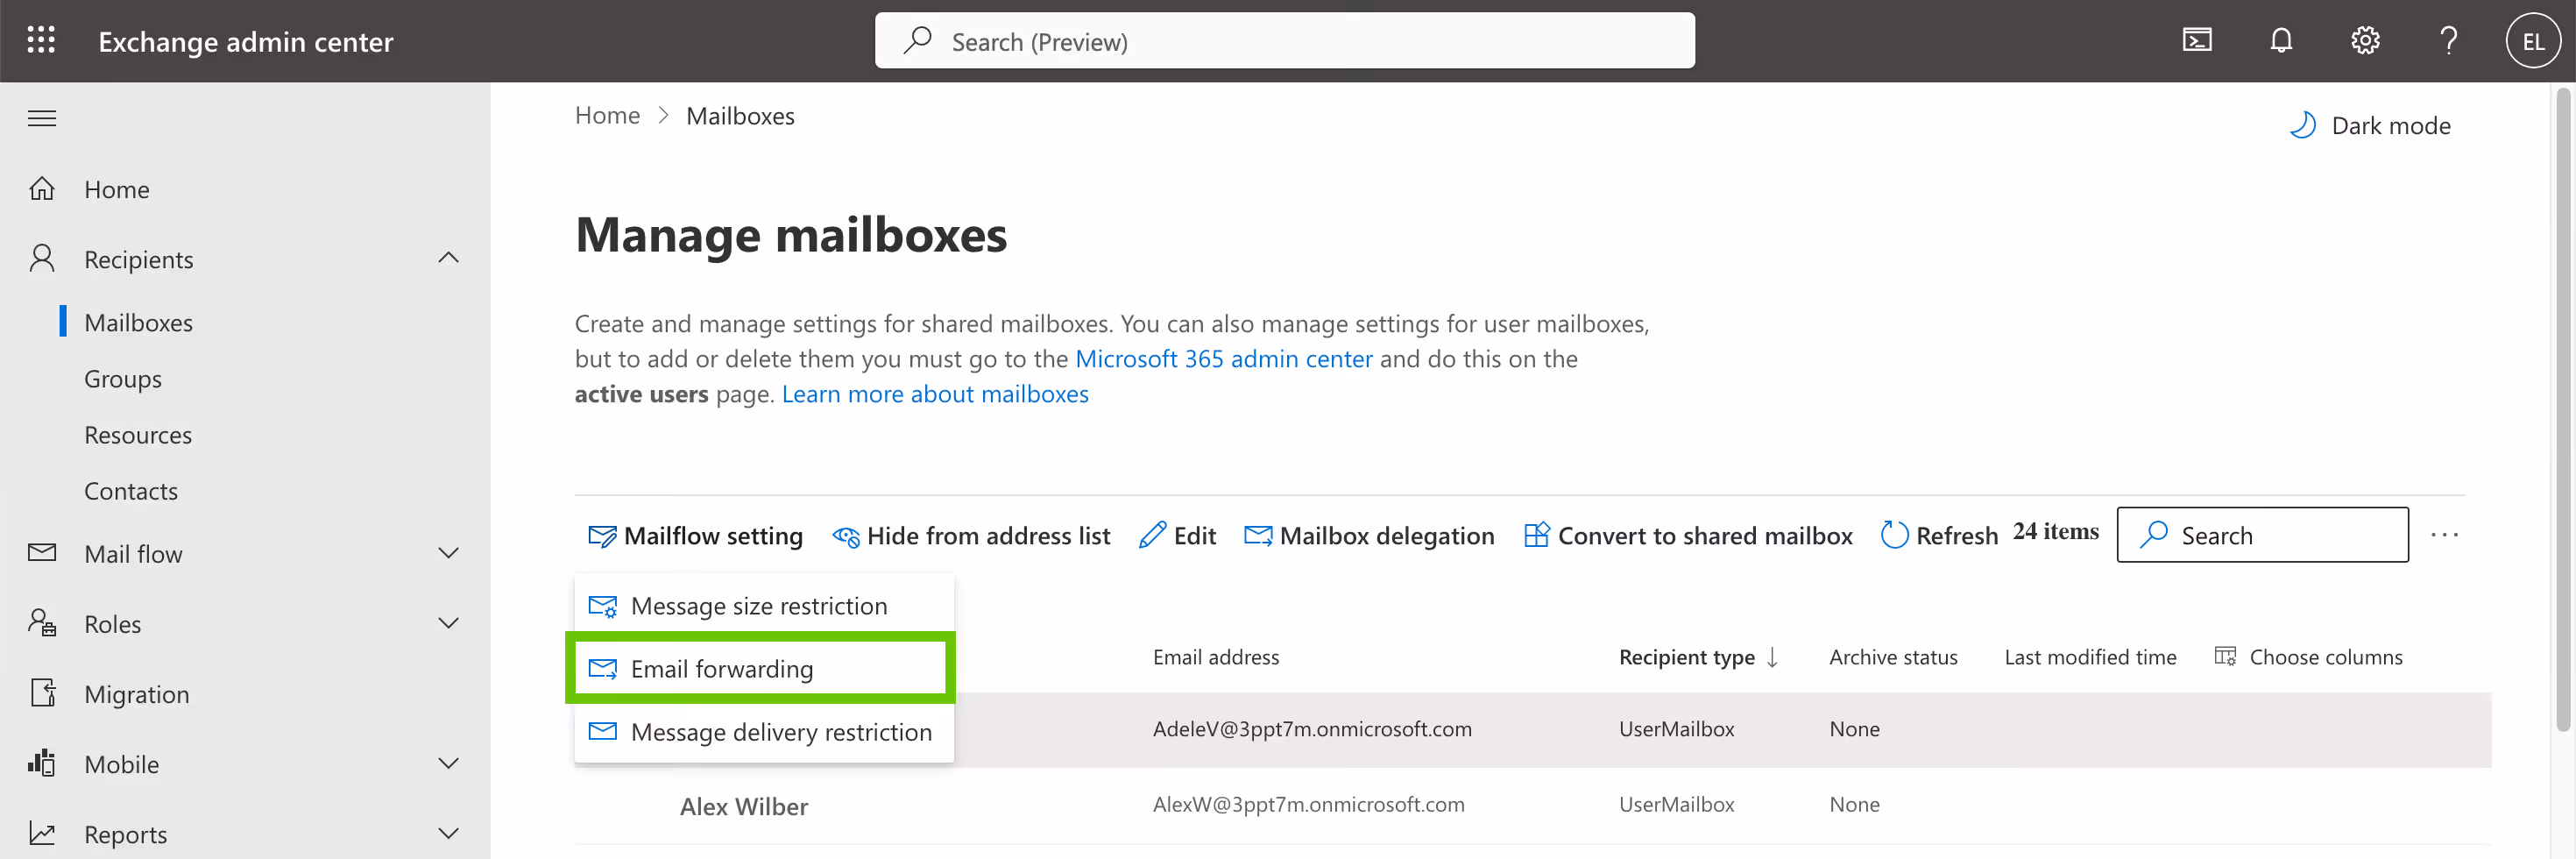
Two actions will show up:

  • 1. Forward Email (Address Book)
  • 2. Forward Email (SMTP Address)
Forwarding screen

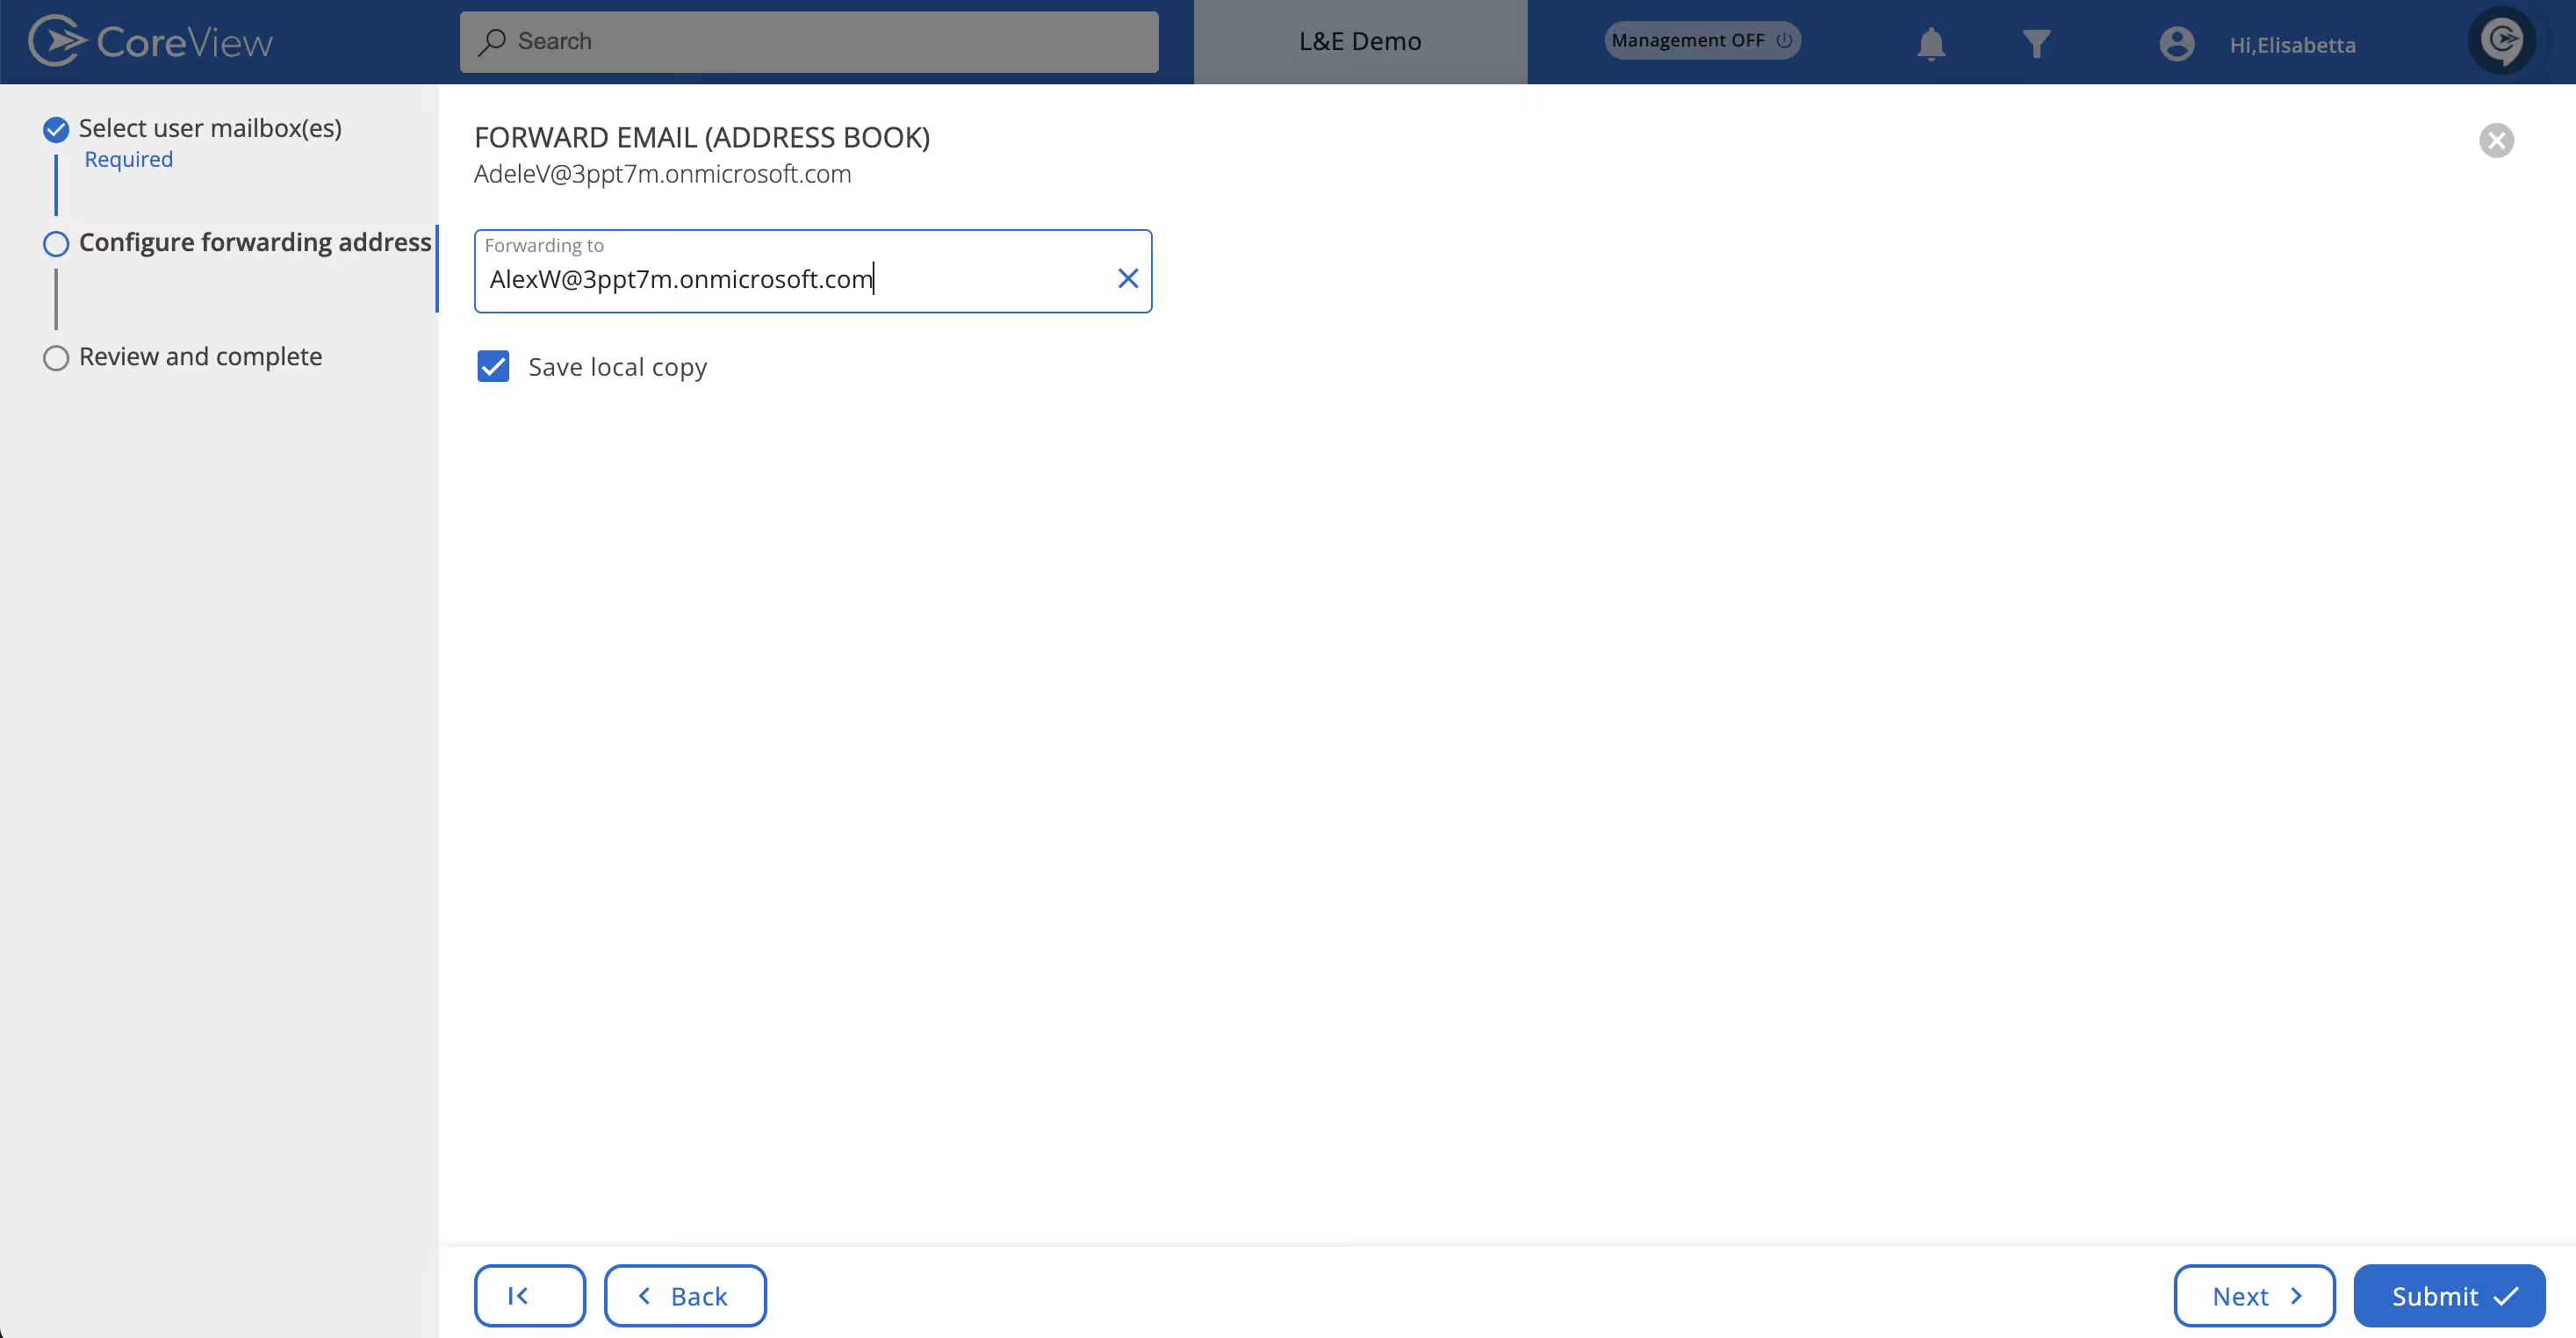
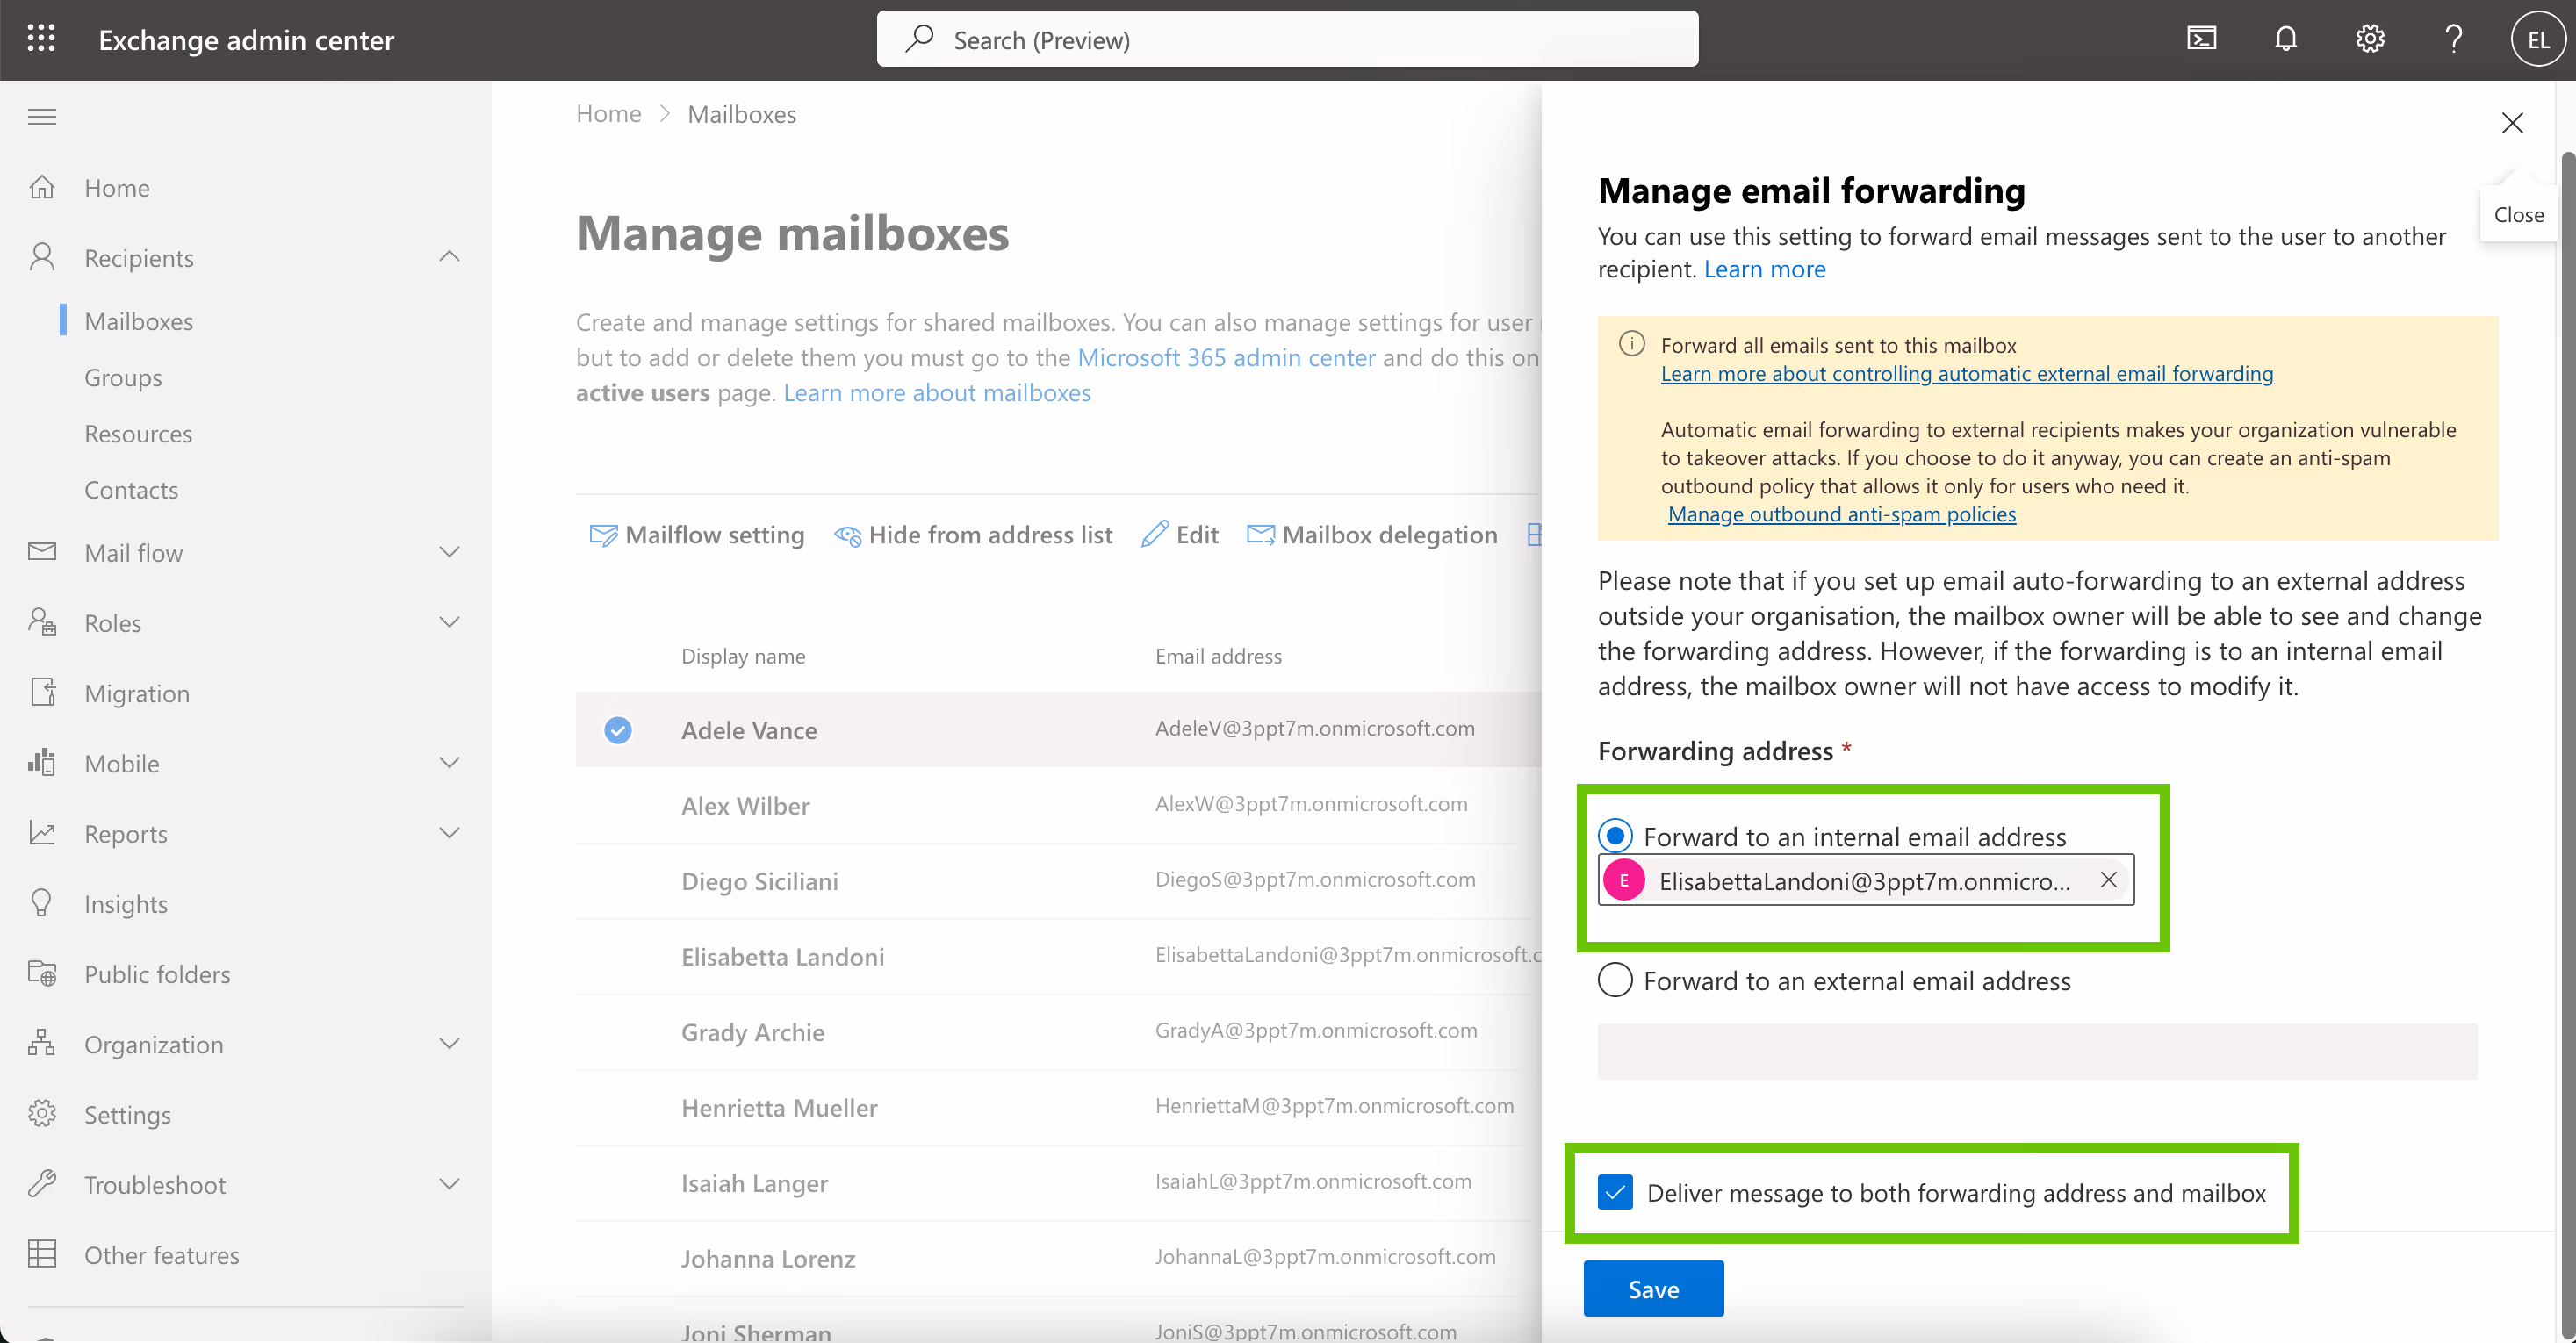
In both cases, you will be prompted to specify the recipient who will receive the forwarded email. If you check the “Save local copy” box, new messages will be retained in the original mailbox and also forwarded to the new destination.

How CoreView Handles Email Forwarding and Security

CoreView uses the same Set-Mailbox PowerShell cmdlet, but provides a more user-friendly experience, with granular scopes enforced by V-Tenant boundaries.

Operators can only view and manage mailboxes that are part of their defined V-Tenant scope.

For more information on how to set up email forwarding using CoreView, please refer to the Forward email (SMTP address) vs. Forward email (Address book) management actions article.

Get a personalized demo today

Created by M365 experts, for M365 experts.