Carmine Punella, a Microsoft Certified Professional, is renowned for his C# expertise, contributions to the Windows 8 App Hall of Fame, and extensive experience in designing scalable, reliable cloud-based platforms.
Understanding Distribution Groups in Exchange Online
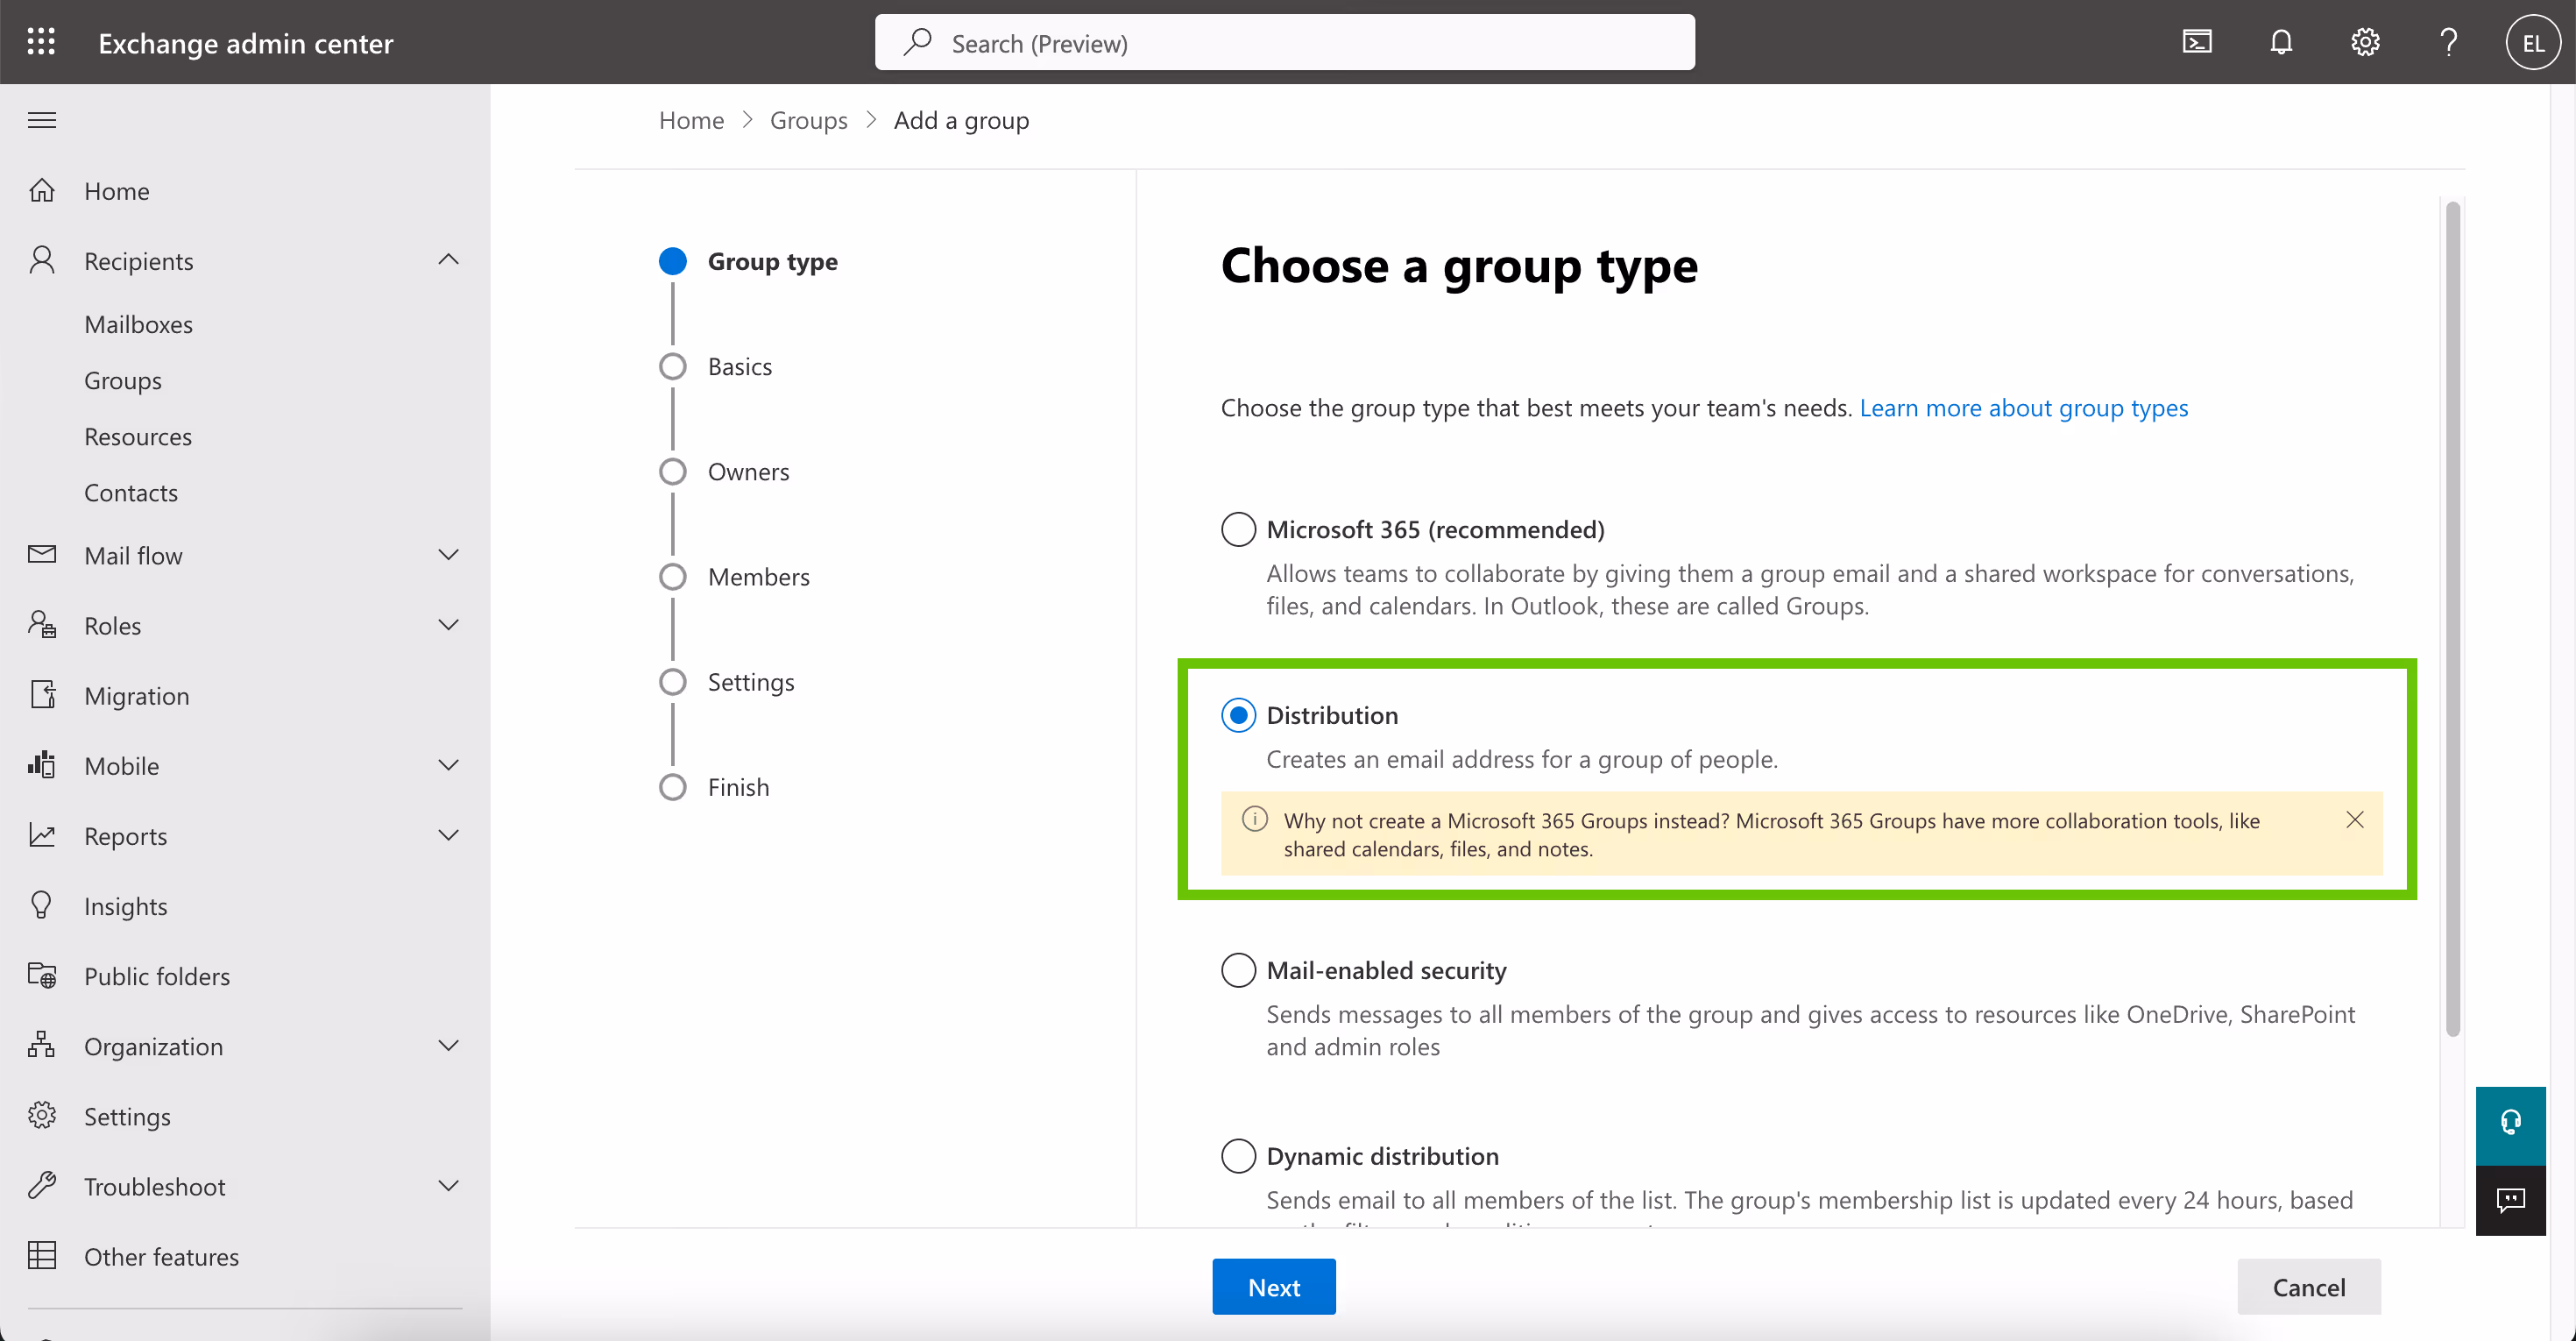
Distribution groups are an essential tool in Microsoft 365 for sending email notifications to a specific set of recipients. Administrators can configure these groups to receive emails from both internal and, if enabled, external sources. Distribution groups are ideal for communicating with a defined group such as “Building A Employees” or the “Contoso Team”.
Key Considerations Before Creating a Distribution Group
Distribution groups can be upgraded to Microsoft 365 groups if broader collaboration tools (such as files and Teams chat) are needed.
Microsoft 365 groups cannot be added as members of distribution groups.
Distribution groups can be integrated into Teams only by adding individual members—not the group as an entity.
# Creates a distribution group named 'ITDepartment' with four members.
New-DistributionGroup -Name "ITDepartment" -Members chris@contoso.com,michelle@contoso.com,laura@contoso.com,julia@contoso.com
For more detailed information, please refer to the Microsoft documentation for New-DistributionGroup.
How to Create and Manage Distribution Groups with CoreView
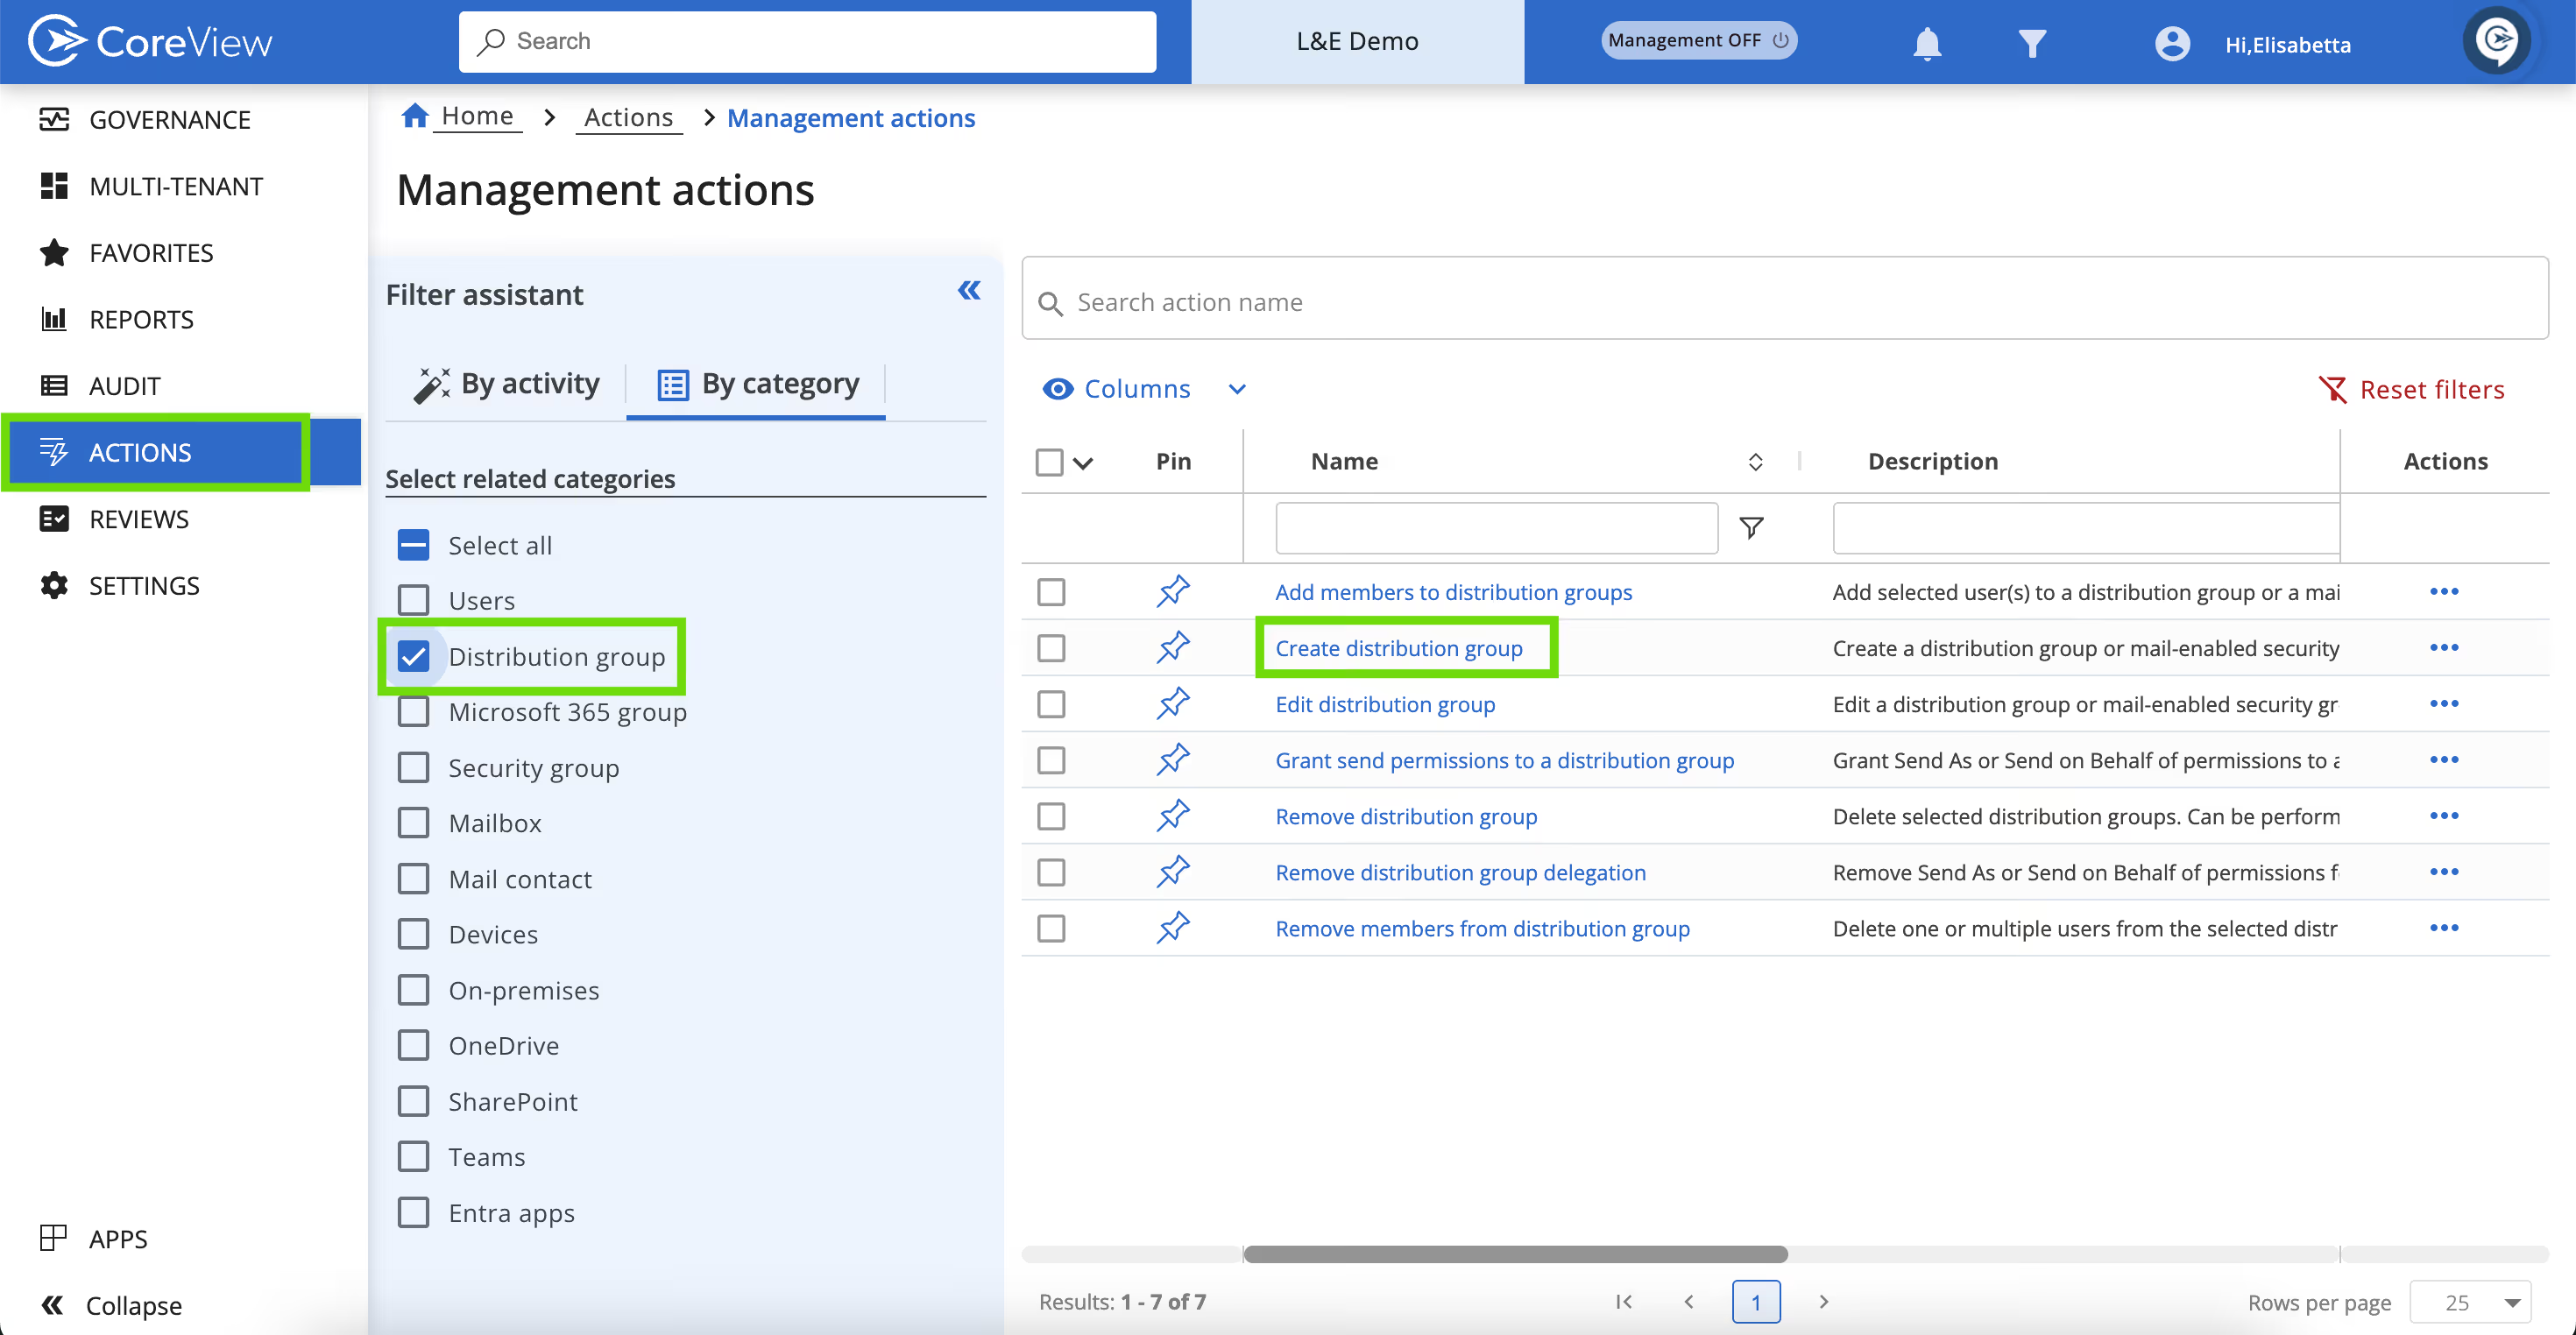
CoreView provides a simplified and enhanced interface for creating and managing distribution groups, along with advanced governance features:
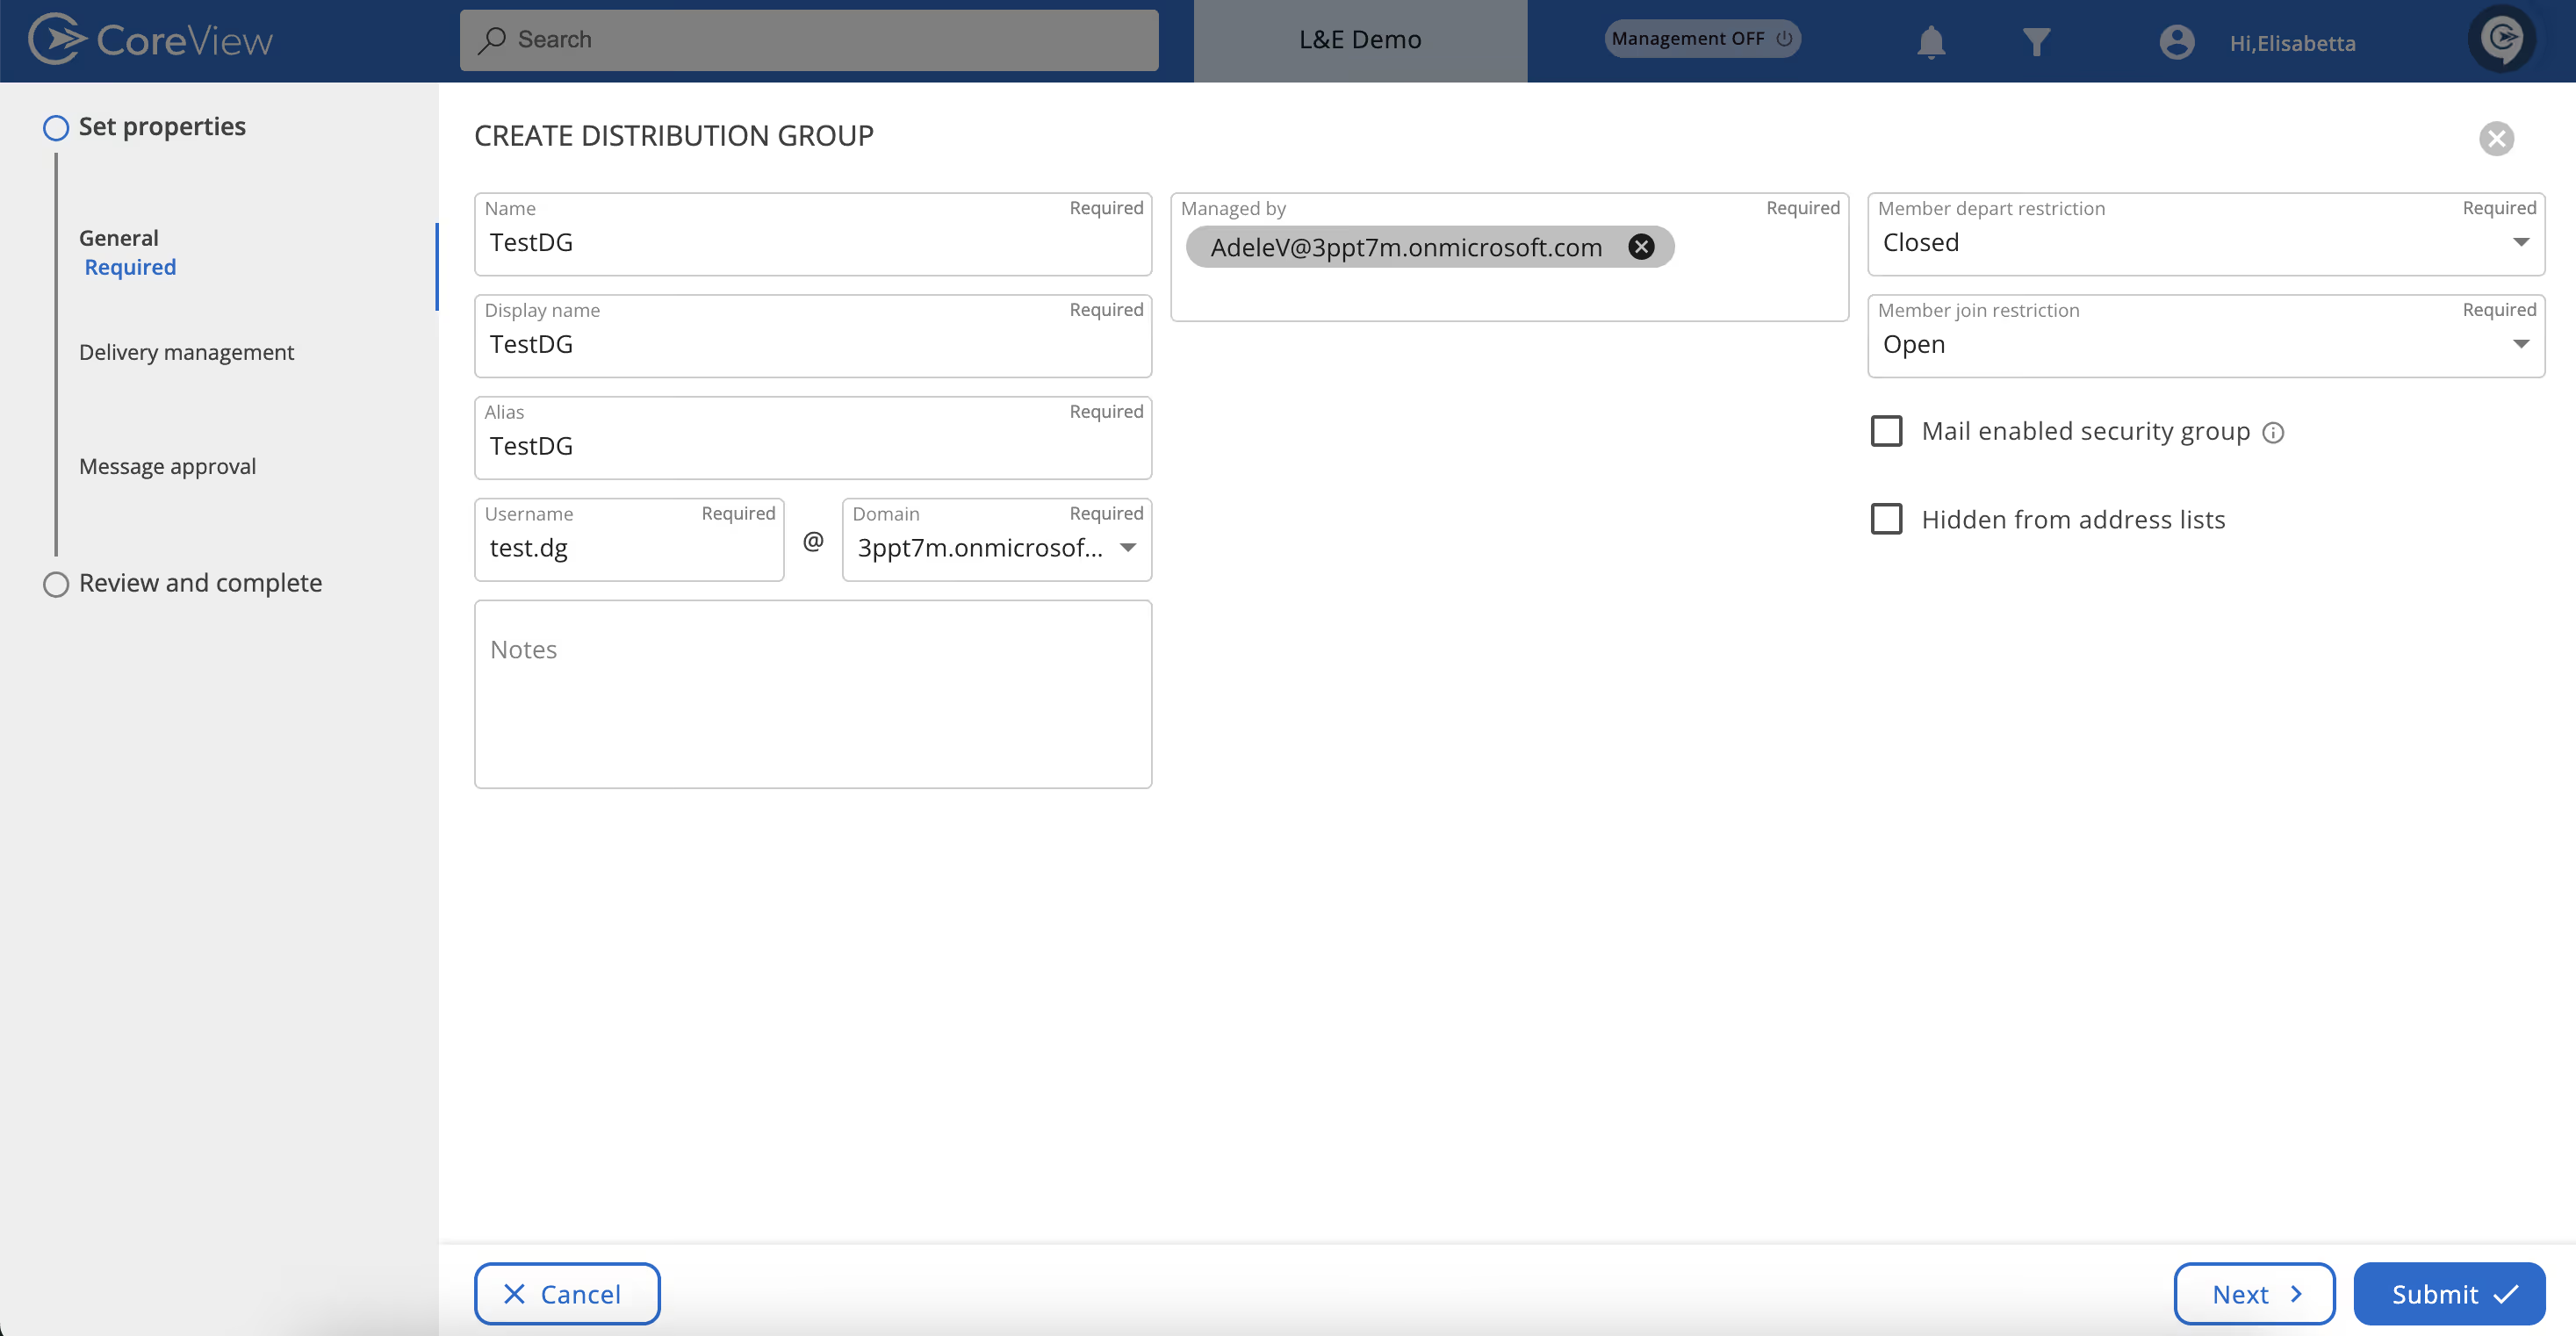
Under “Actions”, click on “Management actions” and select “Distribution group”. Then choose “Create distribution group”.
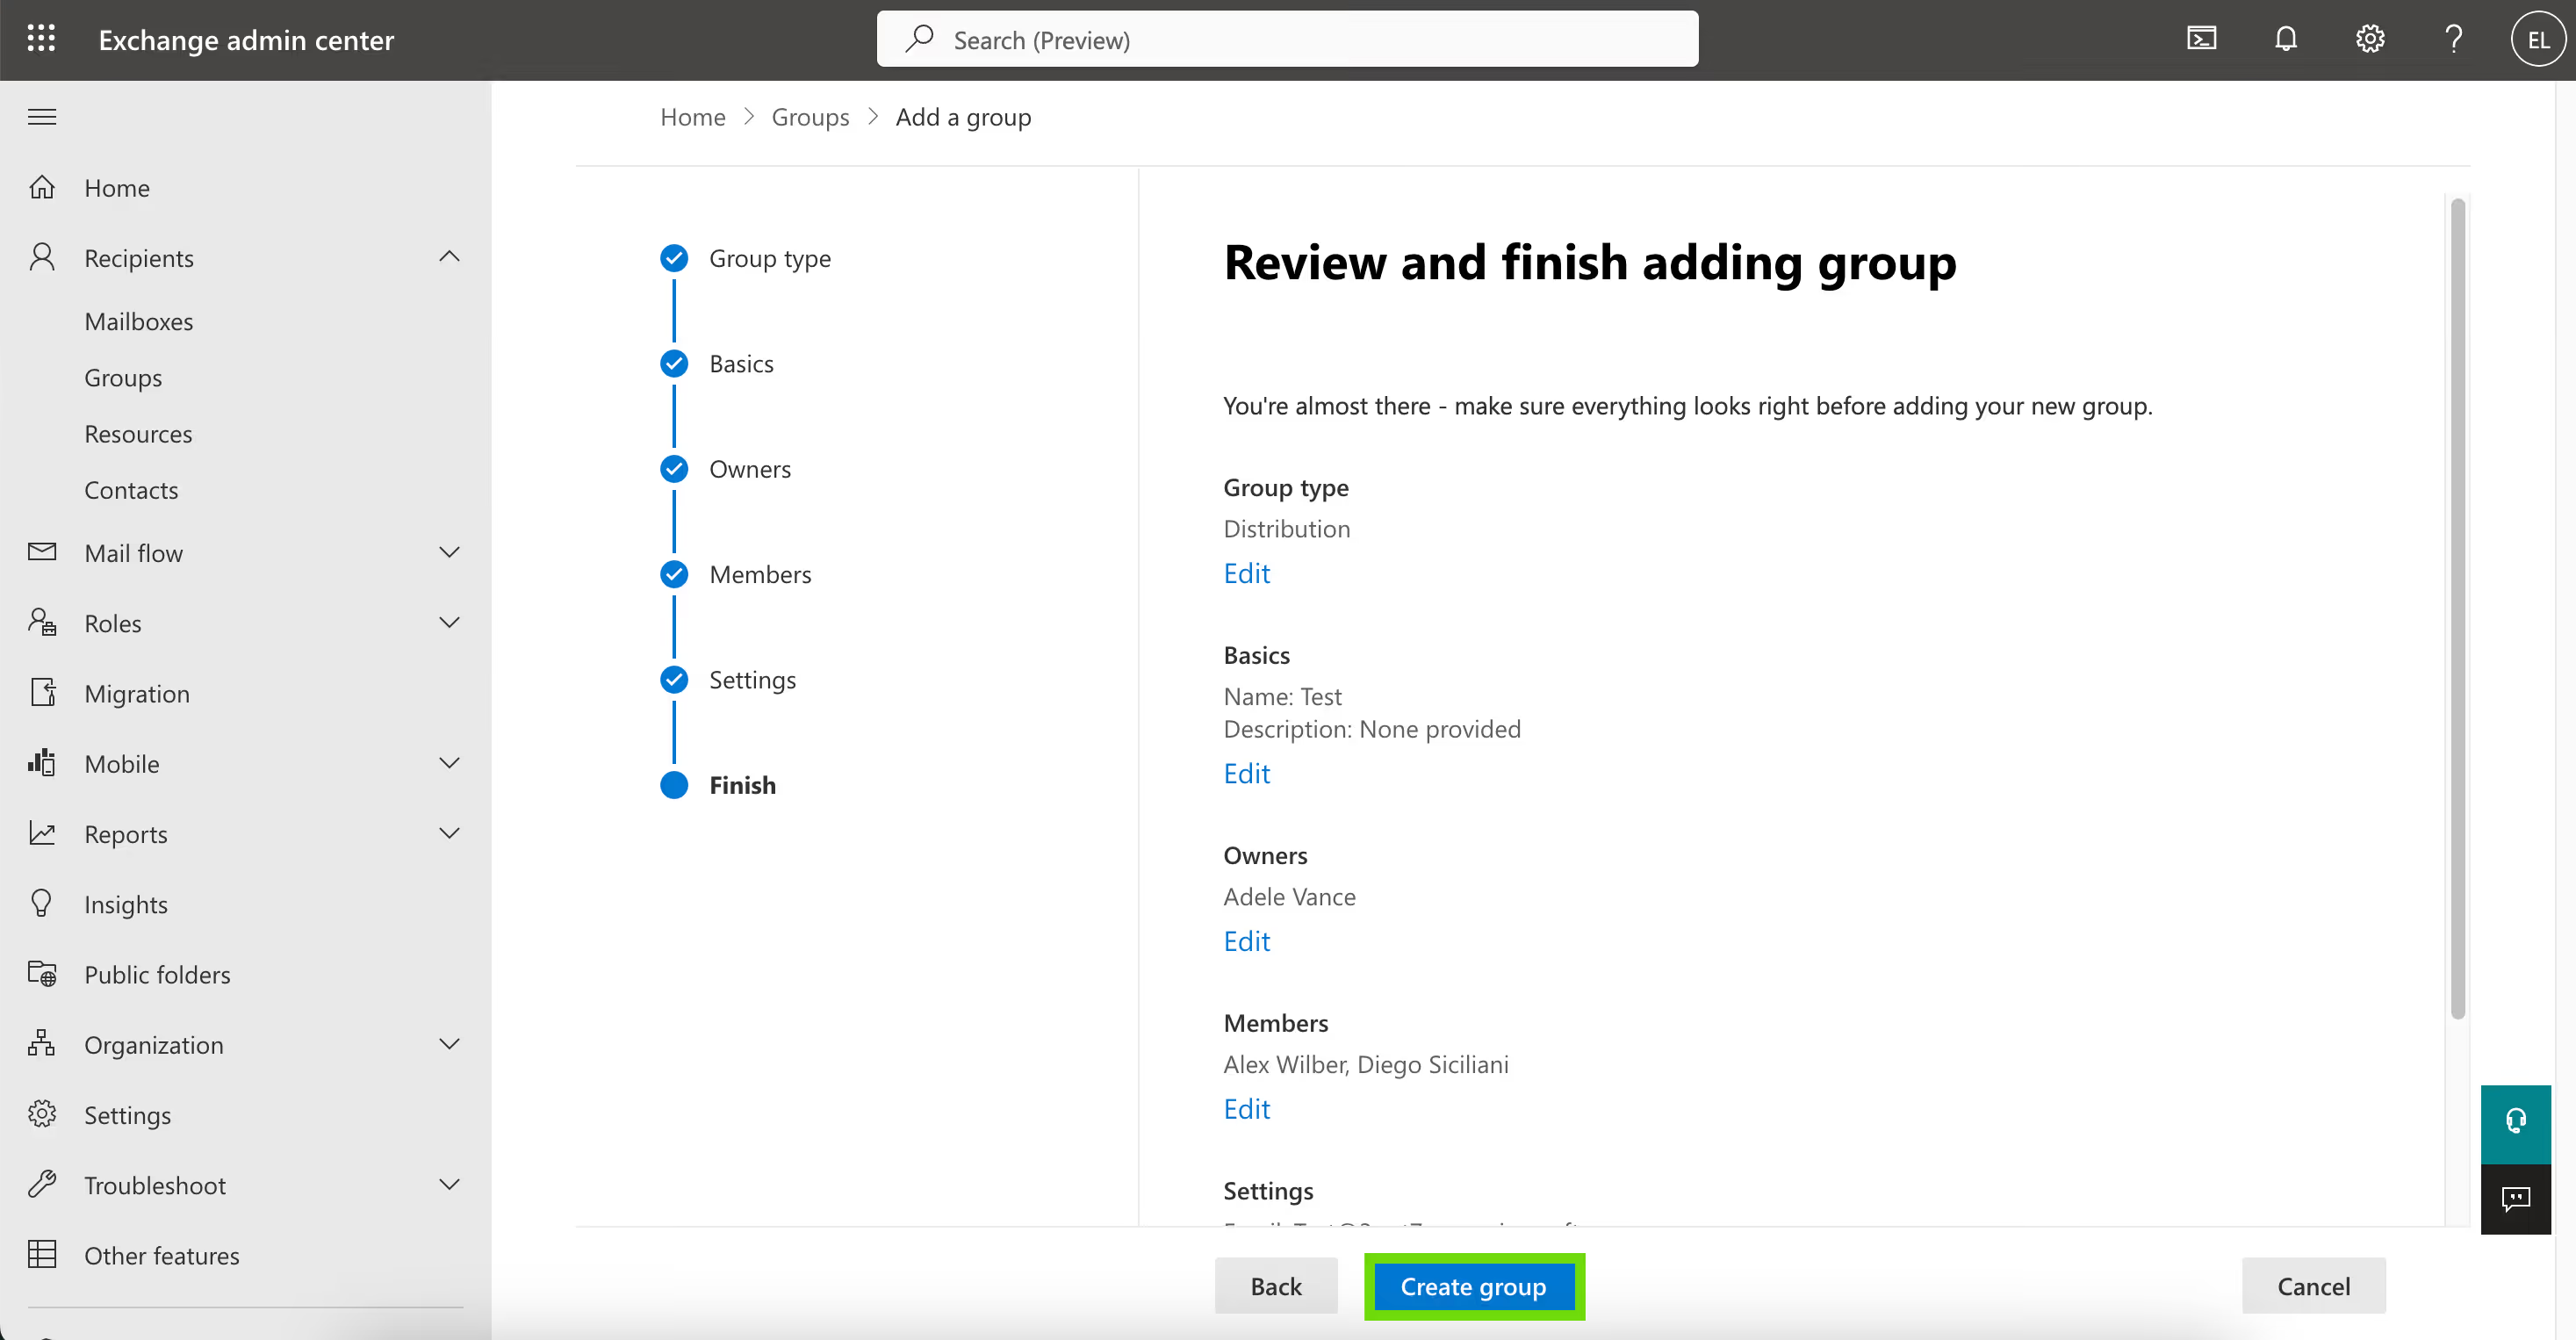
Follow the “Create distribution group” wizard.
Please note that the “Alias” field should not contain any spaces.
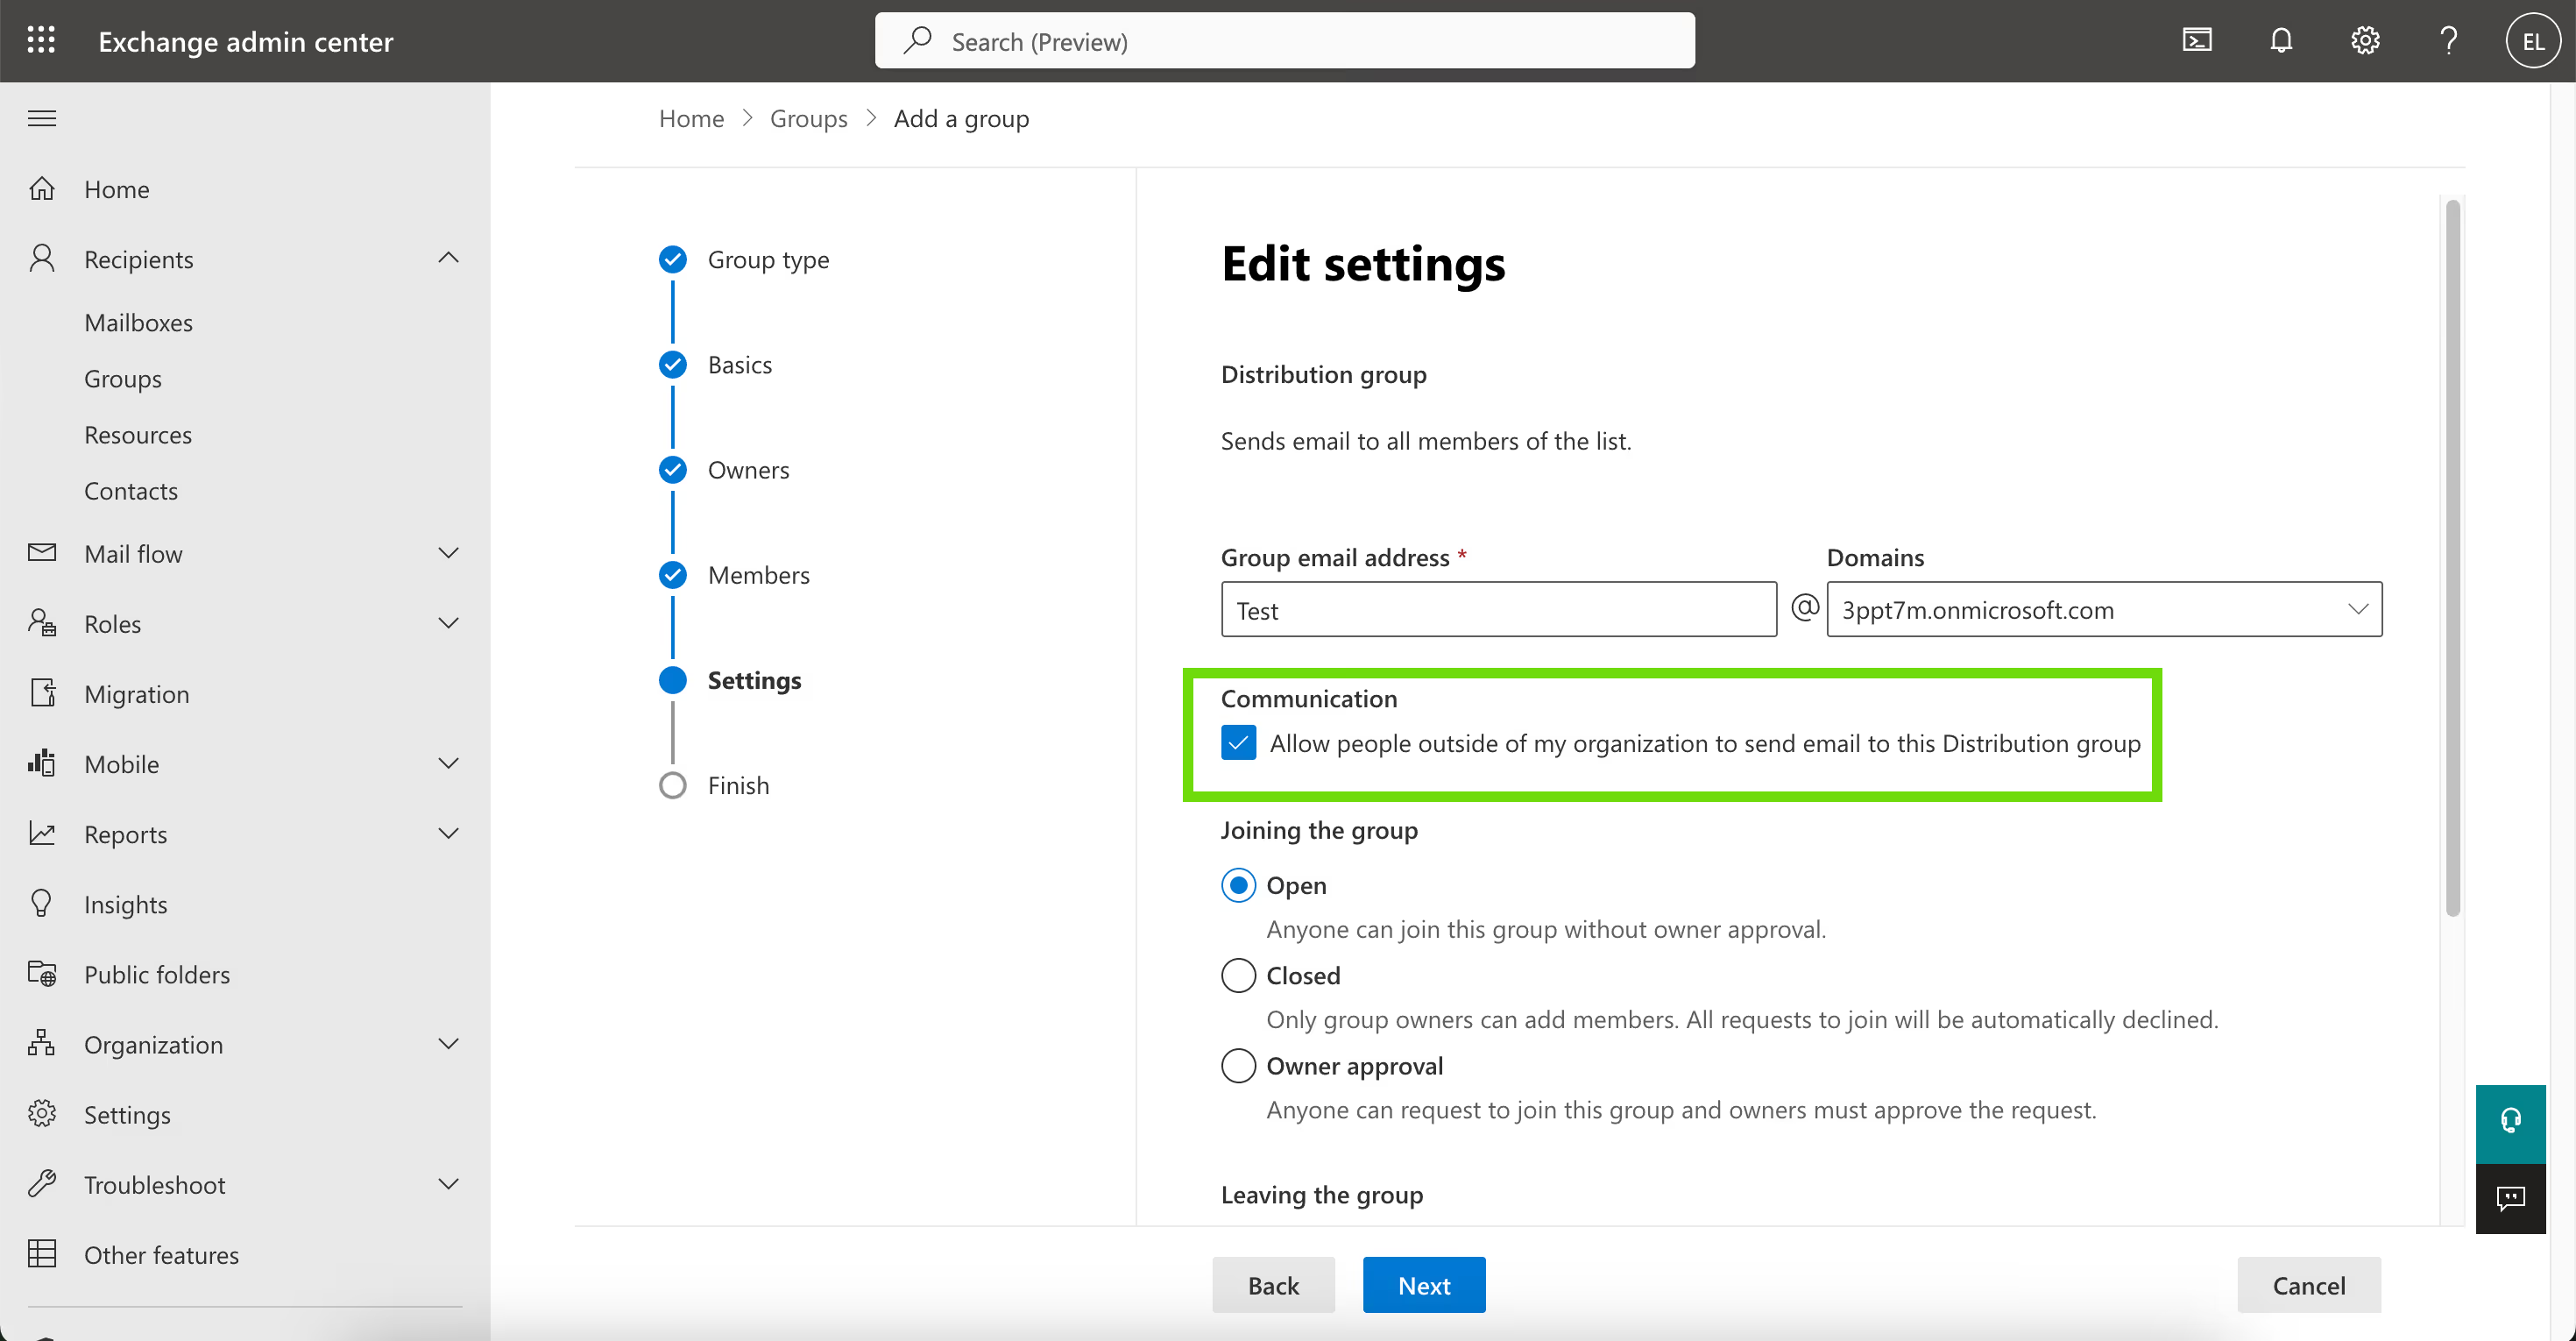
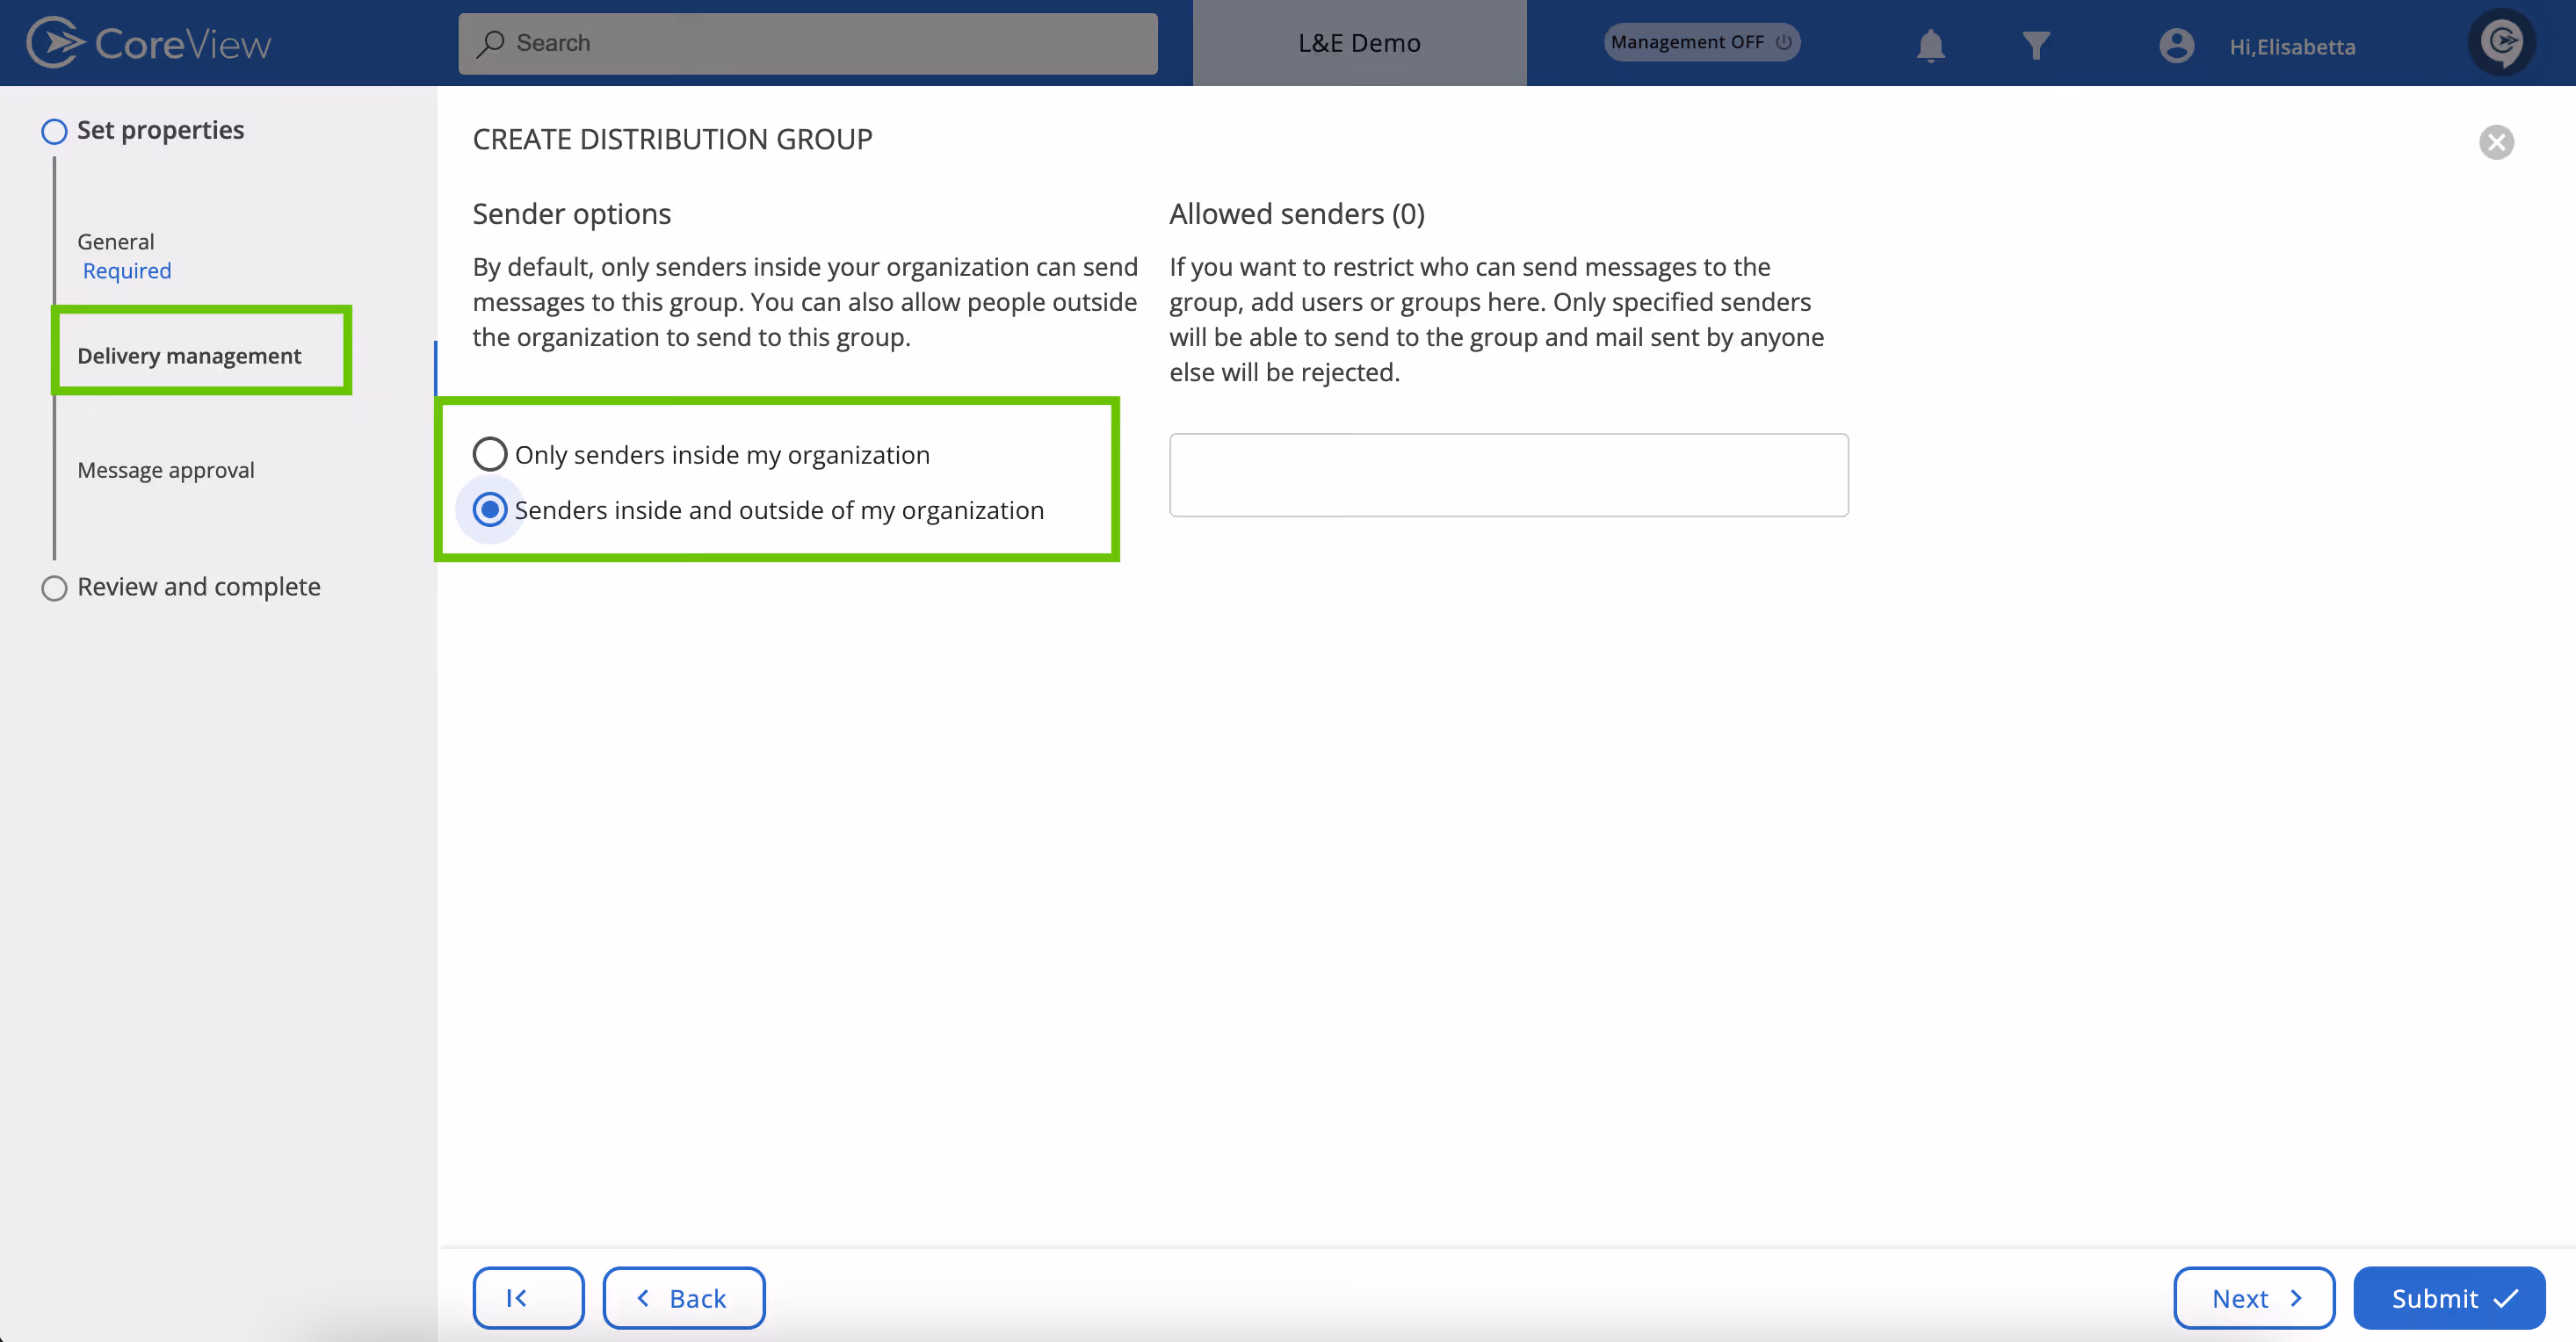
Specify membership and, if needed, restrict who can send messages to the group.
With CoreView, you can also limit who can send messages to the group. Only specified senders will have the ability to send to the group, and emails sent by anyone else will be rejected.