Published:
Mar 17, 2025
|
Modified:
|
5
min read

How to Register an App on Entra ID

Ivan Fioravanti
Ivan Fioravanti, Co-founder and CTO for CoreView, uses his system engineer and .NET development skills to lead CoreView’s technology team. He’s passionate about AI, automation and all things Microsoft 365.

This article is designed to navigate you through the necessary prerequisites and step-by-step processes required to enable partial imports and the Entra ID reports feature effectively within Entra ID.

Register an app on Entra ID

Step 1: create a new App Registration

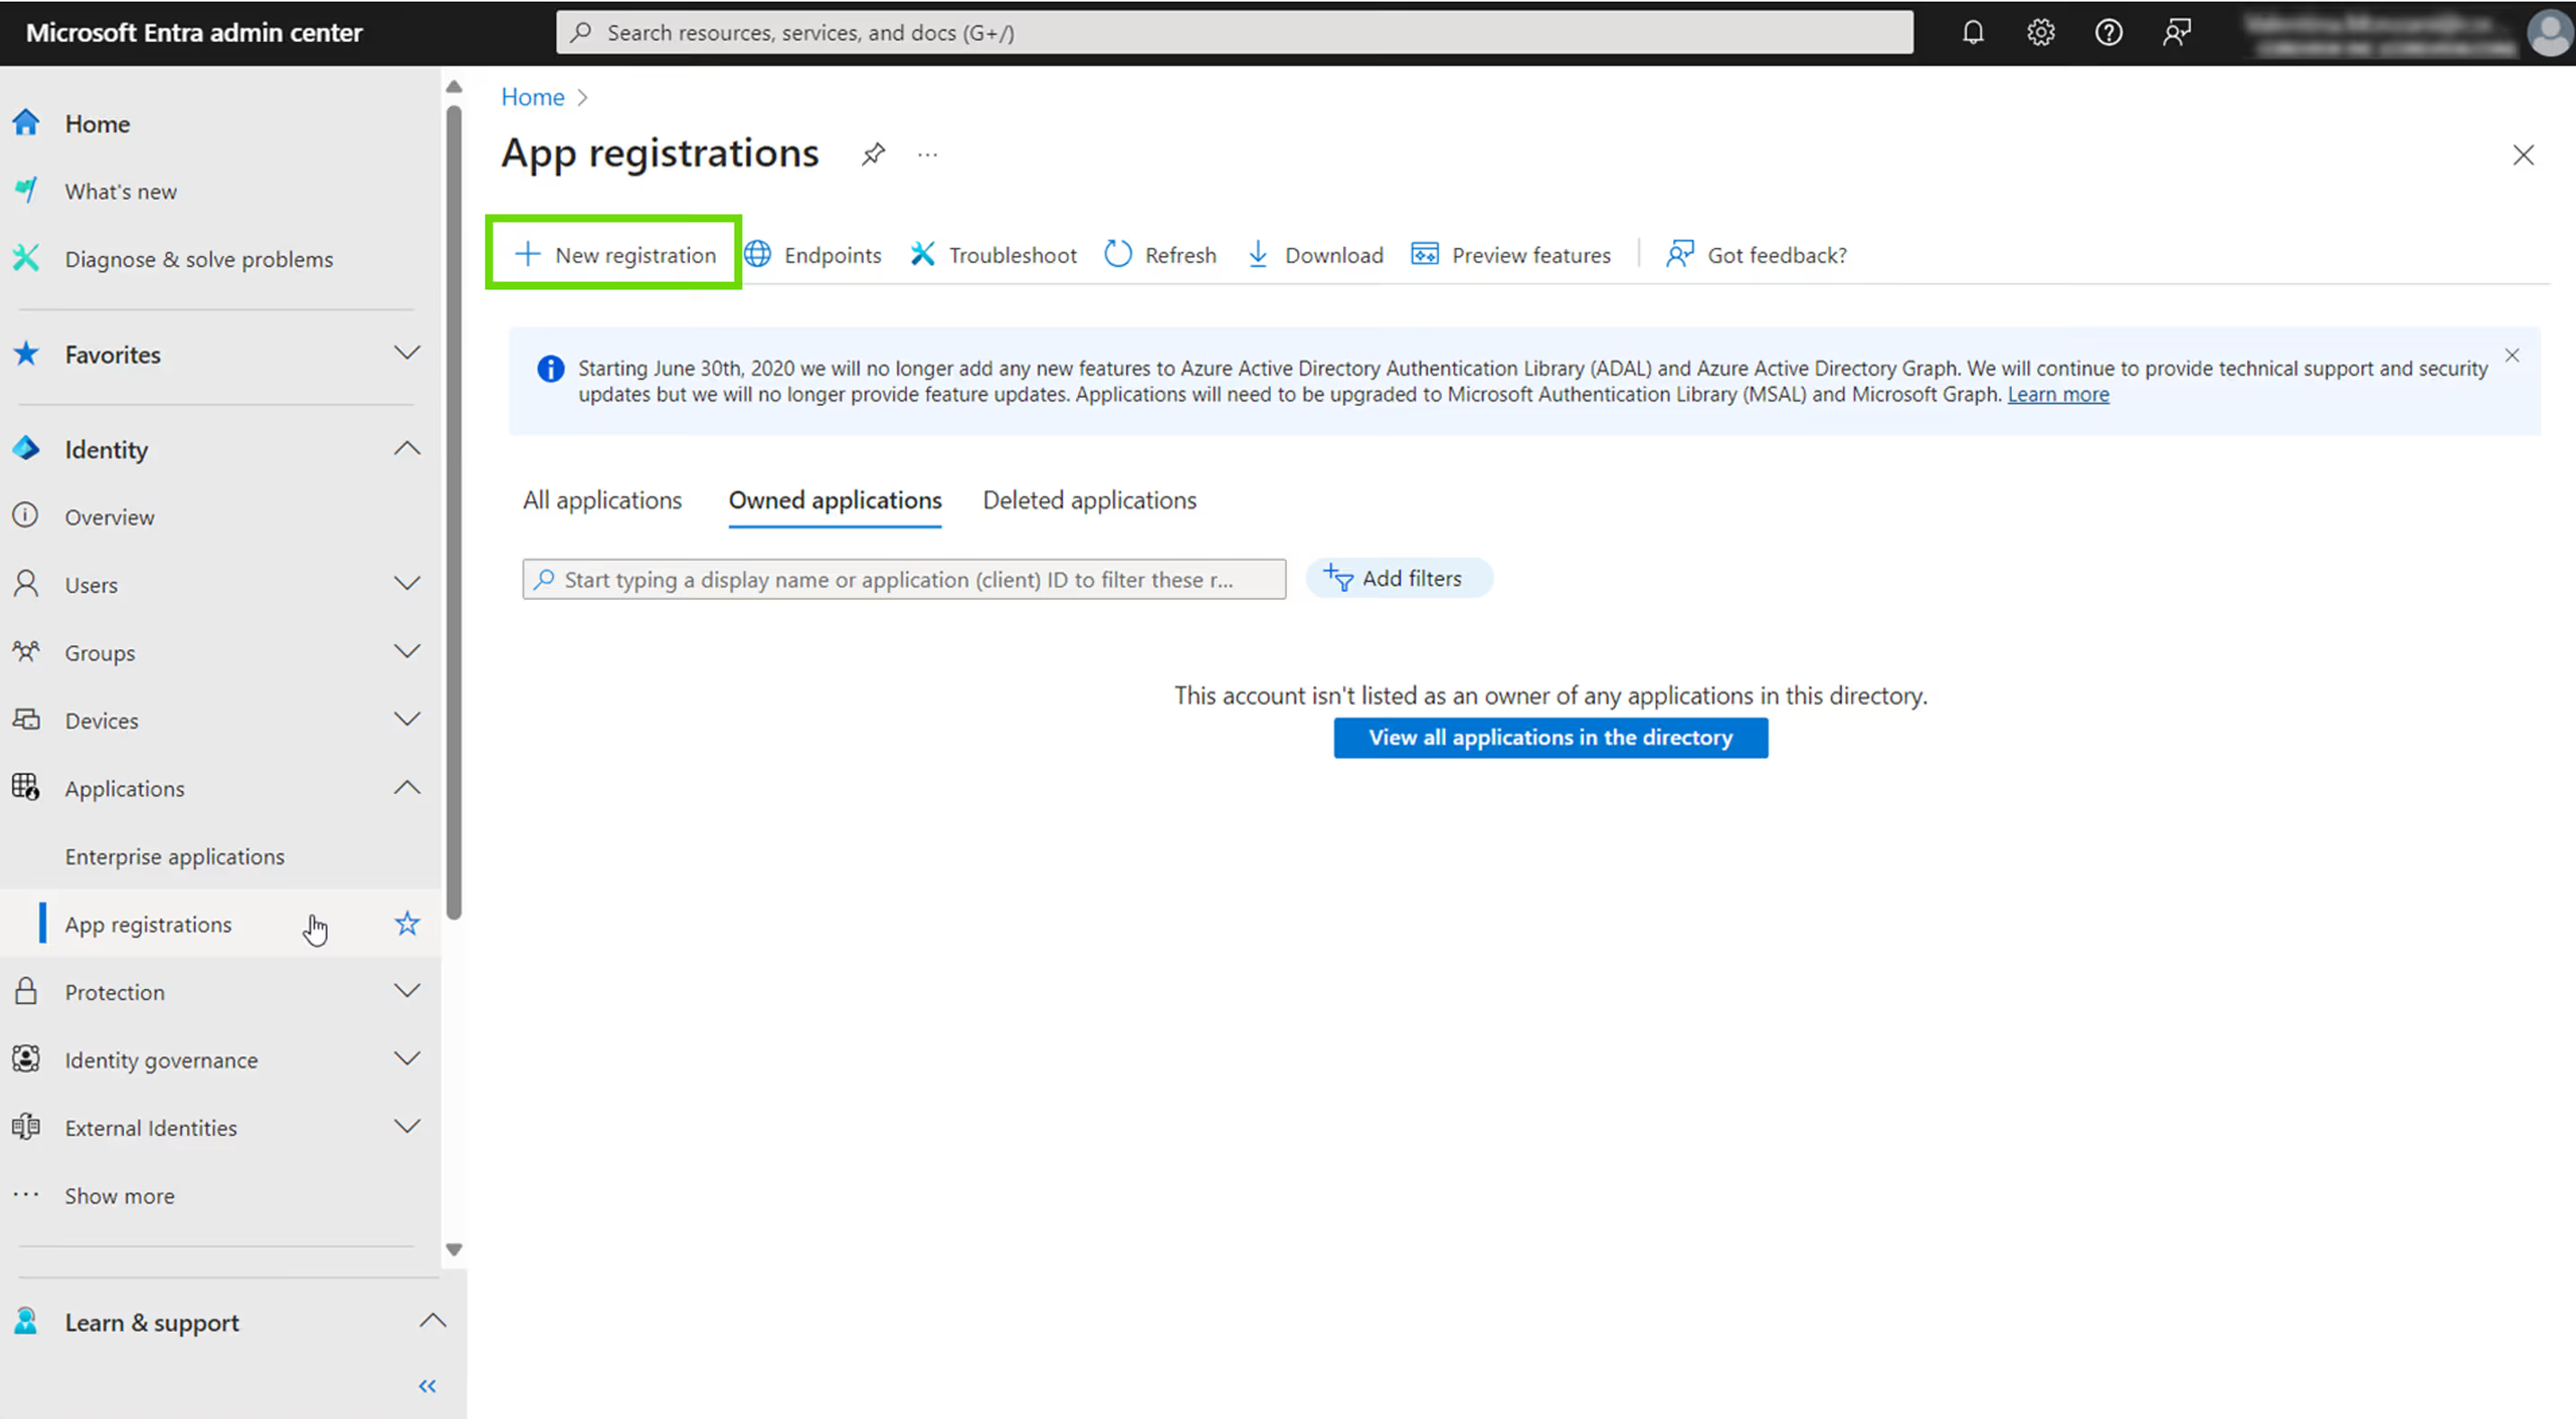
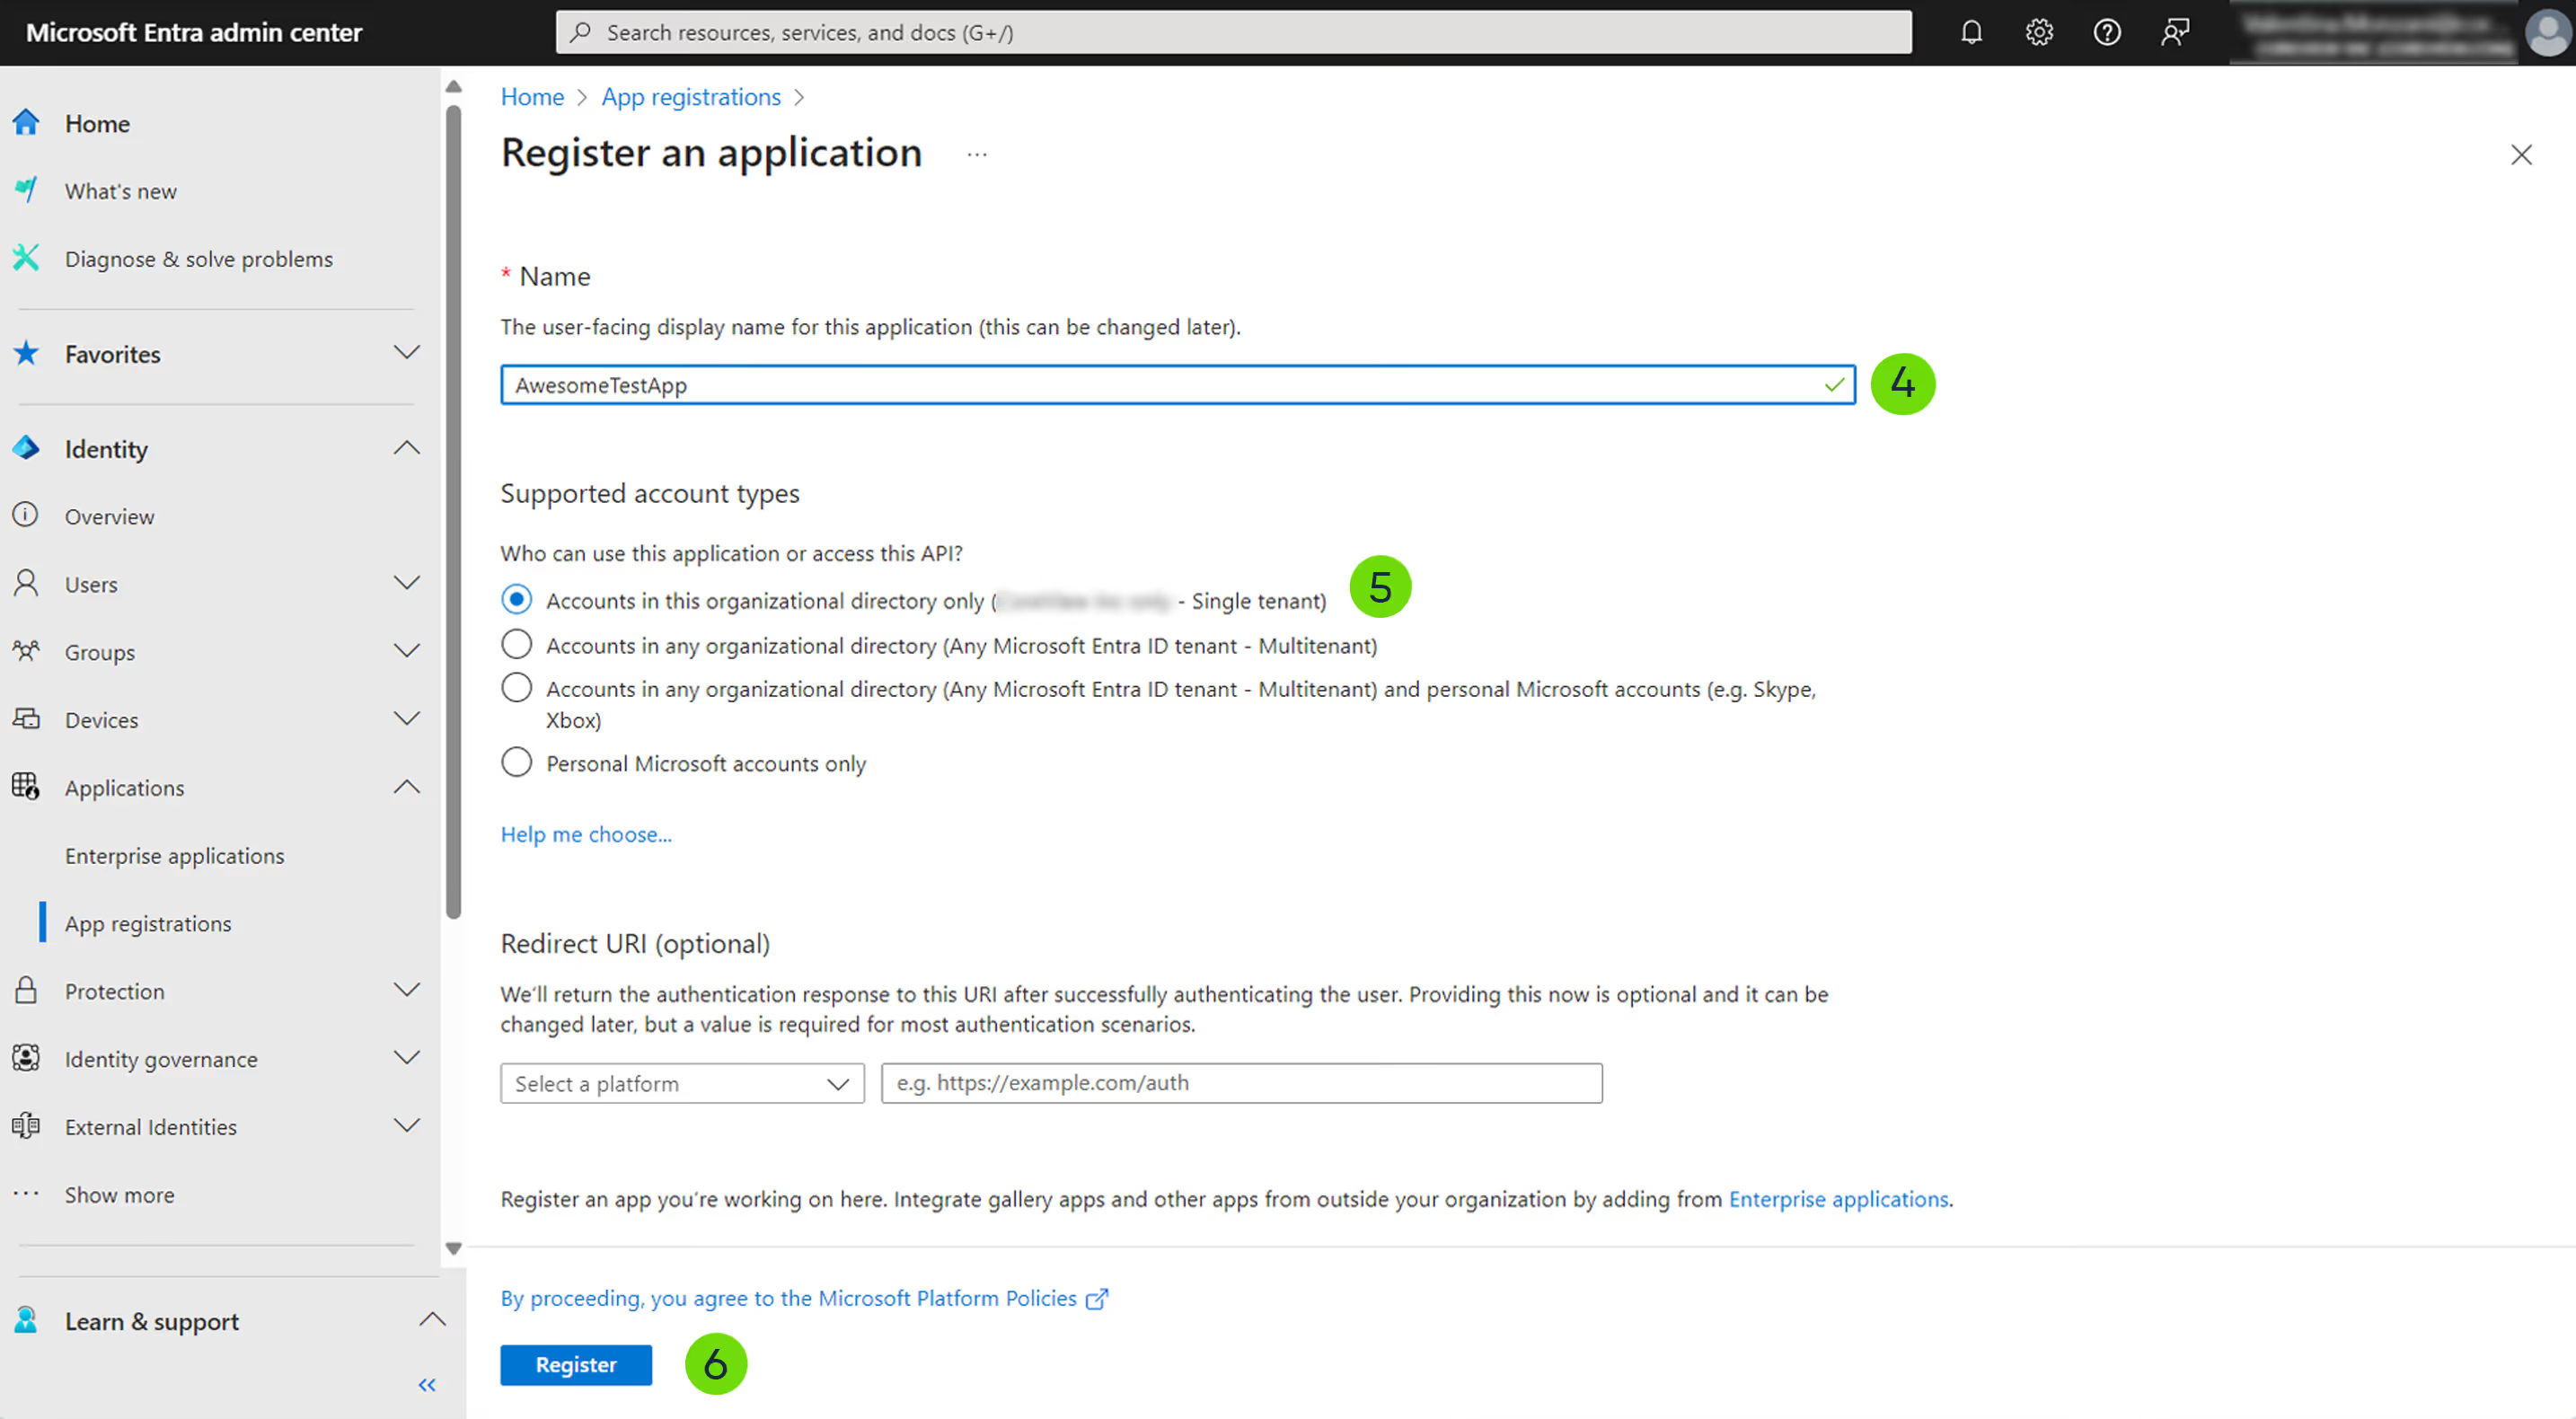
To create a brand new App, access Entra ID and

  1. Navigate to the App registration section within Entra ID under Applications.
  2. Select All Applications.
App Registrations Screen

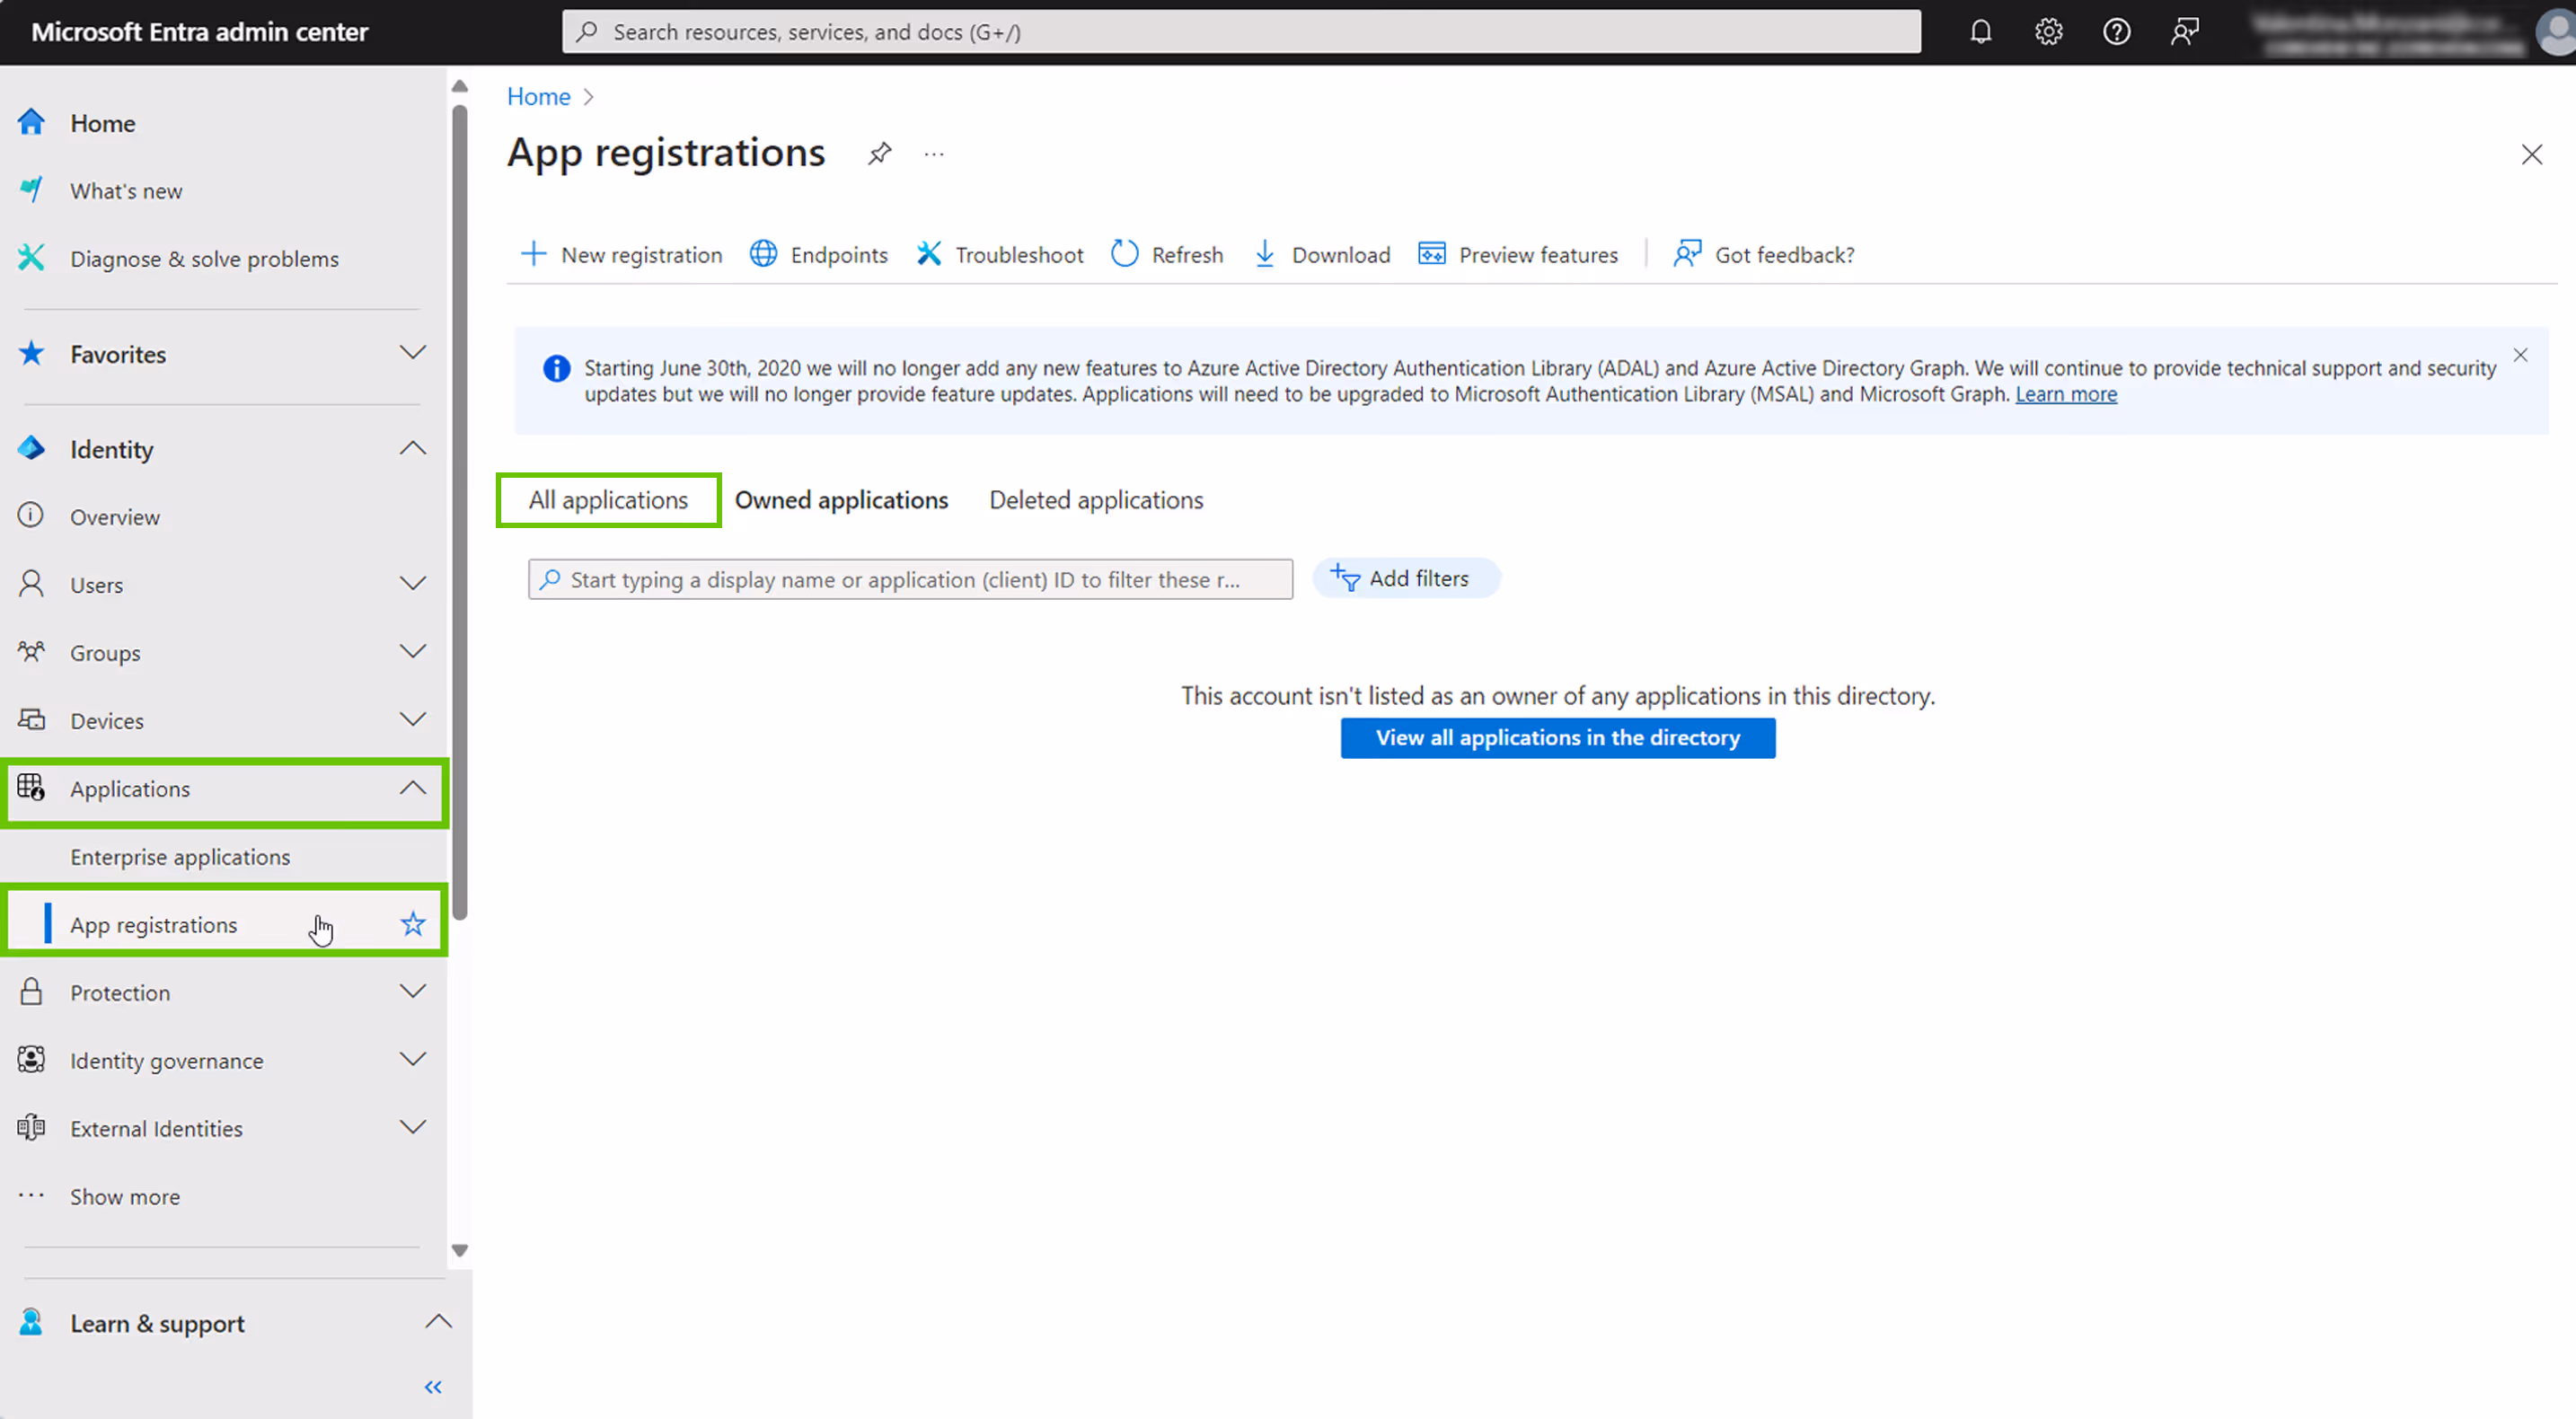
3. Click on New Registration.Name your application. For example, “AwesomeTestApp”.ame your application. For example, “AwesomeTestApp”.

New Registration screen
  1. Name your application. For example, “AwesomeTestApp”.
  2. Choose the supported account types that suit your needs. For this guide, we'll select the first option.
  3. Once all choices have been made, click on “Register”.
Register and application

Step 2: Add API Permissions

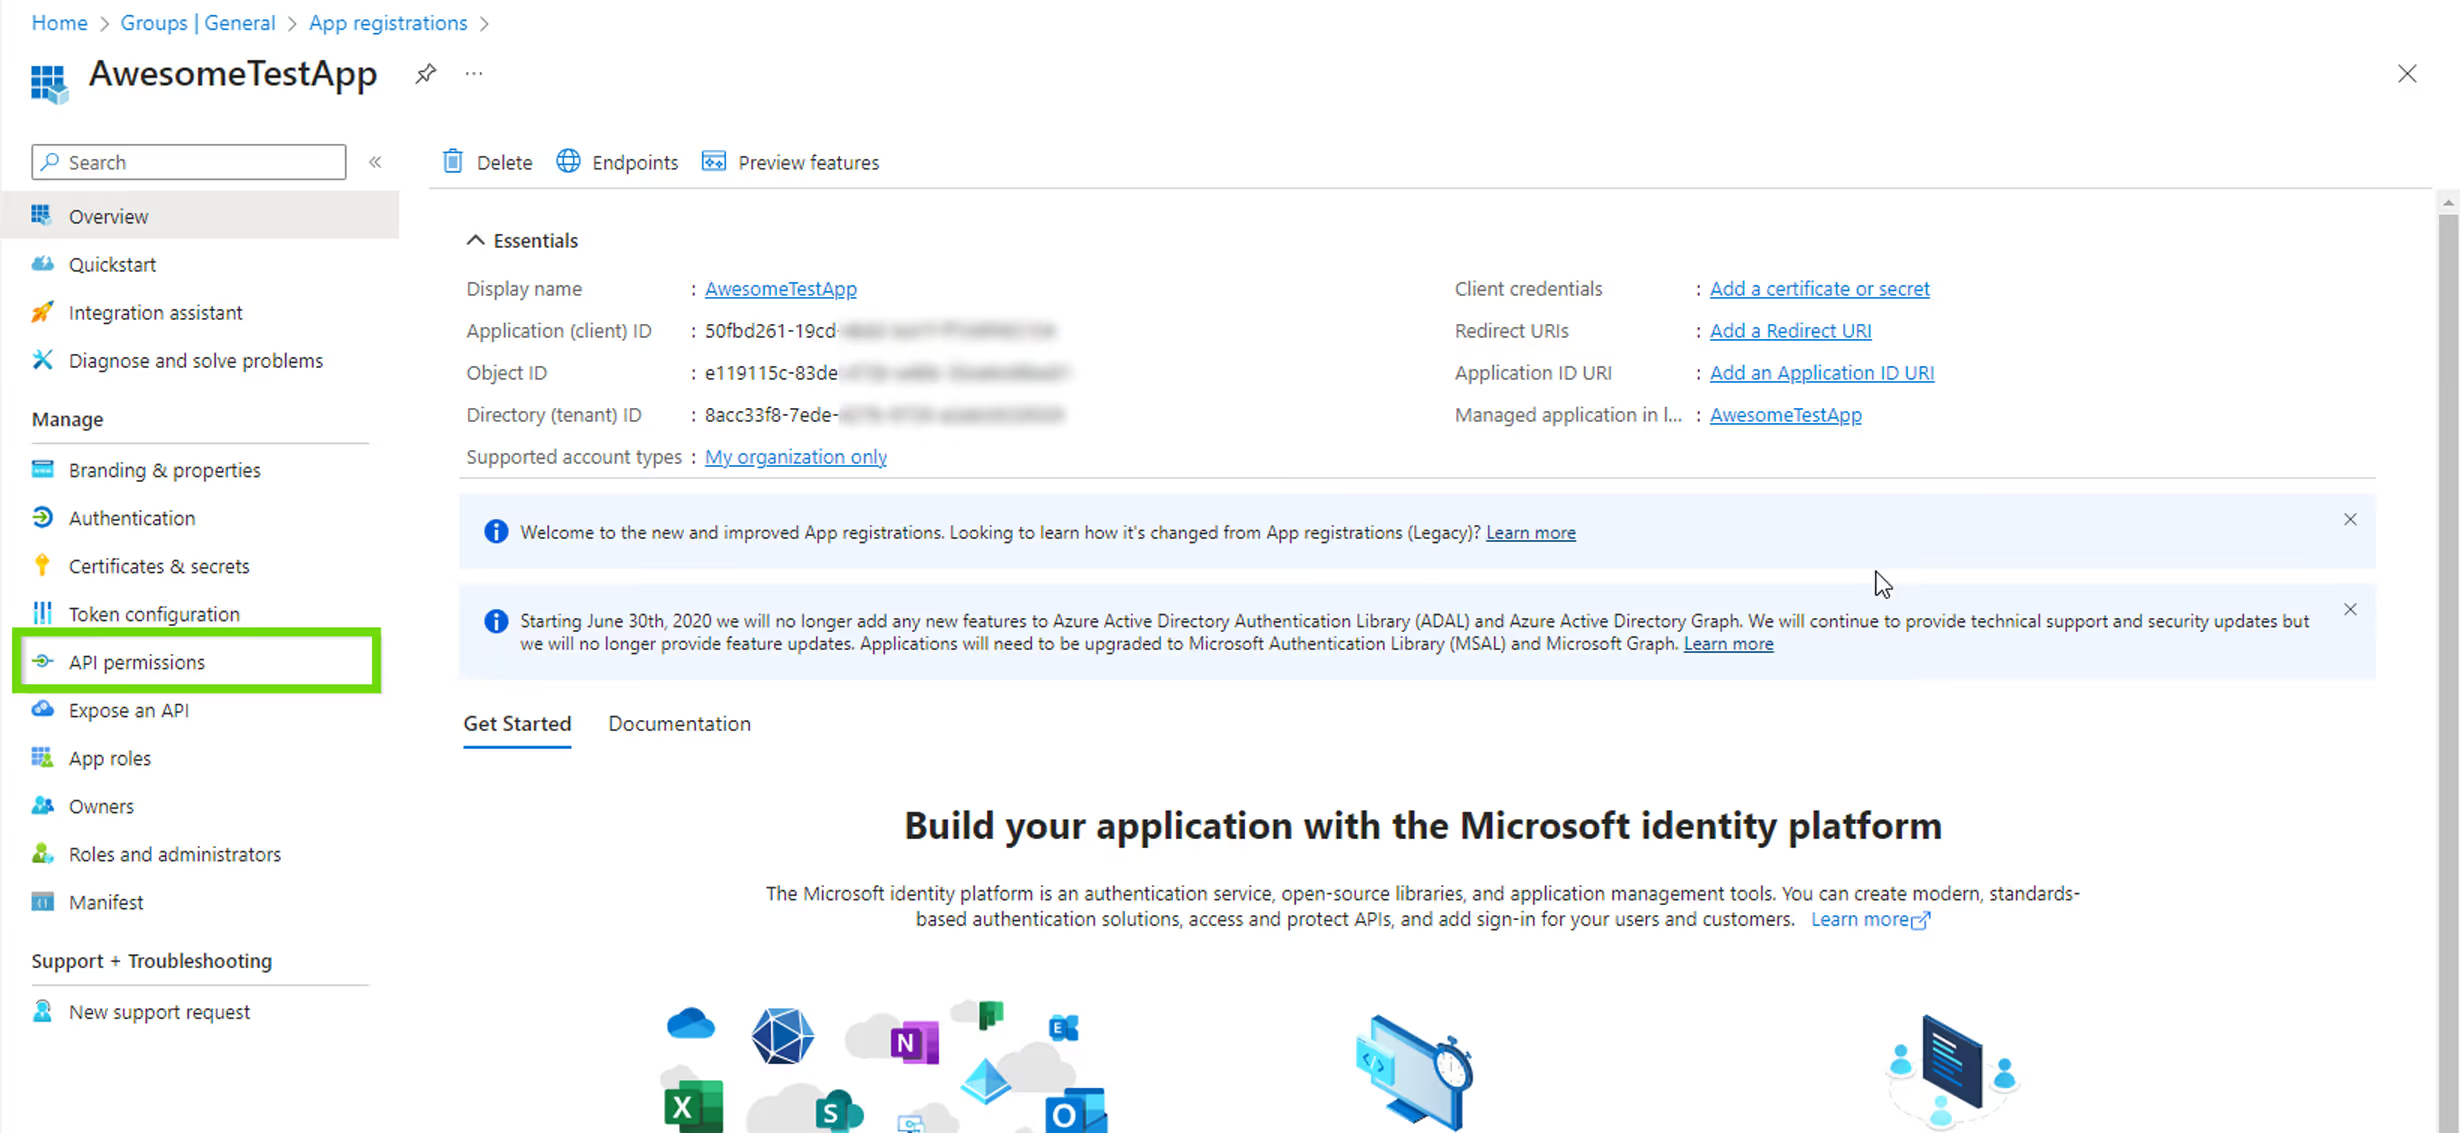
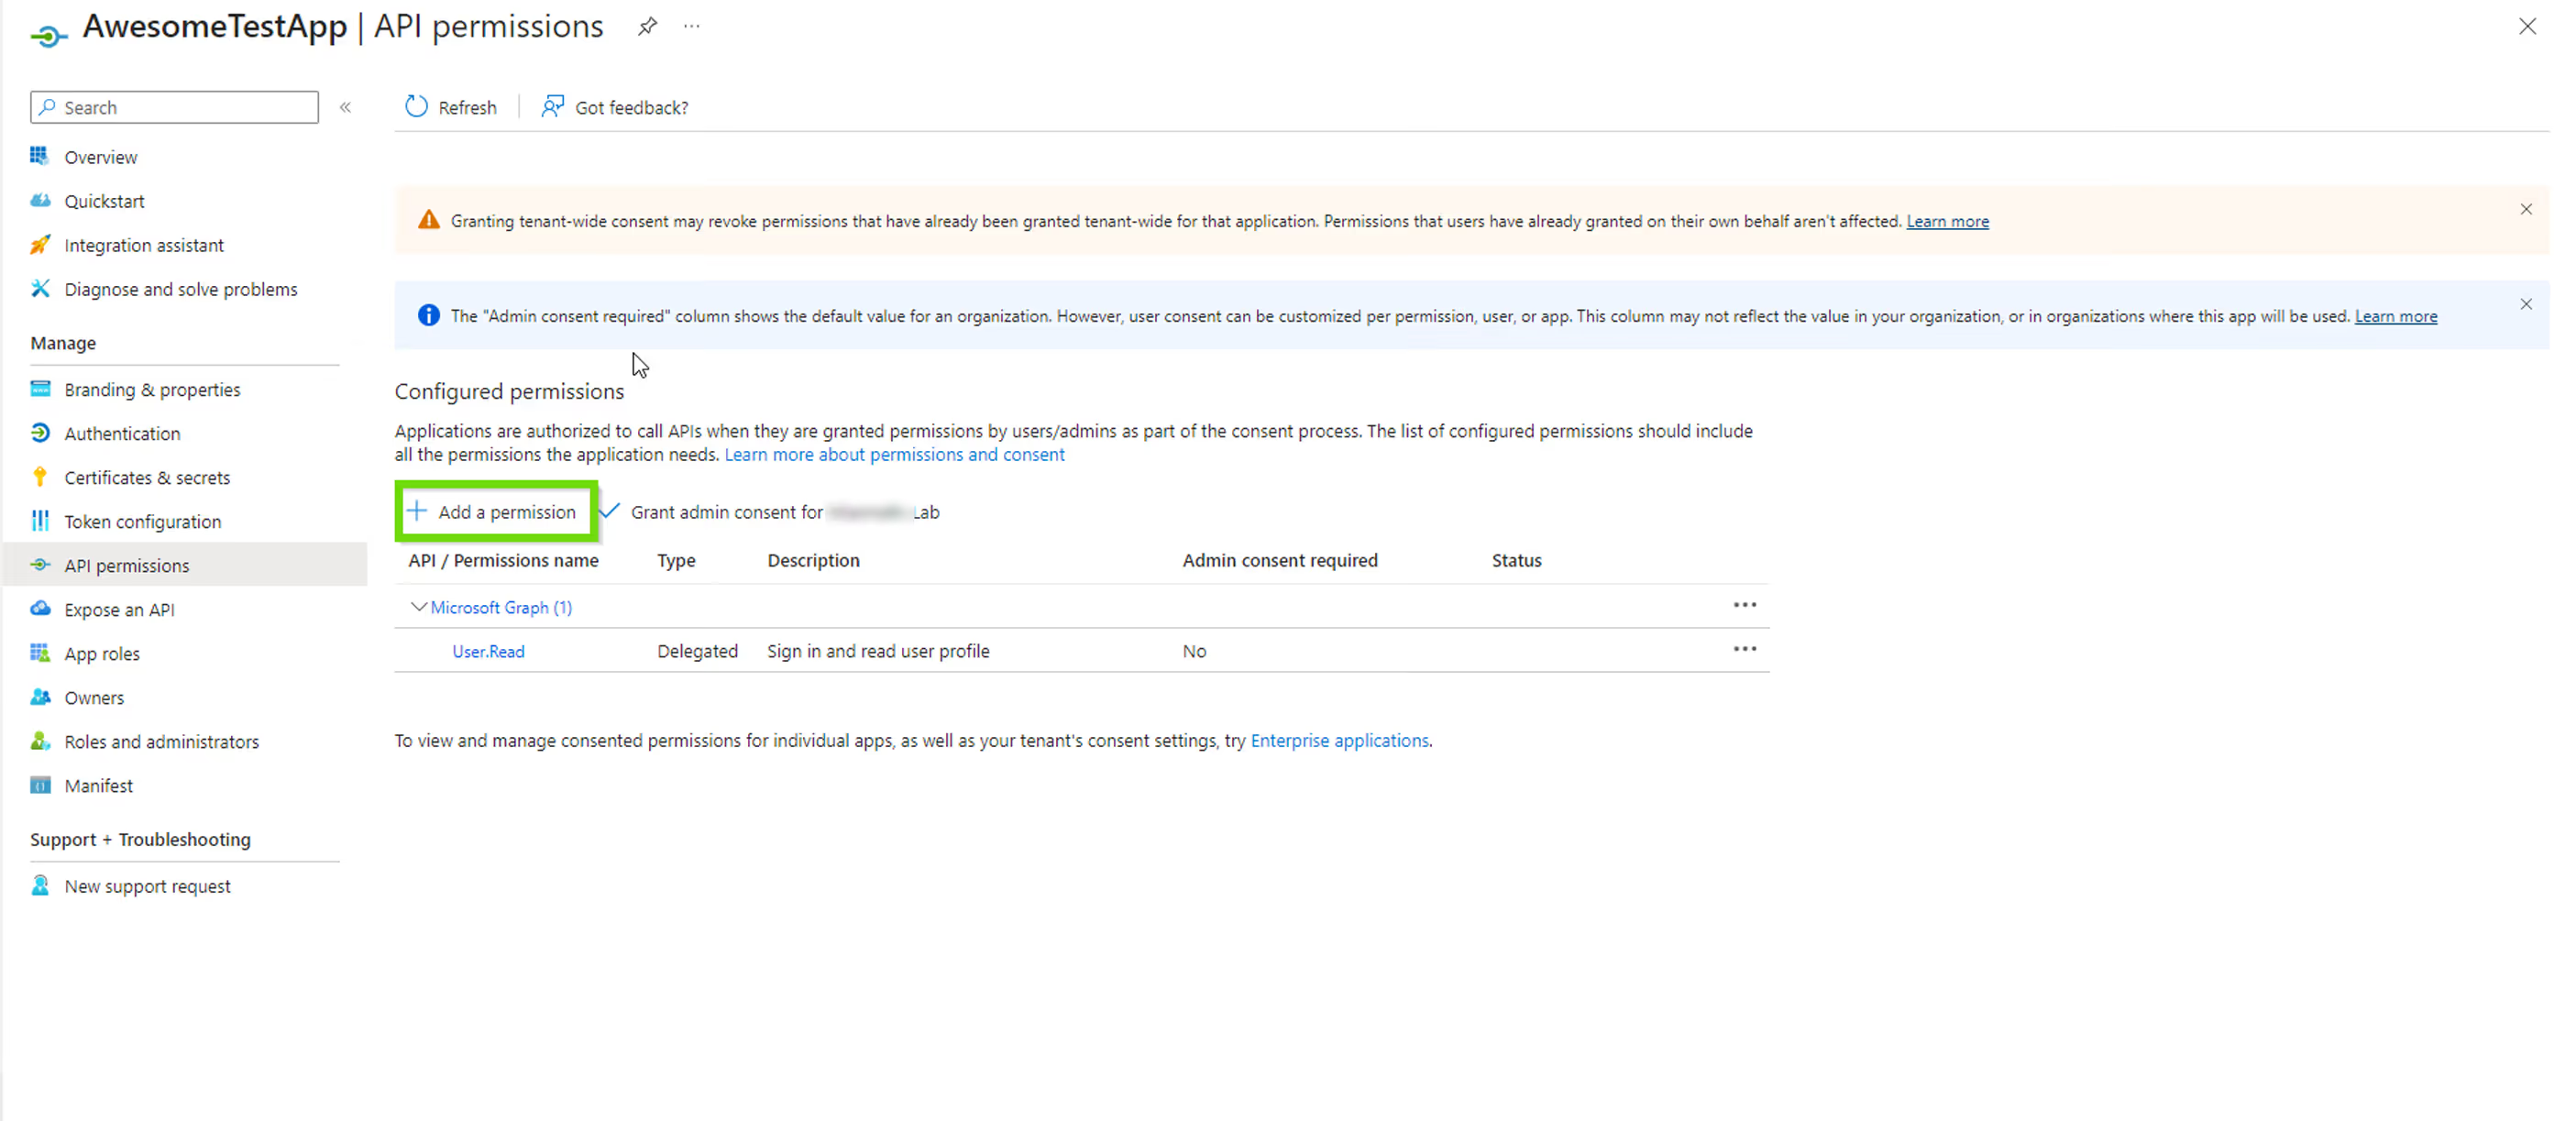
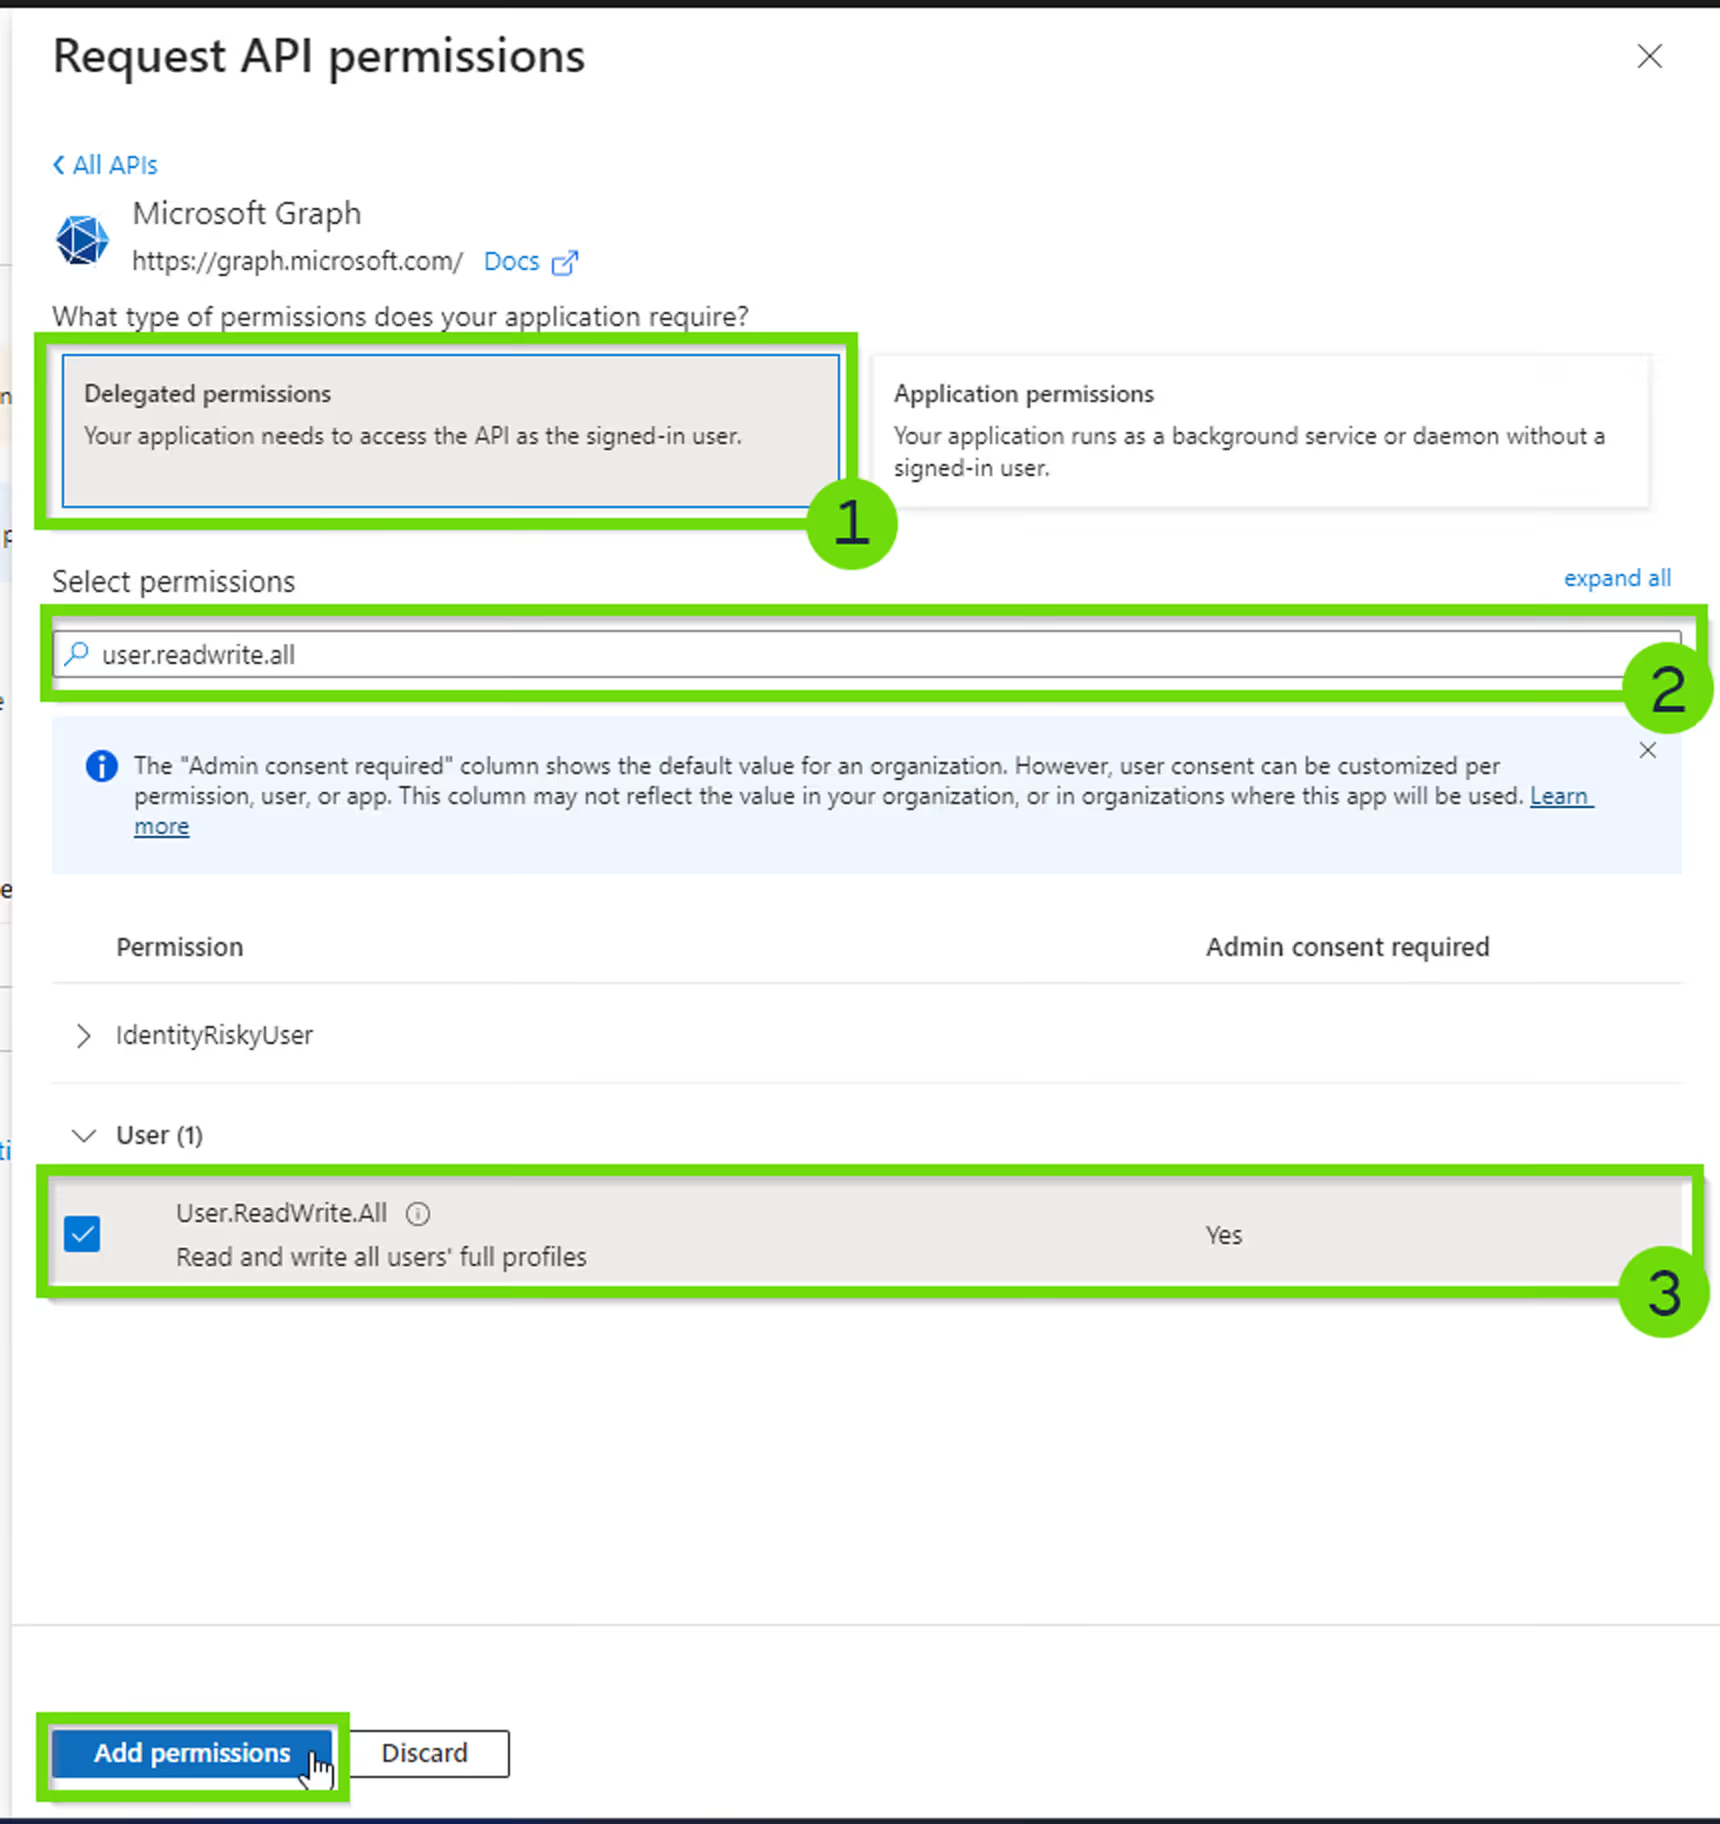
Now that we created our test app, we can add additional API Permissions to this app.

Here's how to proceed:

  1. Go to API Permissions.
API Permissions Screen

2. Click on “Add permissions”

Add Permissions screen

3. For this guide, we'll select Microsoft Graph as the API to grant permissions to.

Request API Permissions

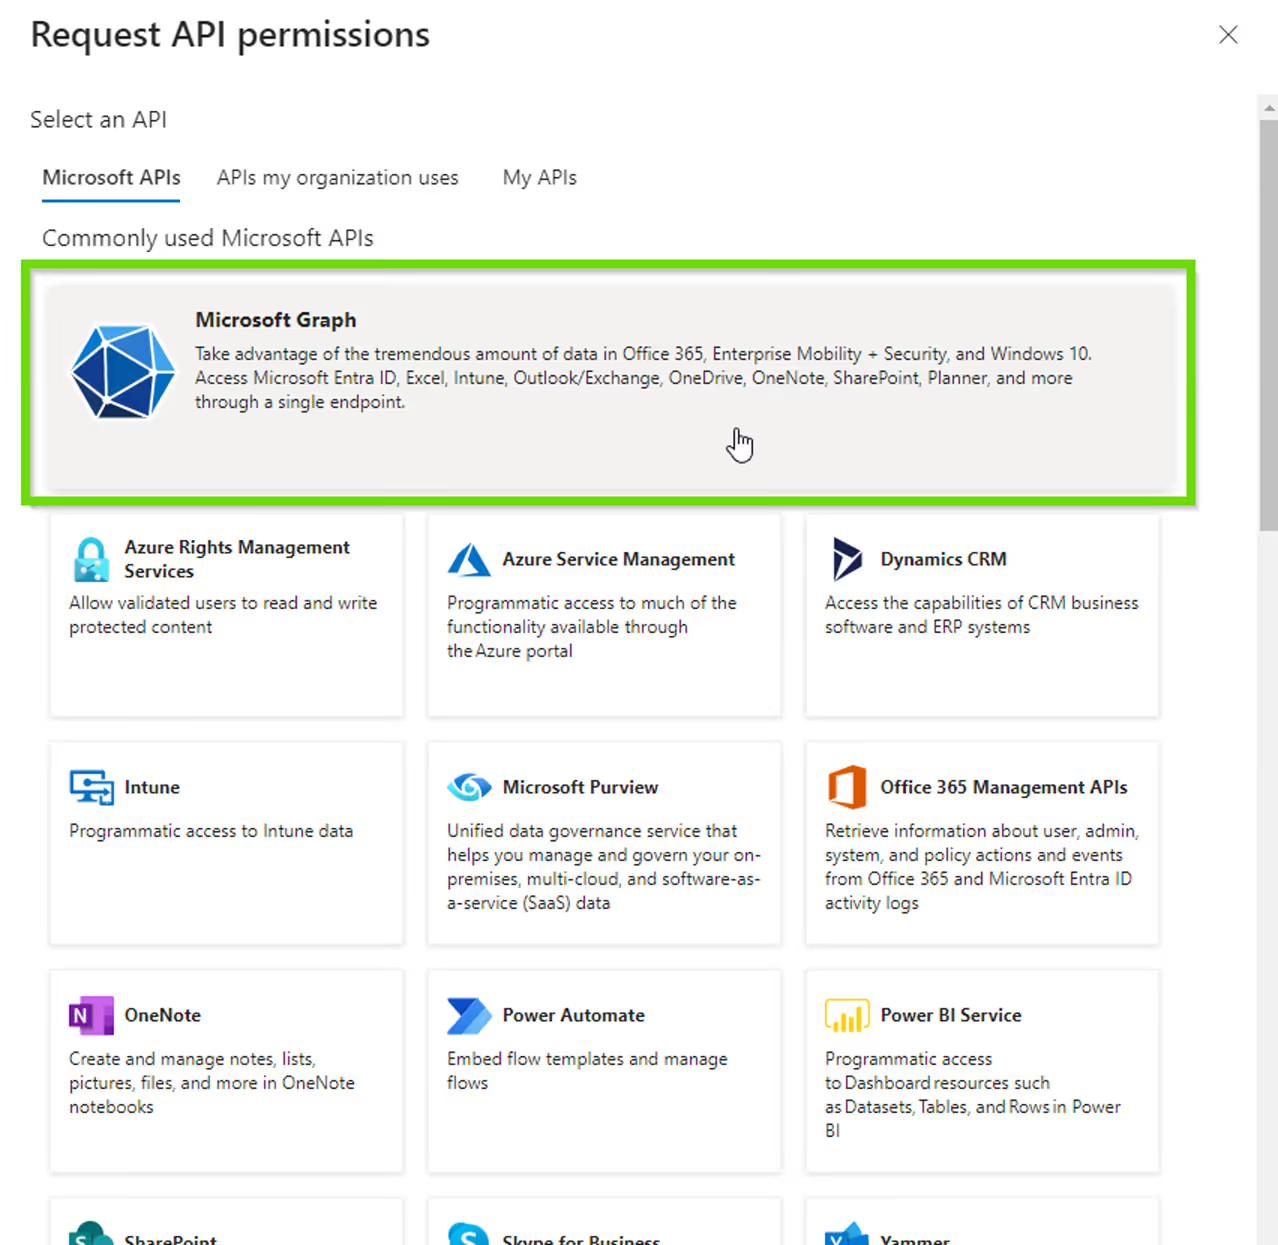
4. Next, let's search for and select user.readwrite.all, then click “Add permissions”:

Step 3: assign user permissions

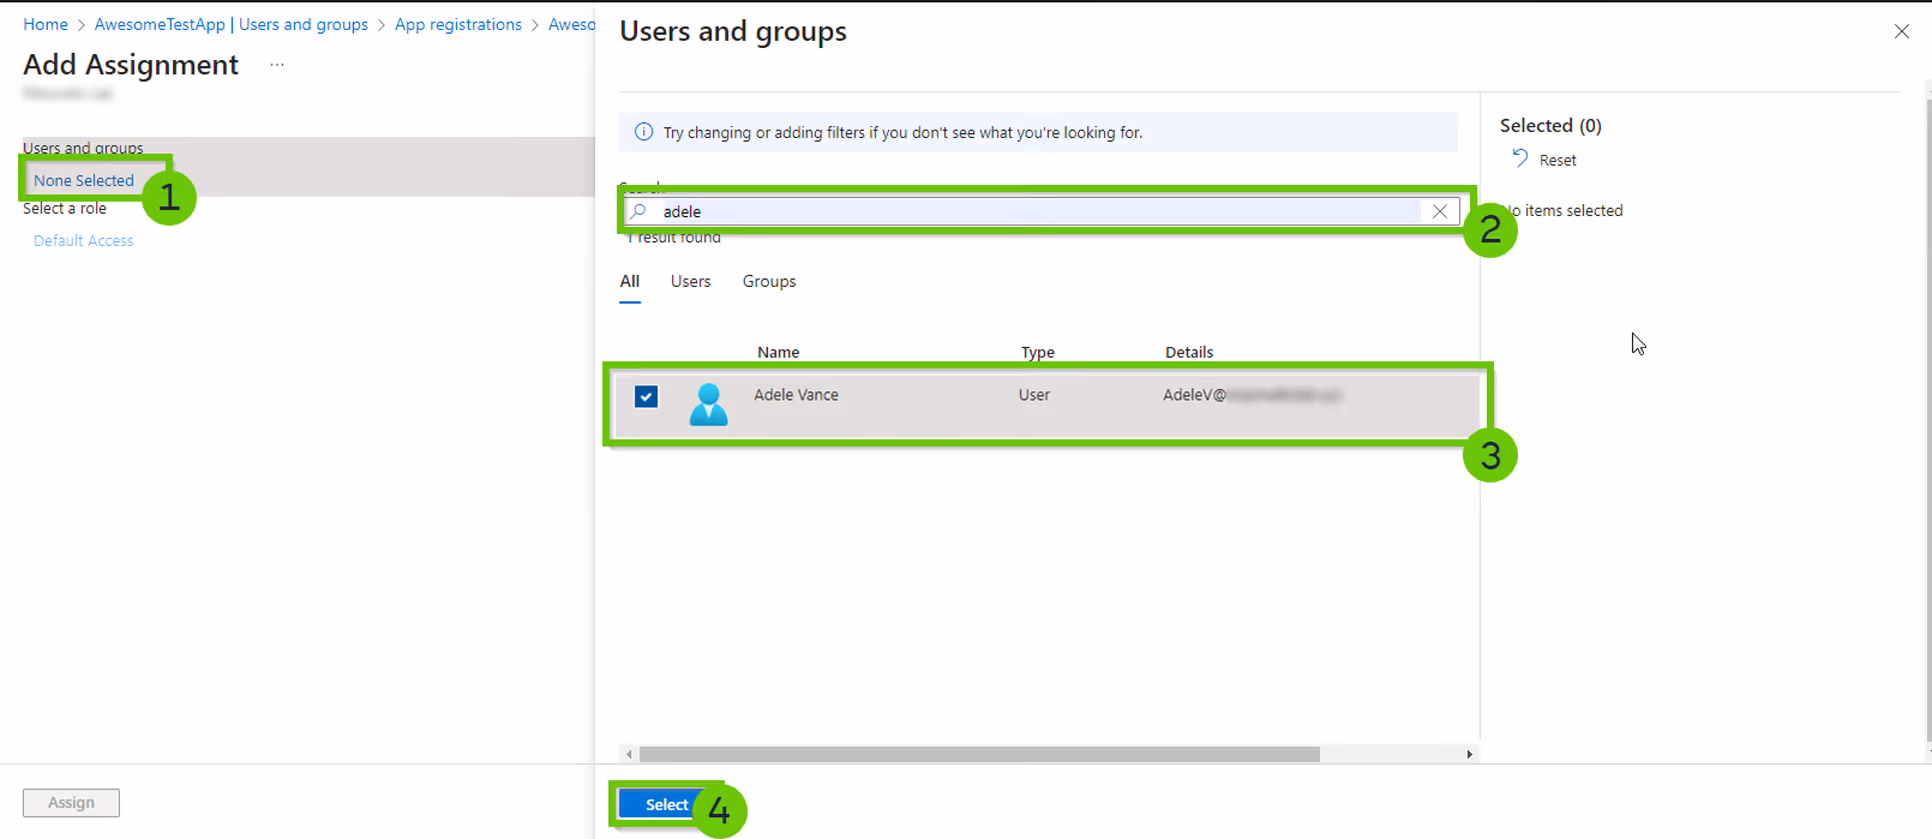
Next, let's assign permission to a specific user, enabling them to utilize this application. Here's the process:

  1. Navigate to “Enterprise Applications” and select “All applications”.
  2. Find and click on the app you just created.
Enterprise Applications screen

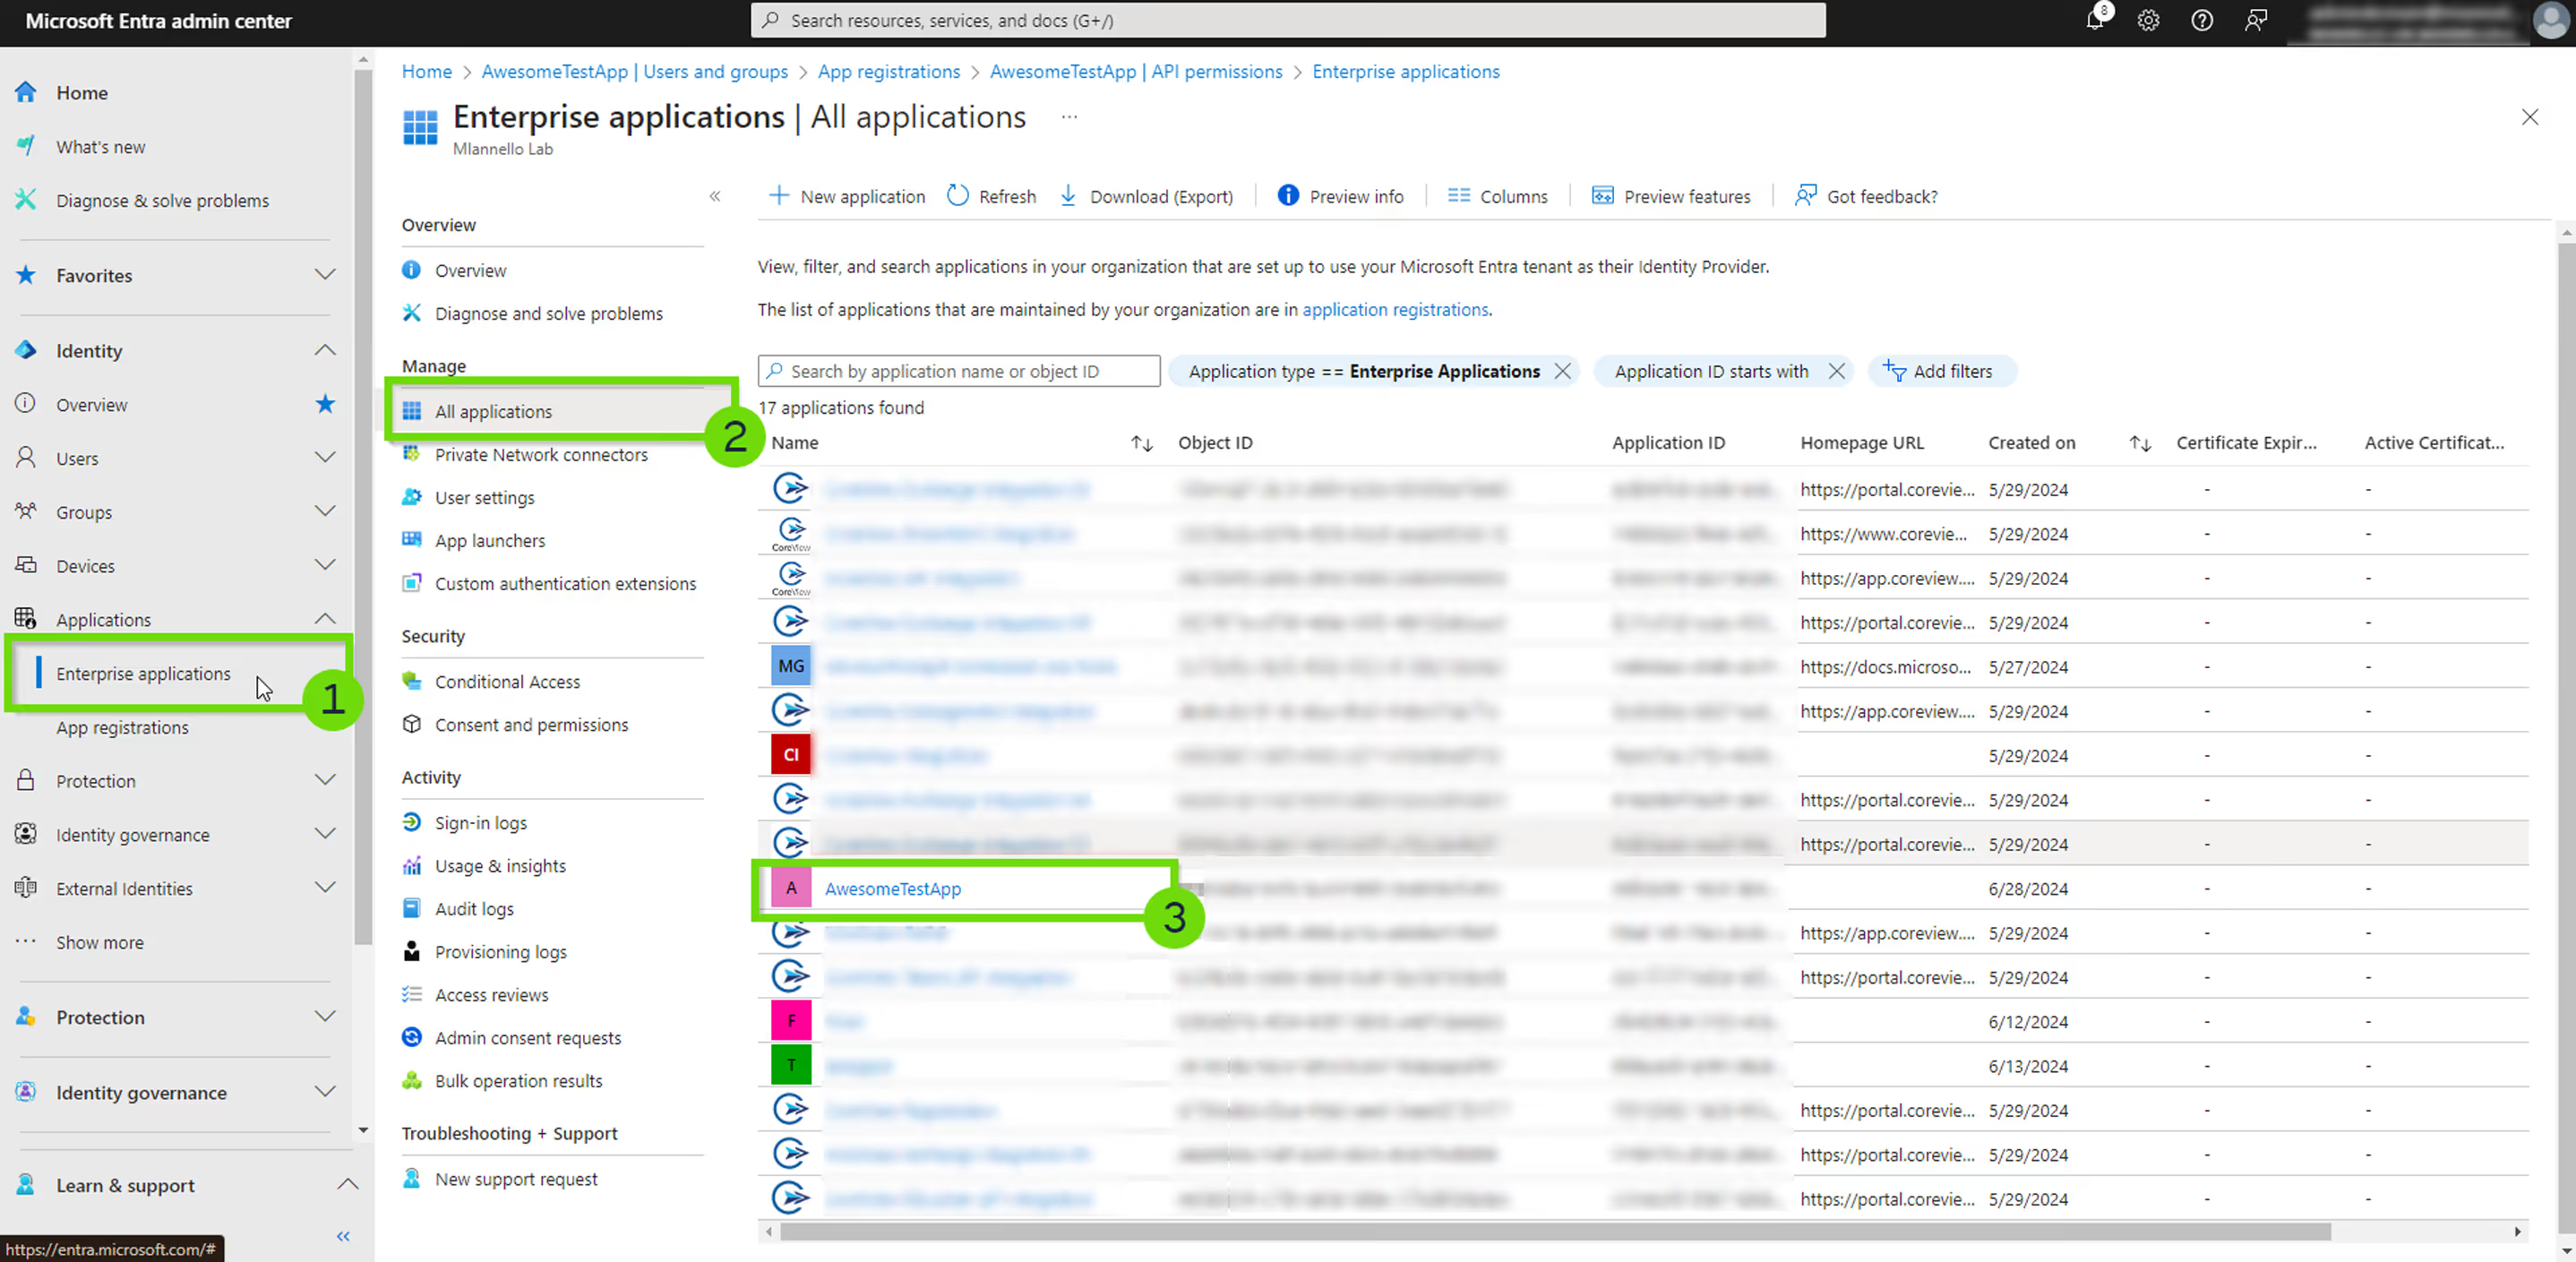
3. Choose Assign users and groups.

Assign users and groups

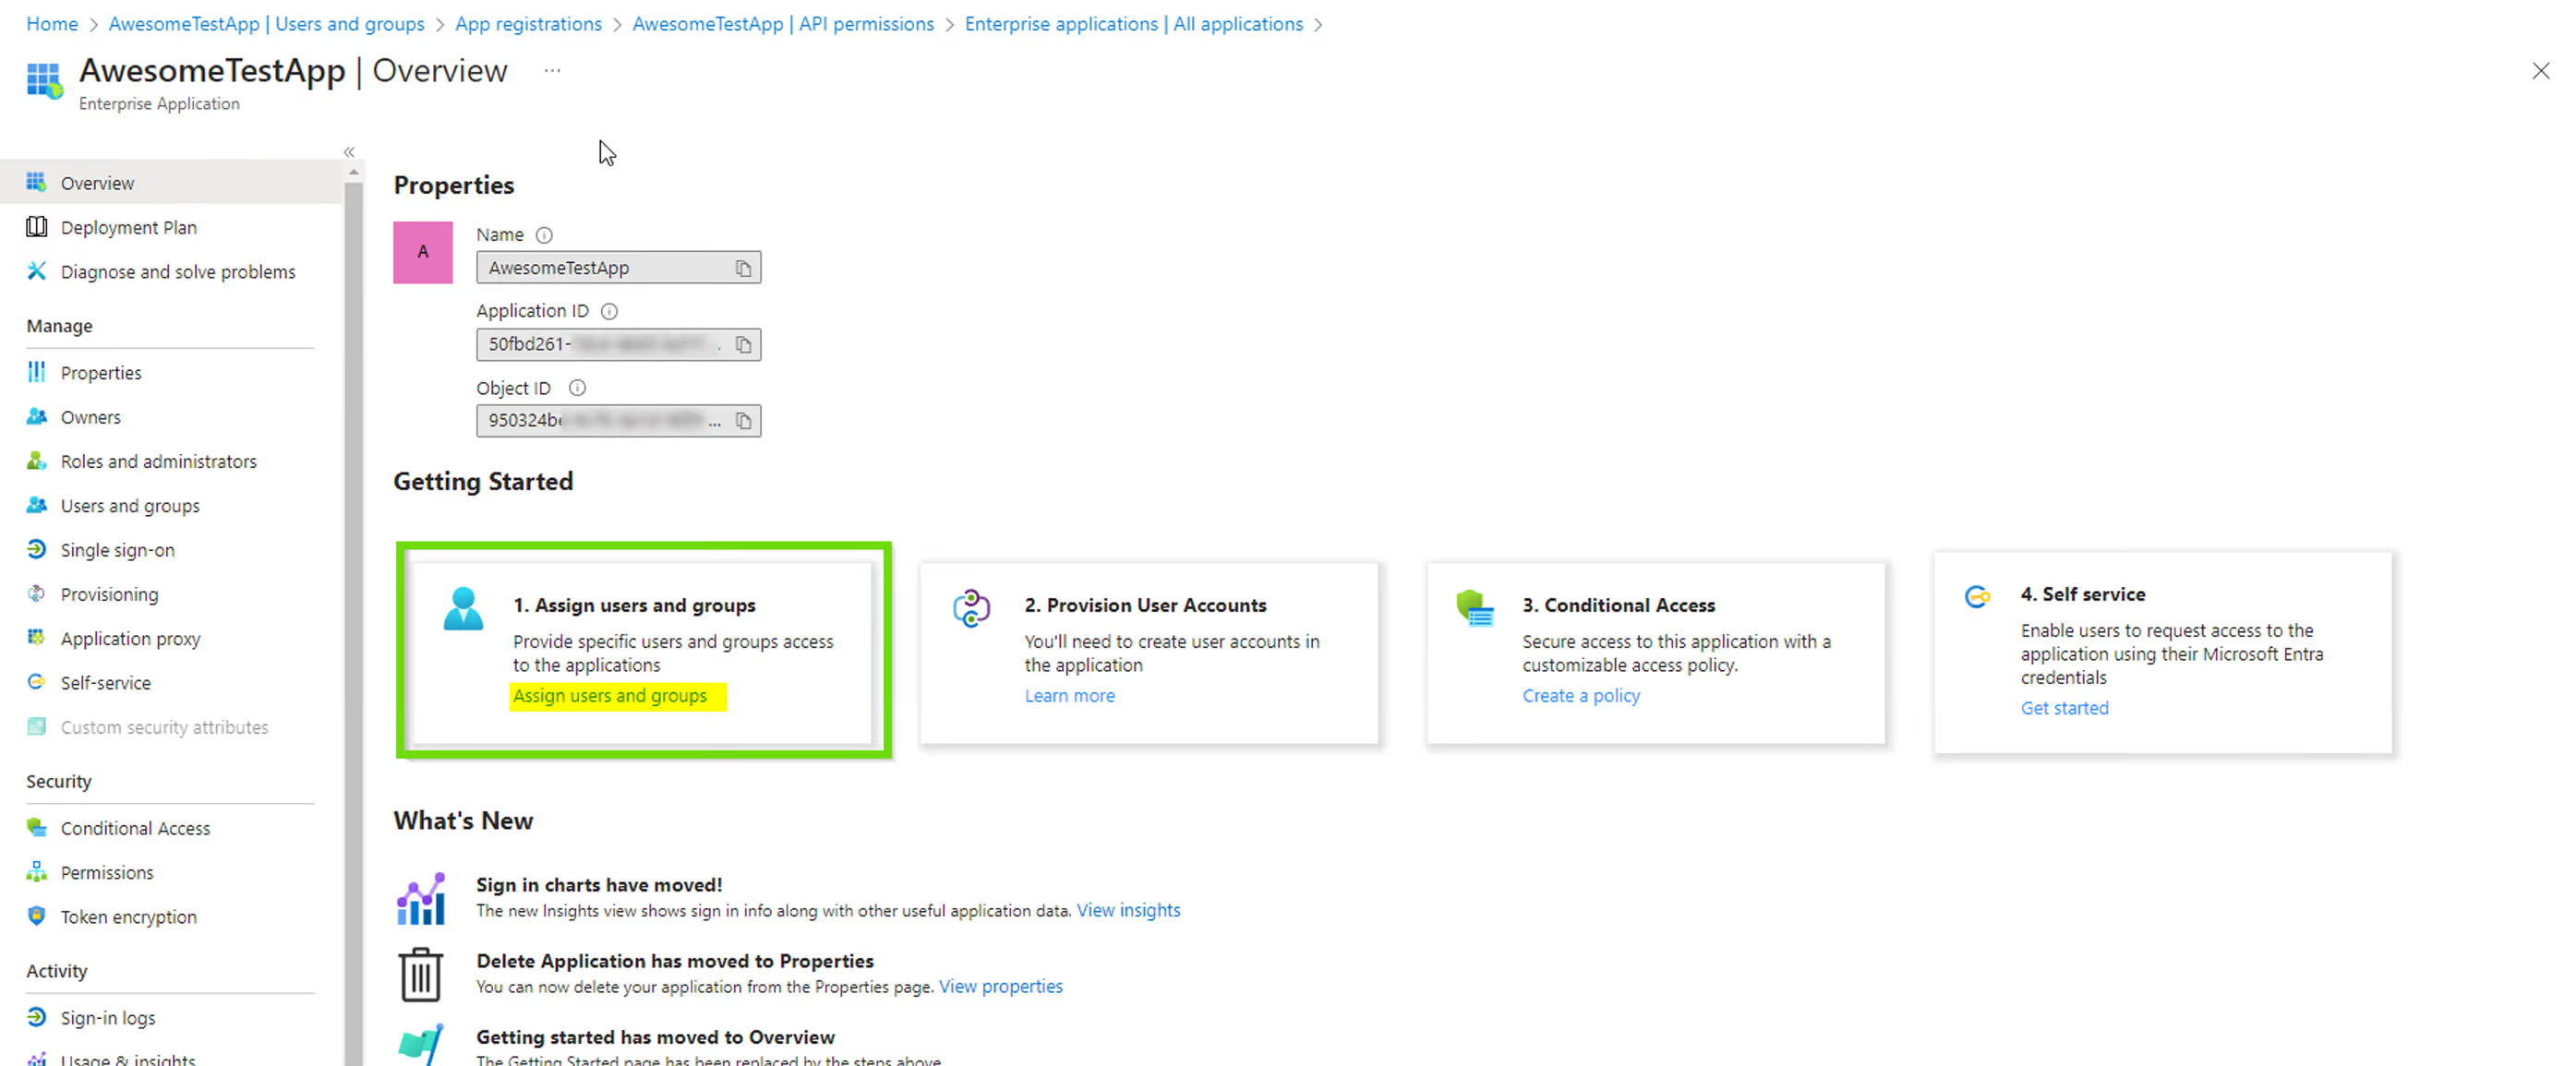
4. Select “Add user/group”

Add user/group screen

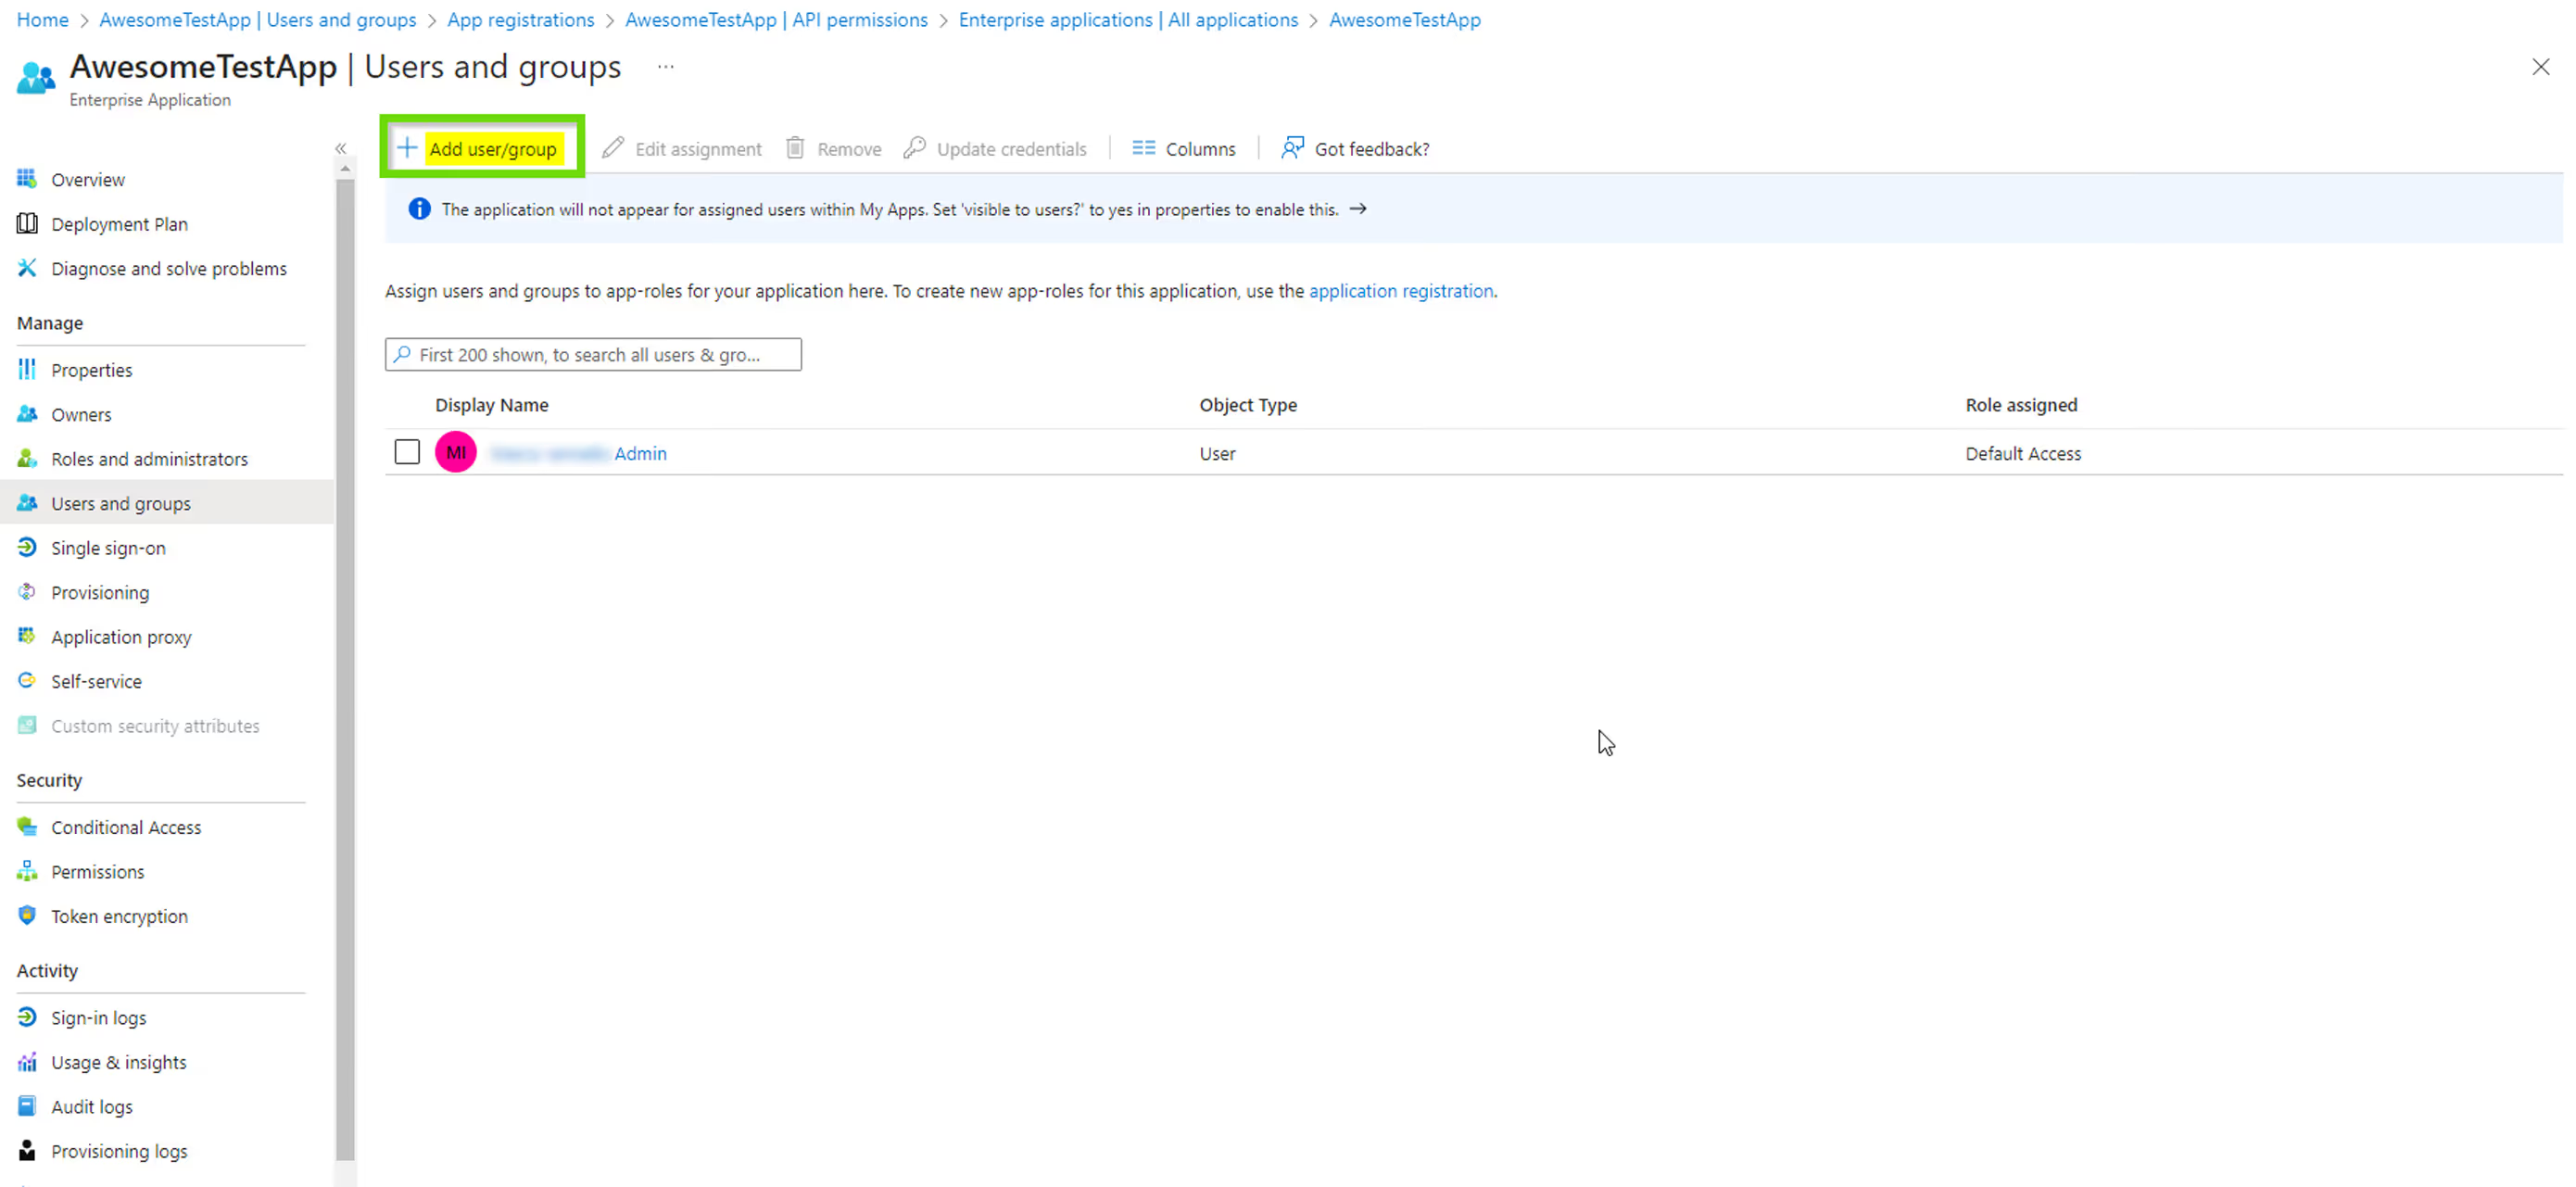
5. Search for and select the user you wish to give permission to, then click “Select”.

Permission user and groups screen

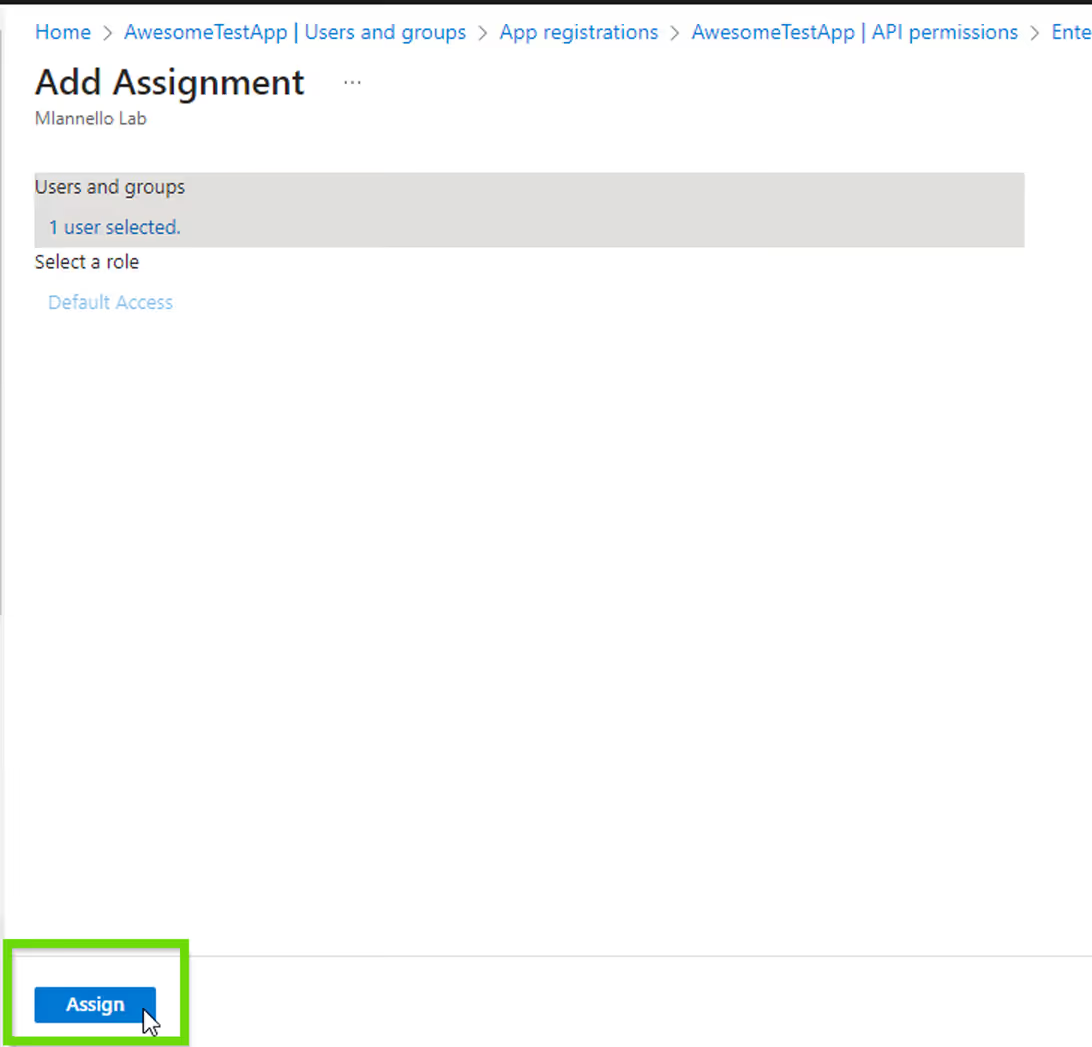
6. Confirm by clicking “Assign”

Assign screen

Step 4: restrict access to assigned users

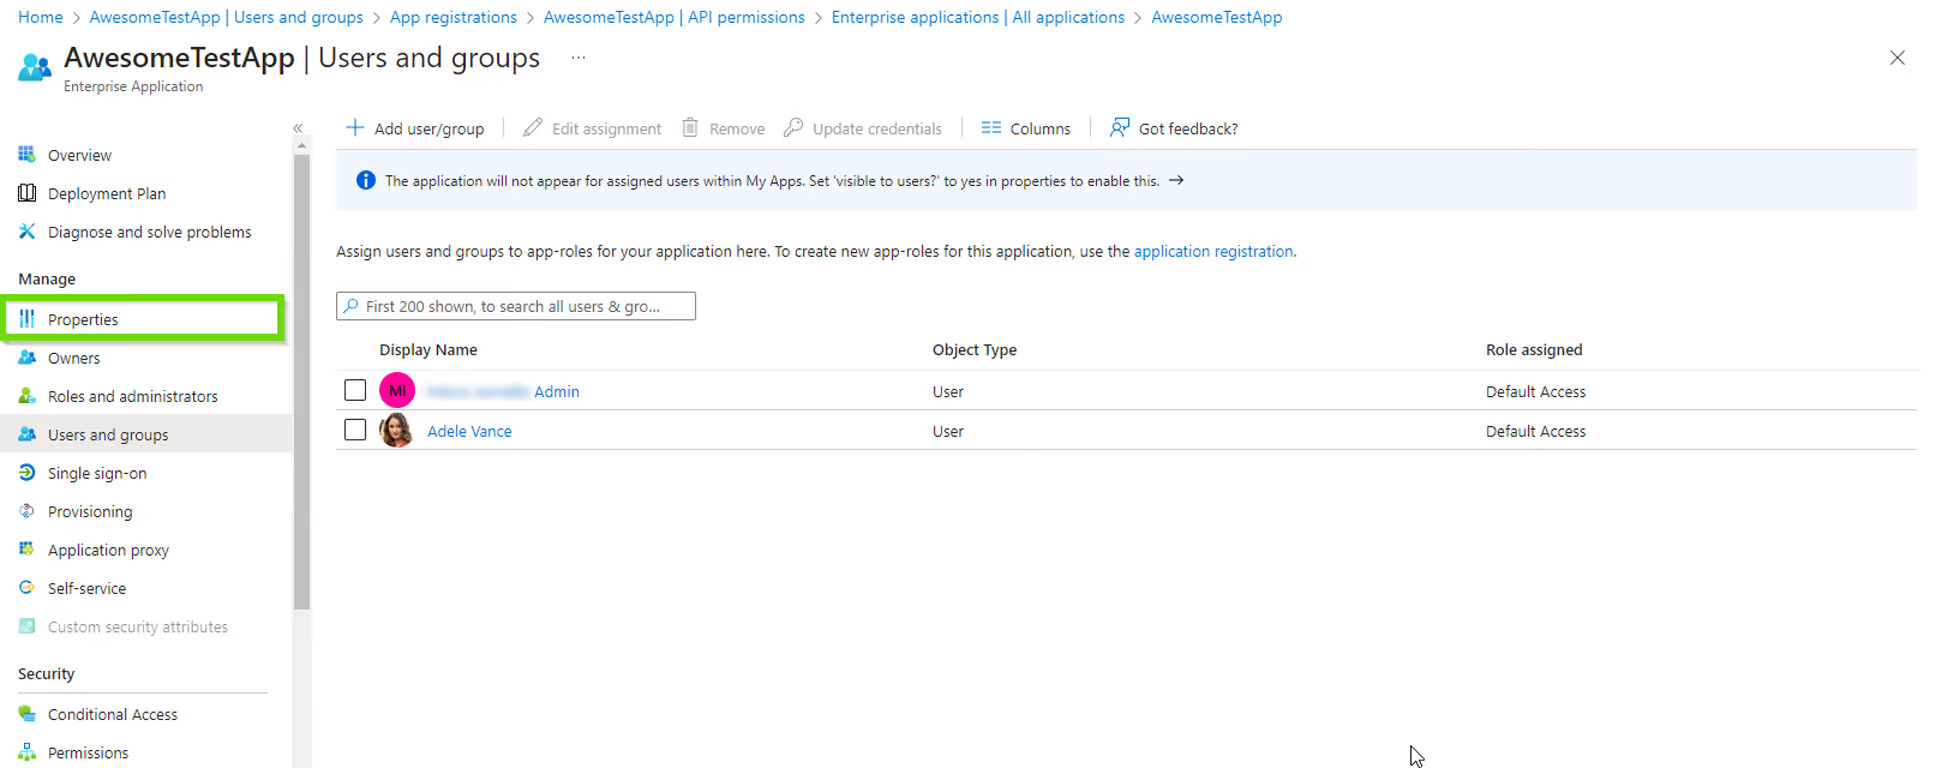
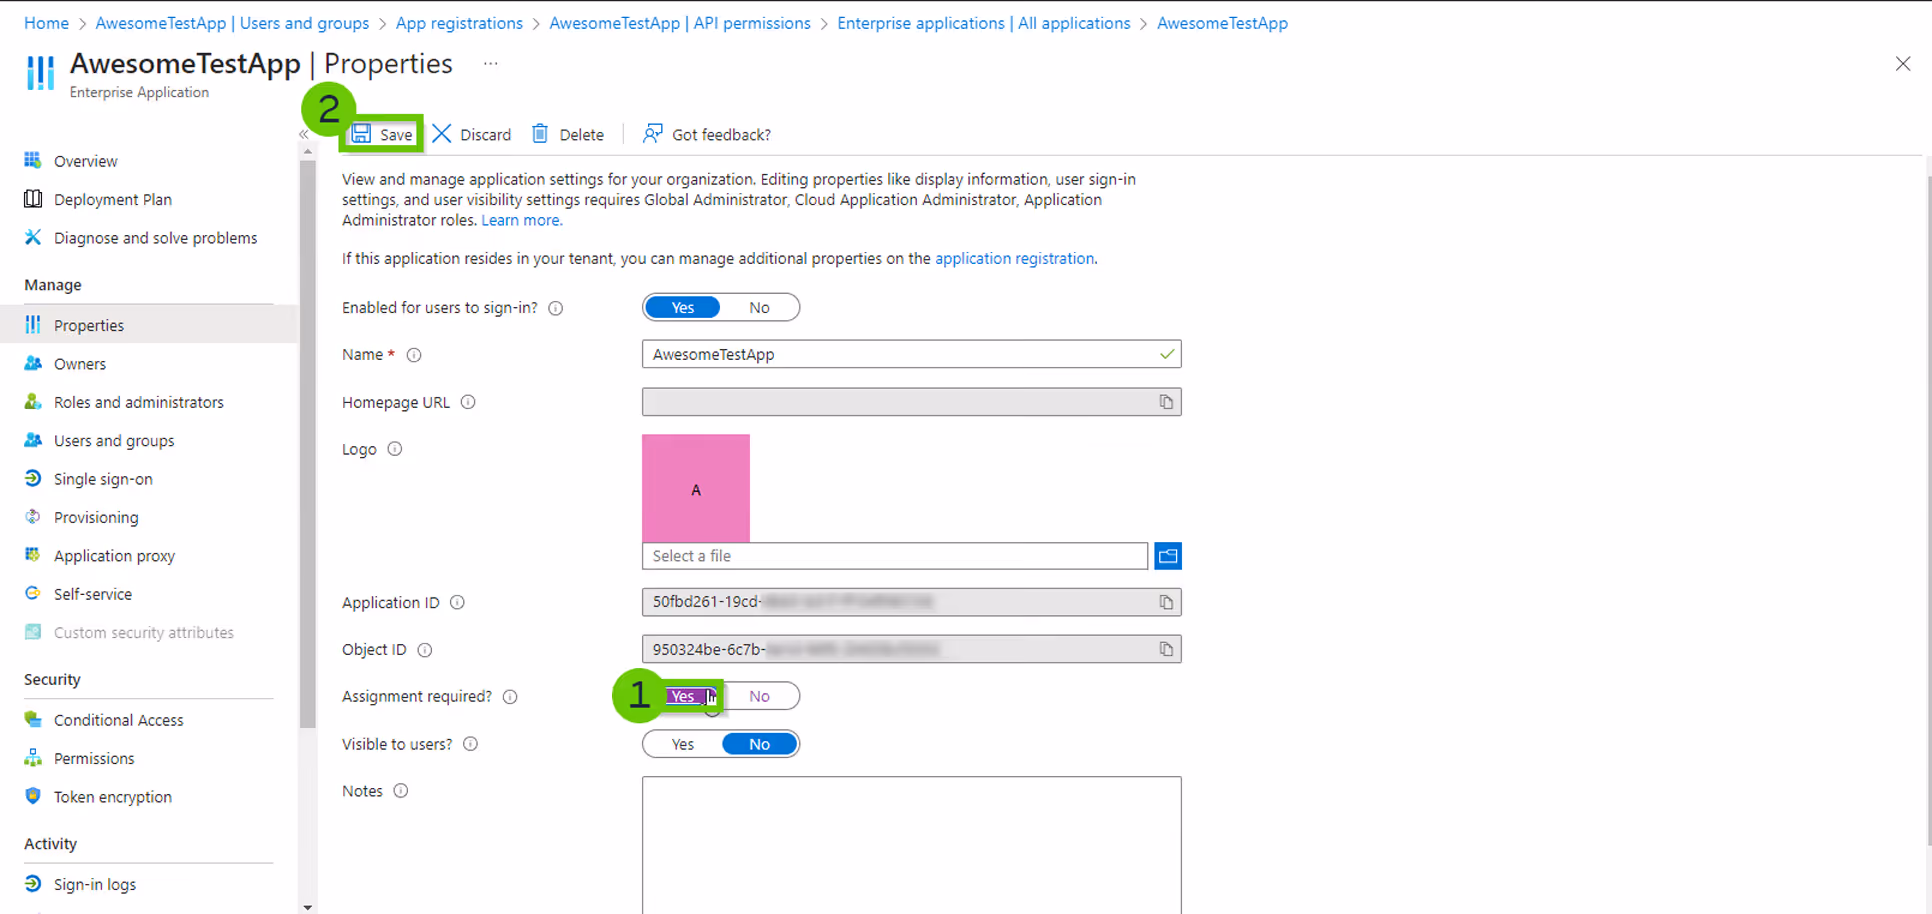
The following step involves configuring the application to ensure that only the users we've specifically assigned can access it. Here's how to proceed with this adjustment:

  1. Click on “Properties”:
Restrict access screen

2. Toggle “Assignment required” to Yes and click “Save”.

Assignement required screen

The process is complete!

View changes in Microsoft Purview

To effectively review the changes made during the app creation and configuration process in Entra ID, and to verify these adjustments through Microsoft Purview, follow this step-by-step guide:

Step 1: Access the Audit Log in Microsoft Purview

Start by accessing the Audit screen of Microsoft Purview: Microsoft Purview Audit Log Search.

Here:

  1. Select the appropriate date range (e.g., today).
  2. In the Activities section, add the following events to track app registration activities:
    • Add app role assignment grant to user
    • Add delegated permission grant
    • Add service principal
  3. Click on “Search”.
Search screen

Step 2: review the Audit log

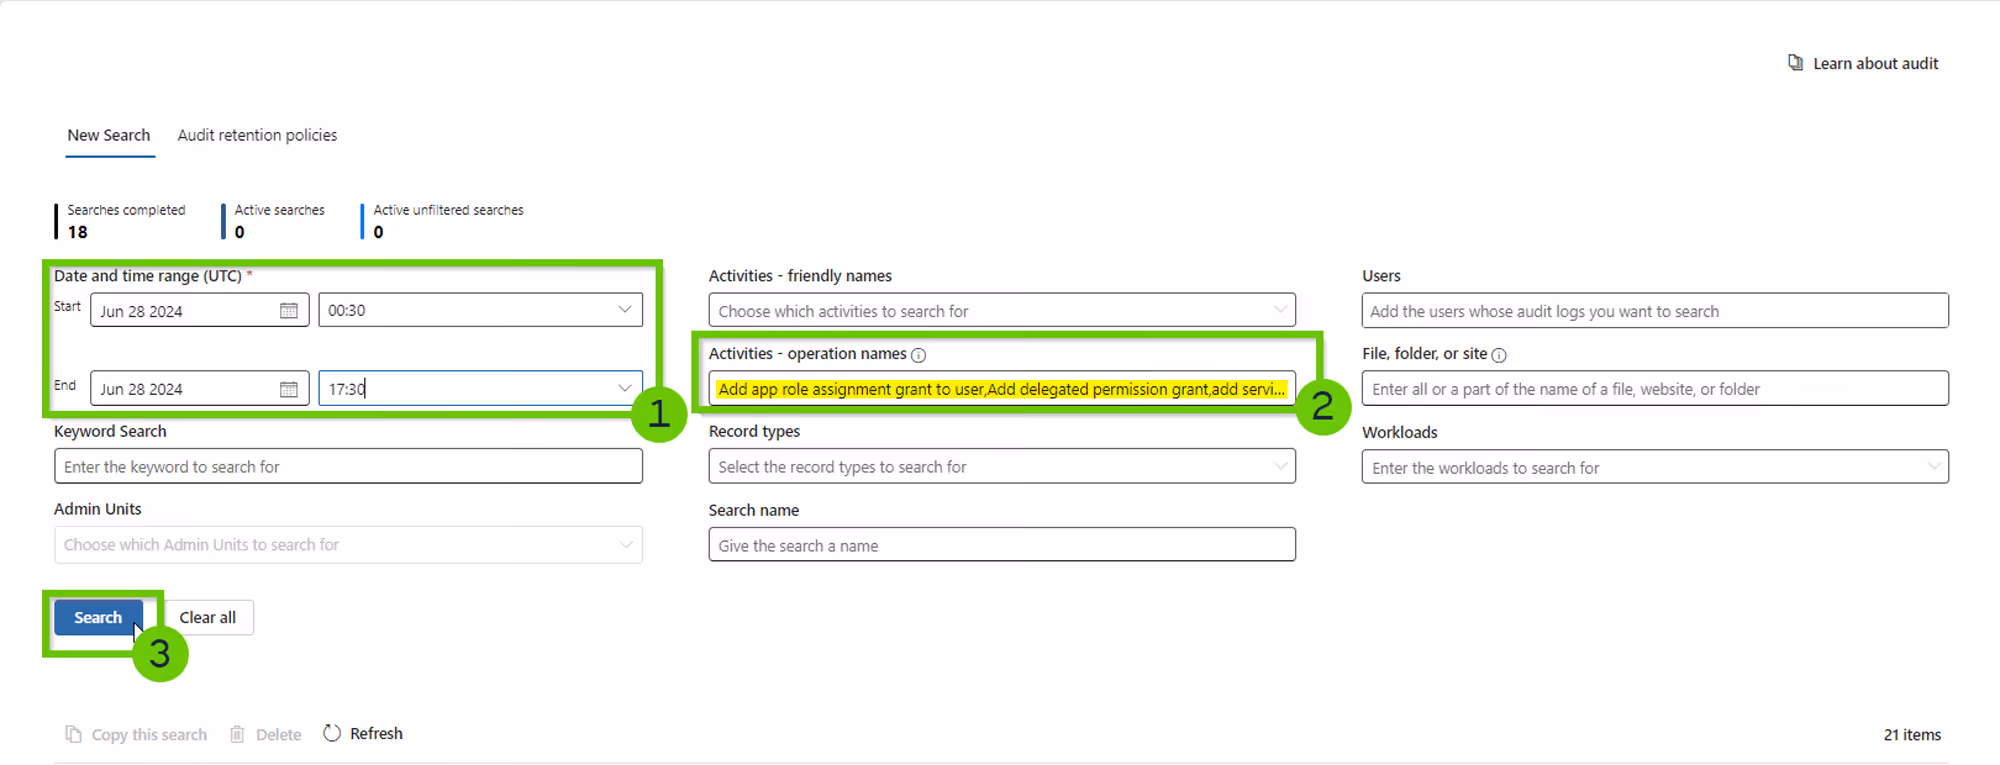
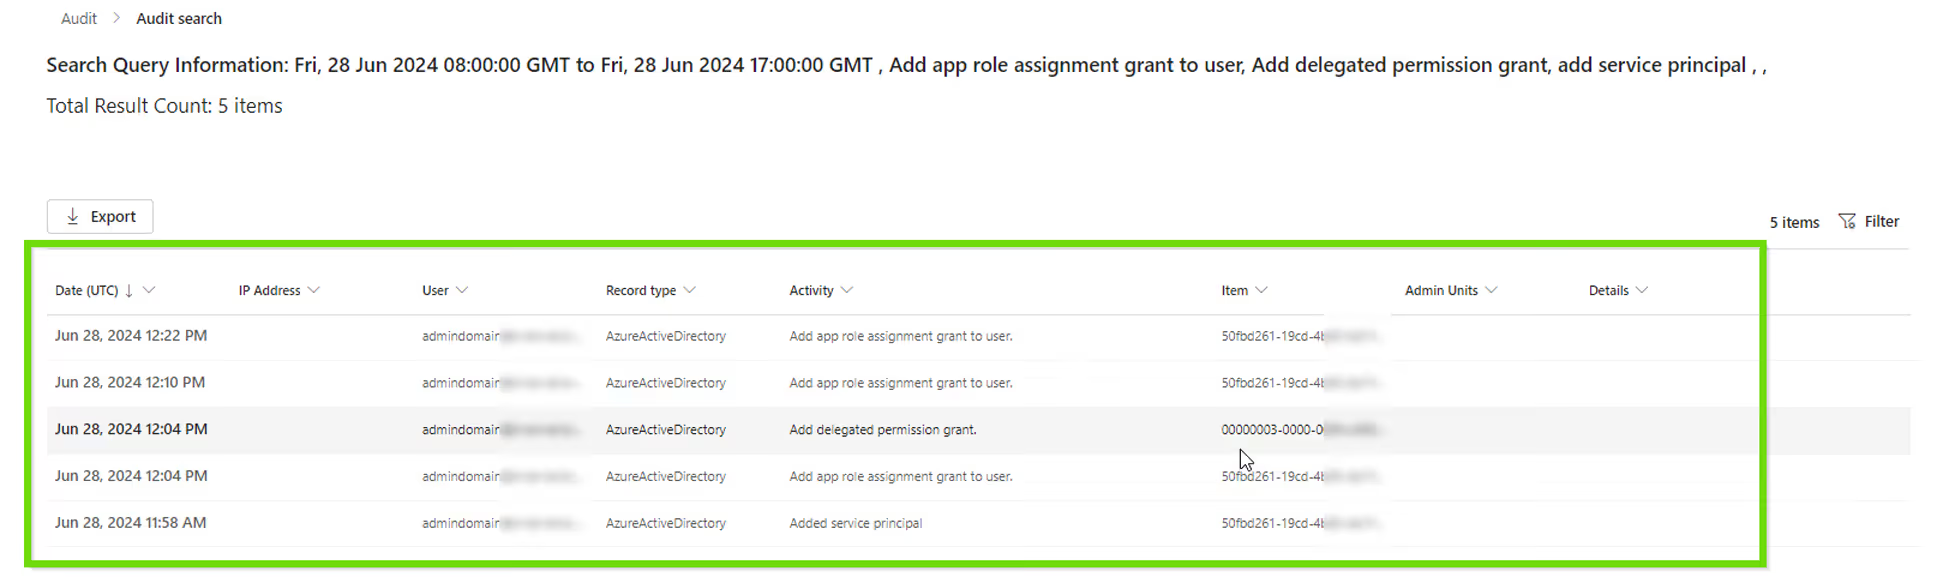
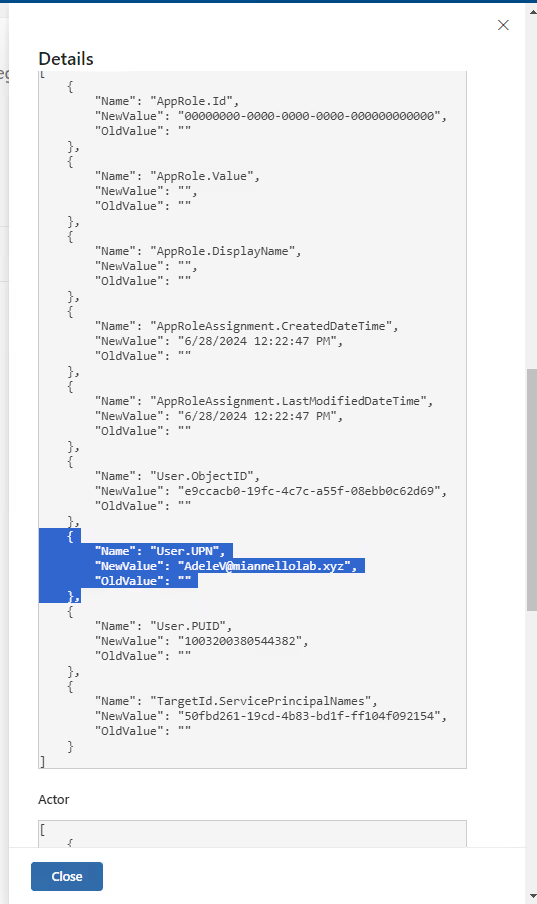
Microsoft Purview will now begin compiling the information requested. This process may take between 5 to 20 minutes, varying with the activity level on your tenant. Once done, you can review details such as:
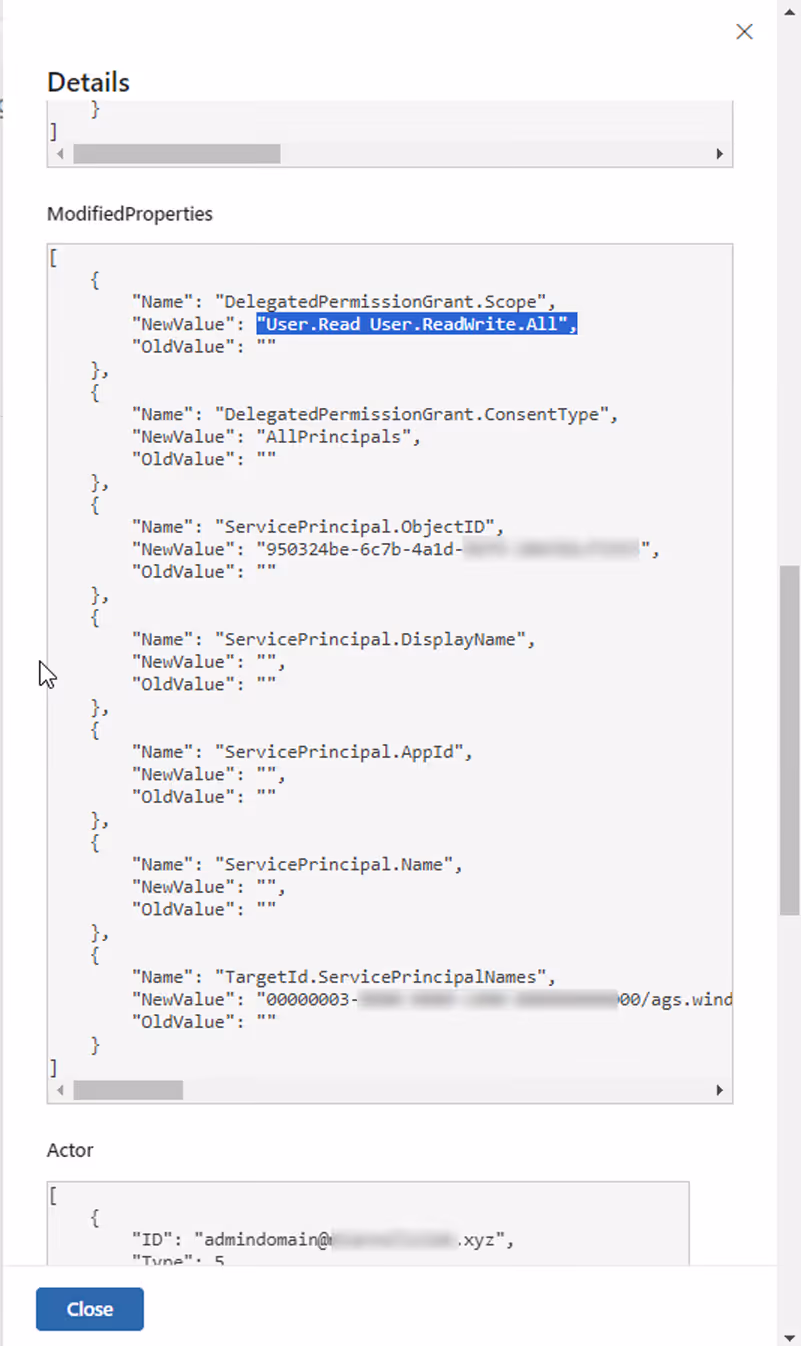
  • Added service principal: check details such as its display name.
  • Added app role assignment grant to user: view which users the app has been assigned to.
  • Added delegated permission grant: examine the permissions that have been granted to the app.

Here's the process:

  1. Let's proceed by clicking on it to explore the details:
Explore the details

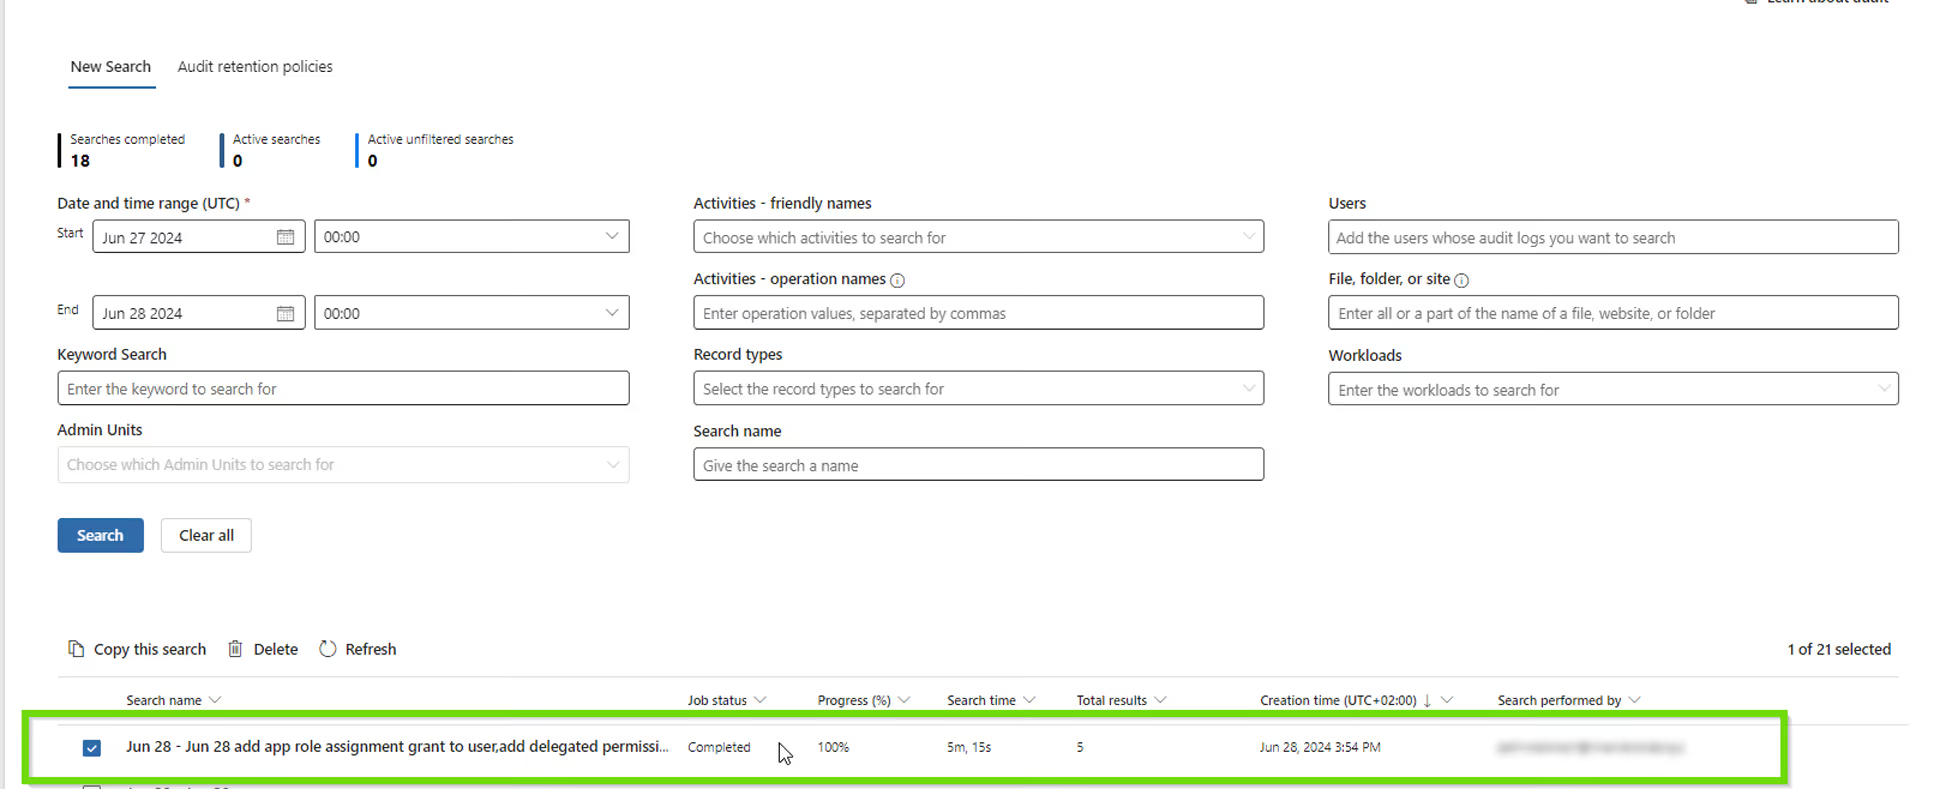
2. Review every event associated with our recent app creation, including the delegation of permissions and other related activities:

Review events screen
  • By selecting the “Added service principal” entry, we gain access to detailed information, including its display name, among other pertinent details:
  • Clicking on the “Added app role assignment grant to user” line reveals details, including which users have been assigned to the app:
  • By selecting the “Added delegated permission grant” entry, we can uncover a range of important details, notably the specific permissions that have been granted to the app:

By following these steps, you will have not only successfully created and configured an application in Entra ID but also verified and reviewed all related changes through Microsoft Purview's audit log feature.

Get a personalized demo today

Created by M365 experts, for M365 experts.